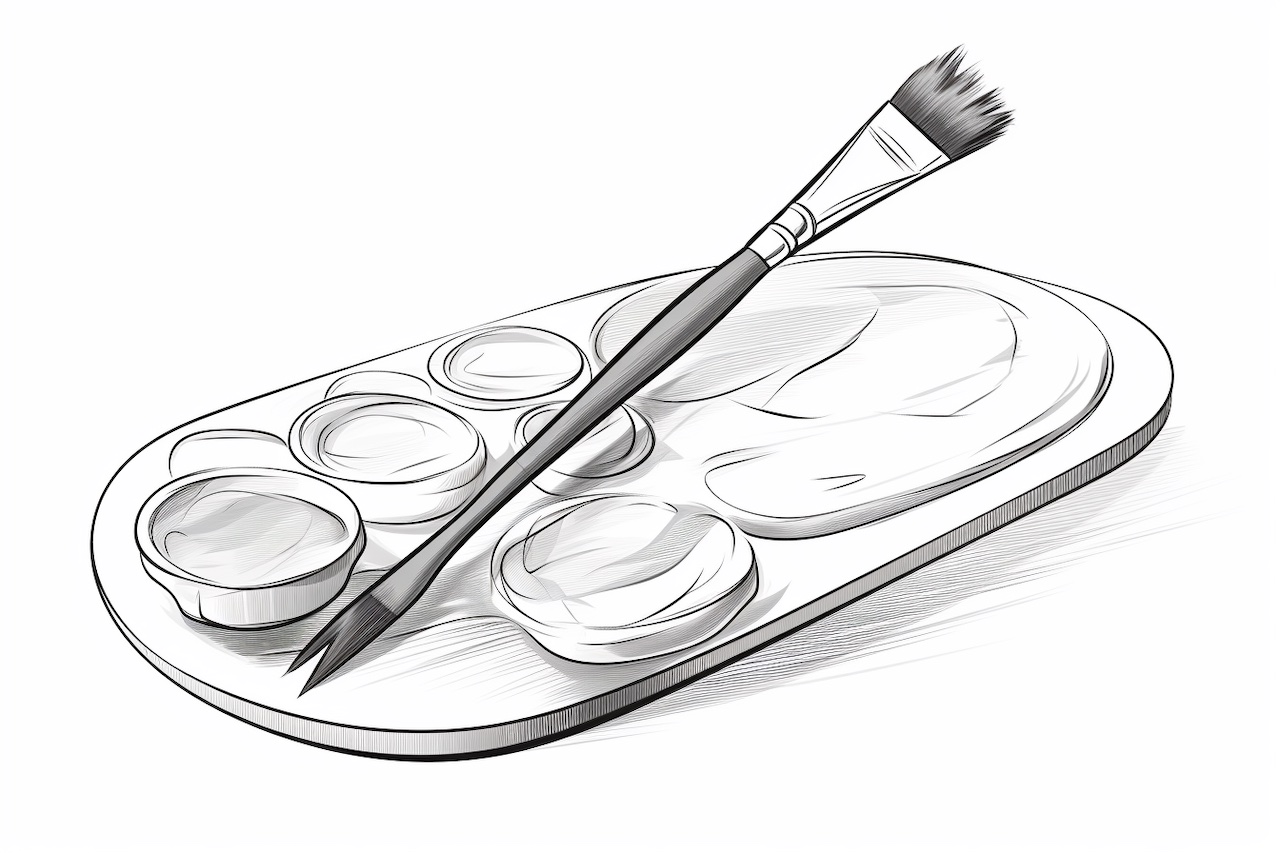
Are you an artist looking to create a drawing of a painting palette? Drawing a painting palette can be a fun and exciting project that allows you to showcase your artistic skills. In this step-by-step guide, we will walk you through the process of how to draw a painting palette in a clear, clean, and concise style. So grab your drawing materials and let’s get started!
Materials Required
Before we begin, make sure you have the following materials ready:
- Drawing paper or sketchbook
- Pencil
- Eraser
- Ruler
- Compass
- Protractor
- Colored pencils or markers (optional)
- Reference image of a painting palette (optional)
Now that you have all the materials ready, let’s dive into the step-by-step instructions.
Step 1: Draw the Outer Shape
Start by drawing a rectangular shape on your drawing paper. The size of the rectangle will depend on how big you want your painting palette to be. Use a ruler to ensure straight lines and a neat appearance.
Step 2: Divide the Rectangle
Divide the rectangle into smaller sections to create the wells on the palette. These wells are where the paint is usually placed. You can divide the rectangle into as many sections as you desire, but a typical painting palette has around six to ten wells. Use a ruler to divide the rectangle evenly and ensure that the sections are the same size.
Step 3: Round the Corners
To give your painting palette a more authentic look, round the corners of the rectangle. You can use a compass to create perfectly rounded corners. Adjust the compass to your desired radius and draw arcs at each corner. Then, connect the arcs with straight lines to complete the rounded corners.
Step 4: Add a Thumb Hole
Most painting palettes have a thumb hole for easy holding and carrying. To create a thumb hole, draw a semi-circle at the top of the rectangle. Use a compass or trace a circular object to ensure a smooth and symmetrical shape.
Step 5: Draw the Mixing Area
The mixing area of the painting palette is where different colors are mixed together to create new shades. Draw a larger section at the center of the palette for the mixing area. This section can be rectangular or oval-shaped, depending on your preference.
Step 6: Add Texture
To make your drawing look more realistic, add texture to the wells and mixing area of the palette. You can create small brushstroke-like lines or dots inside each well to represent the dried paint. For the mixing area, you can add a series of curved lines to depict the mixing motion.
Step 7: Shade and Highlight
To give your drawing more depth and dimension, add shading and highlighting. Determine the light source and shade the areas that are opposite to it. Use a pencil or colored pencils to add shading and blending techniques for a more realistic appearance. You can also add highlights using an eraser or white colored pencils to create a glossy effect.
Conclusion
Drawing a painting palette can be a rewarding experience for any artist. Follow these step-by-step instructions to create a realistic and visually appealing painting palette drawing. Remember to take your time, pay attention to details, and experiment with different shading techniques to make your drawing truly exceptional. Now, go ahead and unleash your creativity! Happy drawing!