If you’re interested in architectural drawing or simply want to learn how to draw a roof, you’ve come to the right place. Drawing a roof can seem complex at first, but with the right guidance and a step-by-step approach, you can master this skill. In this article, we will guide you through the process of drawing a roof, starting from the basic shapes and gradually adding details. So, grab your pencils and let’s get started!
Materials Required
Before we begin, gather the following materials:
- A pencil
- Eraser
- Paper
- Ruler (optional)
Now that you have your materials ready, let’s dive into the steps of drawing a roof.
Step 1: Basic Outline
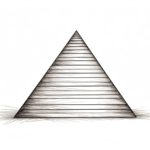
Start by drawing a simple triangle shape to create the basic outline of the roof. Place the triangle on your paper and adjust its size and angle according to your preference. Use light, loose lines at this stage, as you will refine the shape later.
Step 2: Adding the Eaves
Next, extend the lines of the triangle outward on each side to create the eaves of the roof. The eaves are the overhanging edges of the roof that provide shade and protection. Keep the lines parallel to maintain an even and balanced appearance.
Step 3: Creating the Gables
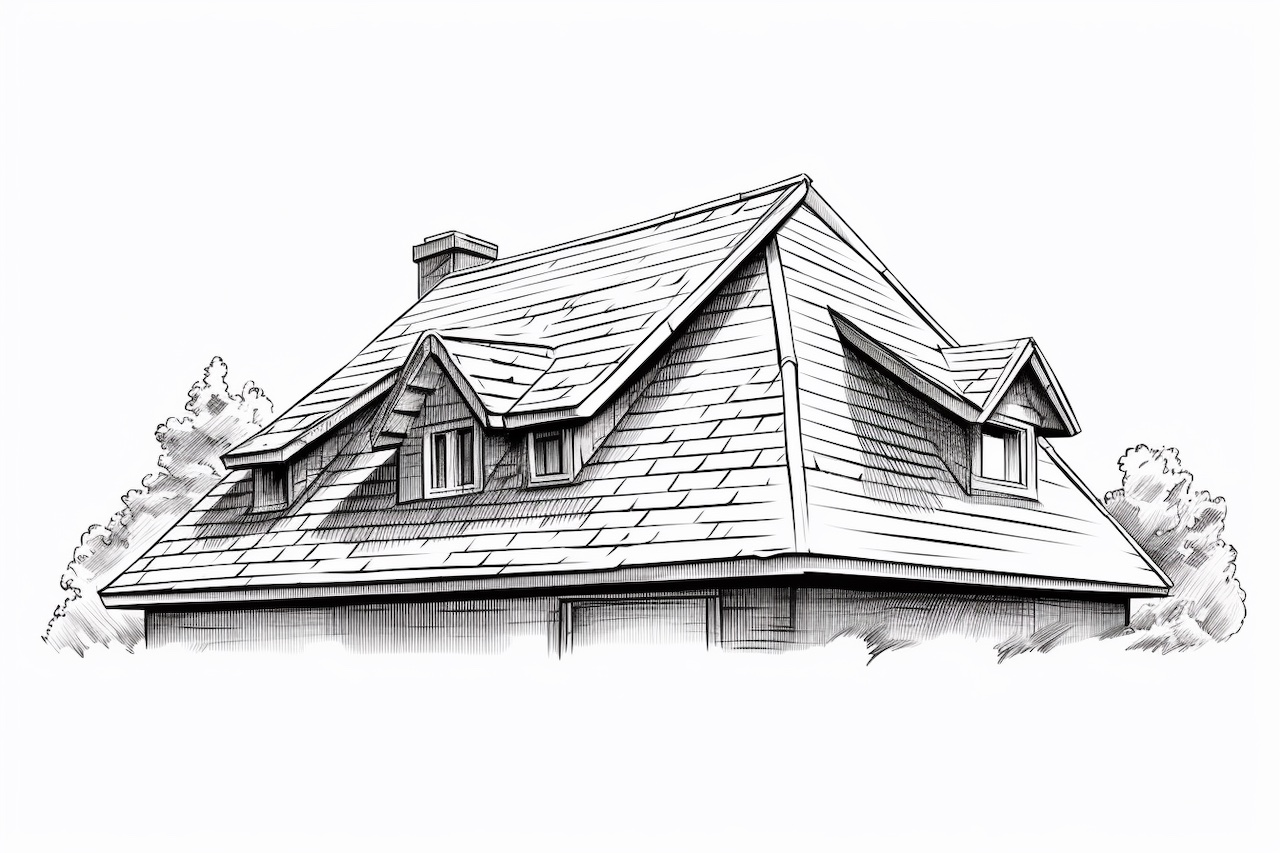
The gables are the triangular shaped walls that sit at either end of the roof. To draw the gables, extend two lines from the top corner of the roof to the eaves on each side. Make sure the lines converge at the top to form a point, creating the characteristic triangular shape of the gables.
Step 4: Adding the Roof Pitch
The roof pitch refers to the slant or steepness of the roof. Decide on the desired pitch for your roof and draw lines across the width of the roof to indicate it. The steeper the pitch, the closer the lines will be together, and vice versa. Keep the lines parallel to maintain consistency.
Step 5: Drawing the Roofing Material
Now that you have the basic shape of the roof, it’s time to add some texture to represent the roofing material. It could be shingles, tiles, or any other material of your choice. Start by drawing horizontal lines across the roof, parallel to the eaves. Then, add short vertical lines or curves along each horizontal line to create the texture of the roofing material.
Step 6: Adding Details
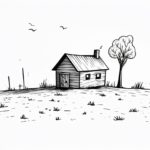
To make the roof drawing more realistic and visually appealing, it’s important to add some details. You can add windows, chimneys, dormers, or any other architectural elements that are commonly found on roofs. Take your time to carefully sketch these details, making sure they are in proportion to the overall roof design.
Step 7: Refining the Shape
Now that you have the basic structure and details in place, it’s time to refine the shape of the roof. Go over the initial lines with a darker pencil or pen, emphasizing the final shape and erasing any unnecessary guidelines. Pay attention to the proportions and make any necessary adjustments to ensure a well-balanced and visually pleasing roof.
Conclusion
Congratulations! You have successfully learned how to draw a roof. By following the step-by-step instructions outlined in this article, you can create beautiful and detailed roof drawings. Remember to start with a basic outline, add the necessary details, and refine the shape to achieve the desired result. Now, go ahead and explore different roof designs and styles to enhance your architectural drawing skills.