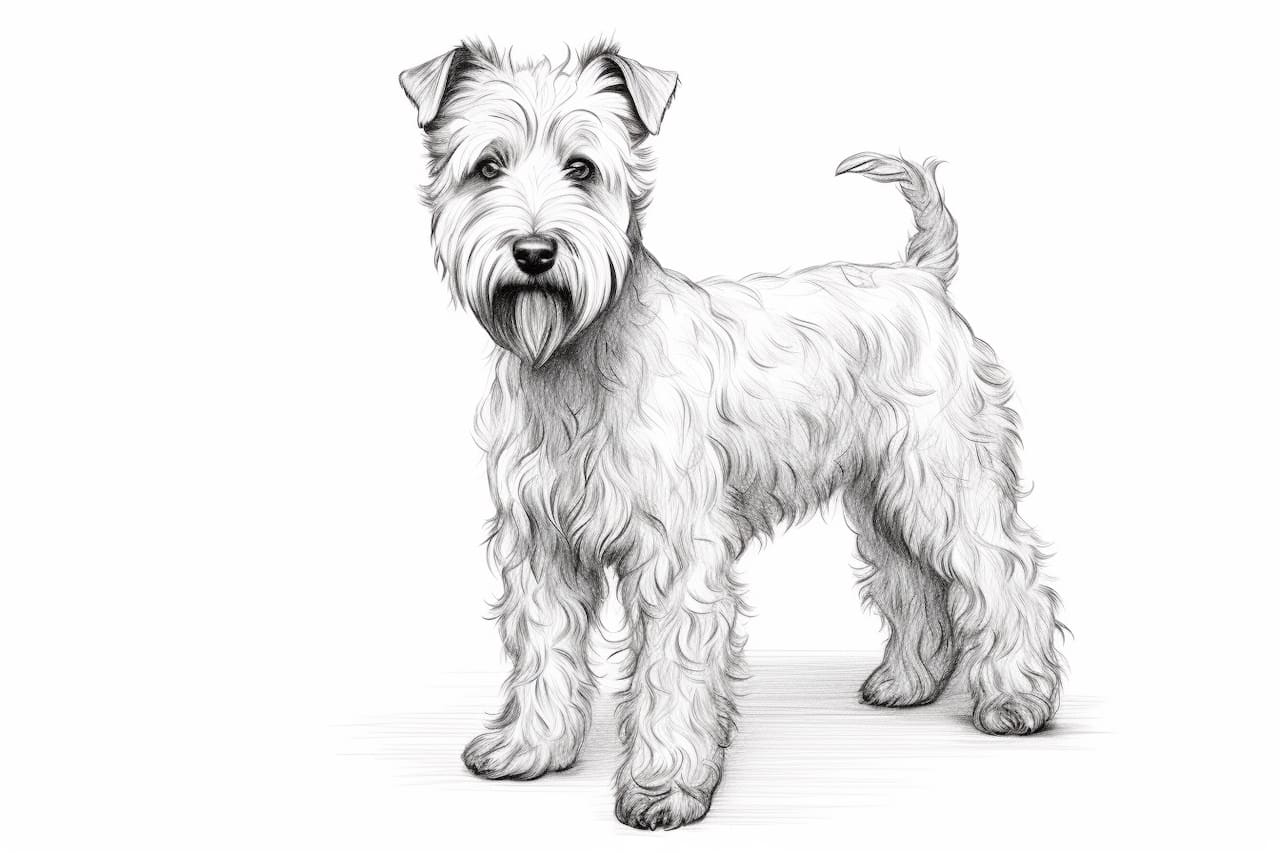
Welcome to this step-by-step guide on how to draw a Pumi! In this article, we will explore the process of capturing the adorable features of this Hungarian herding dog in your artwork. Whether you are a beginner or an experienced artist, we will provide you with clear and concise instructions to help you create your own beautiful Pumi drawing.
Materials Required
Before we begin, let’s gather the materials you will need for this drawing:
- Drawing paper or sketchbook
- Pencils (preferably a set of graphite pencils ranging from HB to 6B)
- Eraser (preferably a kneaded eraser)
- Pencil sharpener
- Reference photo of a Pumi (you can find one online or use a photo you have taken yourself)
Now that we have everything we need, let’s get started with the drawing process.
Step 1: Basic Outline
Begin by lightly sketching an oval shape to represent the head of the Pumi. Then, add a horizontal line across the oval to mark the position of the eyes. Next, draw a vertical line extending from the center of the oval to indicate the dog’s snout. Take your time to ensure these initial guidelines are proportionate and balanced.
Step 2: Eyes and Ears
Move on to sketching the eyes of the Pumi. Using the horizontal line as a guide, draw two almond shapes on either side of the vertical line. Add smaller circles within the almond shapes to represent the pupils. Remember to leave a highlight in each eye to add depth and realism.
Next, draw the ears of the Pumi. These are triangle-shaped with rounded tips and stand erect. Position the ears on either side of the head, slightly above the eyes. Take care to capture the characteristic shape of the Pumi’s ears accurately.
Step 3: Nose and Mouth
Now, let’s focus on the dog’s snout. Using the vertical line as a guide, draw a triangular shape below it to represent the nose. Add small curved lines at the bottom of the triangle to indicate the nostrils. Then, sketch a small oval shape above the nose to depict the Pumi’s mouth.
Step 4: Facial Structure and Fur
To give the Pumi a three-dimensional appearance, add details to its face. Use light, curved lines to contour the dog’s forehead and cheeks, following the shape of the initial oval. Pay attention to the direction of the fur and create soft, gentle strokes to represent its texture.
Step 5: Body and Legs
Extend the oval shape downwards to form the body of the Pumi. Sketch the front legs by drawing two elongated shapes that taper towards the paws. Similarly, draw the hind legs, ensuring they are in proportion to the front legs. Remember to pay attention to the angles and curves of the Pumi’s legs, as they contribute to its unique stance.
Step 6: Tail and Fur Details
Add the Pumi’s tail by sketching a long and fluffy curve extending from the back of its body. Use gentle lines to indicate the fur on the tail, capturing its texture and volume. Now is the time to refine any other details, such as extra fur, wrinkles, or markings. Take your time and observe your reference photo closely to ensure accuracy.
Step 7: Final Details and Shading
With the main structure of the Pumi in place, it’s time to add final details. Pay attention to the eyes, nose, mouth, and ears, adding any necessary shading or highlights to create depth. Study your reference photo to accurately depict the Pumi’s unique facial expression.
Next, work on shading the rest of the Pumi’s body and fur. Observe the direction of the fur and use varied pencil strokes to achieve a realistic texture. Gradually build up the shading, starting with lighter tones and gradually adding darker tones to create contrast.
Conclusion
Congratulations! You have learned how to draw a Pumi. By following these step-by-step instructions and practicing regularly, you can continue to refine your artistic skills and create stunning drawings of this adorable Hungarian herding dog. Remember to have patience and enjoy the process of bringing your Pumi drawing to life.