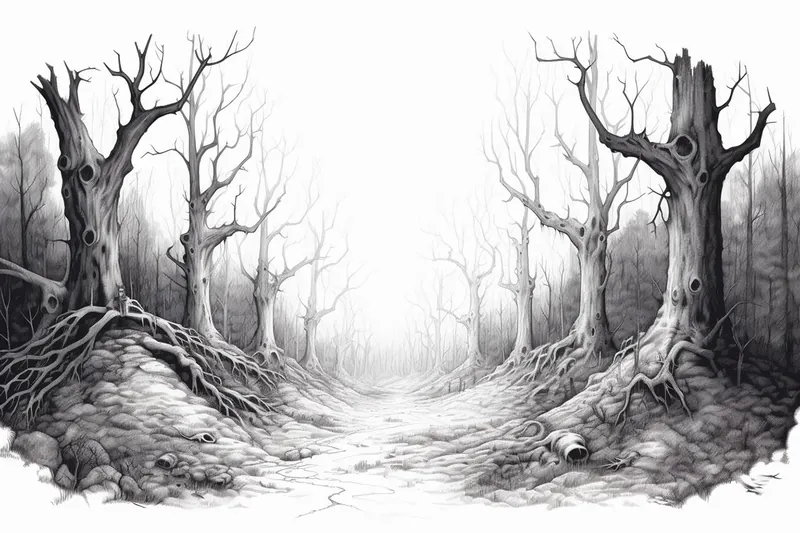
How to Draw a Creepy Forest
Learn how to draw a creepy forest in this step-by-step tutorial. Capture the haunting atmosphere with these simple instructions and unleash your artistic skills.
Materials You'll Need
- Pencil
- Paper
- Eraser
If you've ever been captivated by the mysterious allure of dark, tangled woods in stories or movies, learning how to draw a creepy forest is the perfect way to bring that haunting atmosphere to your own artwork. Creepy forests are a popular subject in fantasy and horror art, often serving as the backdrop for ghostly tales, enchanted adventures, or spine-chilling scenes. With their twisted trees, looming shadows, and misty paths, these forests invite the viewer to imagine what might be lurking just out of sight. Drawing a creepy forest can enhance your portfolio, set the mood in your comics or stories, or simply satisfy your urge to explore the eerie and unknown on paper.
This tutorial is designed for artists of all skill levels, from beginners looking to practice basic shapes and shading to more advanced artists seeking to hone their atmosphere-building techniques. We'll cover essential concepts such as creating depth with overlapping trees, using contrast to evoke a sense of mystery, and adding creepy details like gnarled branches or foggy backgrounds.
Exploring how to draw a creepy forest will help you develop useful skills in texture, composition, and mood-setting that can be applied to many other subjects. Don't worry if you've never attempted something like this before—each step is broken down clearly, and you can work at your own pace. Gather your favorite drawing materials, let your imagination wander, and get ready to create a forest that's as spooky as it is stunning!


Materials Required
Before we begin, gather the following materials:
- [Drawing paper or sketchbook](https://yonderoo.com/best-sketchbooks-for-artists/)
- Pencils of various hardness (HB, 2B, 4B)
- Eraser
- Blending stump or cotton swabs
- Black ink pen or fine-tip marker (optional)
Now that you have your materials ready, let's delve into the process of creating a creepy forest scene.
Step 1: Sketch the Overall Composition
Start by lightly sketching the outline of your forest on your drawing paper. You can begin with a horizon line to establish the ground and sky. Next, use curvy lines to sketch the main tree trunks and branches. Remember, this is a creepy forest, so make the trees tall and gnarled. Add some smaller branches and twigs for detail. Don't worry about perfection at this stage – it's all about getting the basic shapes down.
Step 2: Add Texture to the Trees
With the outline in place, it's time to add texture to the trees. Use varying line thickness and direction to give the trunks and branches a rough, weathered appearance. The lines should be irregular and jagged to enhance the creepy vibe. Add knots, cracks, and bumps to make the trees look more menacing. Use a softer pencil (4B) for darker areas and a harder pencil (HB) for lighter details.
Step 3: Create Depth with Shadows
To add depth to your forest, incorporate shadows. Determine the direction of your light source and shade the opposite side of the trees accordingly. Use a blending stump or cotton swabs to gently blend the shadows, giving them a softer, more natural look. With each stroke, pay attention to the form and contours of the trees, making them appear three-dimensional.
Step 4: Introduce Spooky Elements
Now it's time to make your creepy forest come to life with some eerie elements. Add spooky details such as fog, mist, or a full moon in the sky. You can also include some bats, owls, or other creatures lurking in the branches. These elements will enhance the atmosphere of your drawing and add an extra touch of creepiness.
Step 5: Enhance the Details
In this step, focus on refining the details of your forest. Add more branches and twigs, making sure to vary their sizes and direction to create a sense of chaos and disarray. Pay close attention to the texture of the bark and any other details you want to highlight. This is the stage where you can really bring your creepy forest to life, so take your time and experiment with different techniques.
Step 6: Darken and Define the Shadows
To intensify the creepiness, darken the shadows and define them further. Use a softer pencil (4B) to create more contrast and depth in the darkest areas. This will make the shadows appear more foreboding and create a sense of mystery within your drawing. Take your time to build up the darkness gradually, making sure to blend and smudge as needed.
Step 7: Add Final Details and Highlights
In this final step, add any remaining details to your drawing. This could include fallen leaves on the ground, moss-covered rocks, or eerie shapes in the distance. Use an eraser to create highlights and bring certain areas forward. This will add depth and dimension to your drawing. Take a step back, assess your work, and make any final adjustments to ensure you're happy with the overall result.
Tip: To really nail the unsettling mood of a creepy forest, try using a soft pencil (like 4B or 6B) to block in your darkest shadows first—think of the spaces beneath tangled roots, behind dense trees, and within hollow trunks. This bold approach helps establish your main areas of mystery early on and guides where you'll add lighter mist or eerie highlights later. Keep your lines jagged and irregular when sketching tree trunks and branches; avoid symmetry to make the forest feel wild and unnatural. Don't be afraid to layer graphite or charcoal for extra texture, especially around gnarled bark or twisted roots, and use a kneaded eraser to lift out foggy shapes or ghostly beams of light.
Conclusion
Congratulations! You have successfully completed a creepy forest drawing that captures the haunting atmosphere of a haunted woodland. By following these step-by-step instructions and using your creative intuition, you have created a chilling scene that evokes a sense of mystery and unease. Keep practicing and exploring different techniques to further develop your artistic skills. Now, go out there and unleash your imagination in the world of spooky art!
Gallery of Creepy Forest Drawings


Fun Facts About Creepy Forest
- The infamous Aokigahara, also known as the "Sea of Trees," is a real-life creepy forest at the base of Mount Fuji in Japan.
- Many creepy forests in folklore are believed to be haunted by spirits or supernatural beings, as described in ghost stories from around the world.
- The Black Forest in Germany inspired the Brothers Grimm to set many of their fairy tales in dark, mysterious woods.
- Fog and mist, common features in creepy forests, are caused by condensation of water vapor near the ground.
- Some trees in creepy forests, like the yew, have long been associated with death and the supernatural in European folklore.
- Forests are often used in horror films to create a sense of isolation and fear, as explored in this list of forest horror films by the British Film Institute.
- The Crooked Forest in Poland is famous for its mysteriously bent pine trees that add to its eerie appearance.
- Bioluminescent fungi, sometimes found in creepy forests, can make tree trunks and fallen logs glow in the dark.
Suggestions for Scenes and Settings for Creepy Forest Drawings
- A dense forest path shrouded in swirling mist, with gnarled trees arching overhead and shadowy figures barely visible in the fog.
- An ancient, abandoned graveyard hidden among twisted trees, where broken headstones are tangled in roots and eerie will-o'-the-wisps float above the ground.
- A moonlit clearing surrounded by skeletal trees, with a mysterious glowing portal or standing stone at its center.
- A decrepit wooden cabin, half-swallowed by roots and vines, with flickering candlelight in a single window and claw marks on the door.
- A tangle of trees whose branches form sinister, face-like shapes, with glowing eyes peering out from the darkness between trunks.
- An overgrown well in the middle of the woods, its water black and still, surrounded by animal skulls and ancient runes carved into nearby stones.
- A ruined stone archway or bridge, crumbling and covered in moss, with spectral figures drifting just beyond its threshold.
- A forest floor littered with bones and decaying leaves, where shadowy animal forms slink between the roots and a full moon breaks through the clouds above.
- A lone, crooked signpost at a fork in a woodland path, with arrows pointing to places like "Nowhere," "Lost Souls," or "Do Not Enter."
- A canopy of trees so thick that only thin, ghostly rays of light reach the ground, illuminating strange symbols carved into the trunks and rocks.