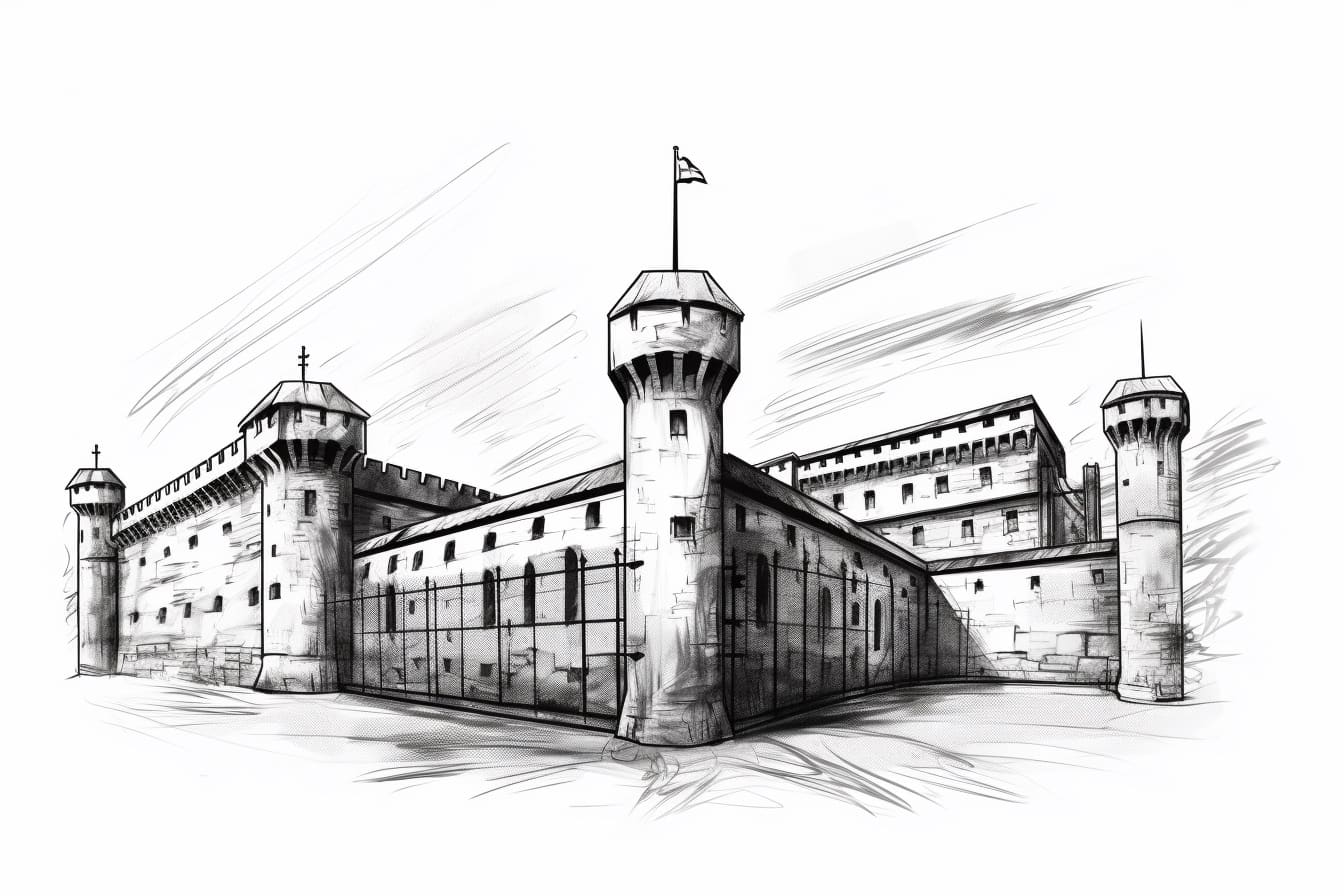
Welcome to this step-by-step guide on how to draw a prison! In this article, I will guide you through the process of drawing a prison using easy-to-follow instructions. Whether you’re an aspiring artist or just looking for a fun creative project, this tutorial is designed to help you create a realistic prison drawing. So grab your drawing materials and let’s get started!
Materials Required:
Before we begin, make sure you have the following materials handy:
- Drawing paper or sketchbook
- Pencil (preferably an HB or 2B for sketching)
- Eraser
- Fine-tip black marker or pen
- Ruler
- Coloring tools (optional) such as colored pencils, markers, or watercolors
Now that you have all the necessary materials, let’s dive into the steps of drawing a prison.
Step 1: Sketch the Base Structure
Start by sketching the basic shape of the prison. Use light and loose lines to create a rectangular shape, representing the main building. Remember to keep the lines simple and adjust the proportions to your liking. You can use a ruler to ensure straight lines.
Step 2: Add the Details
Next, we’ll add the details that give the prison its distinct appearance. Begin by drawing the bars on the windows. Draw vertical and horizontal lines to create a grid-like pattern. Take your time to make the bars evenly spaced and parallel.
Step 3: Outline the Building
Now it’s time to add depth and definition to the prison. Start by outlining the main building with bold, dark lines. This will make it stand out and give it a solid look. Pay attention to the corners and edges to make them sharp and defined.
Step 4: Create the Entrance
A prison drawing wouldn’t be complete without an entrance. Sketch a heavy metal gate at the front of the building. Add intricate details like bolts and locks to make it more realistic. Remember to keep the lines clean and precise.
Step 5: Add the Surroundings
To make the prison drawing more interesting, add some surroundings to the scene. You can sketch a tall fence around the prison or even a watchtower. These elements will enhance the overall composition and give the drawing more context.
Step 6: Shade and Texture
Now let’s add some shading and texture to our prison drawing to bring it to life. Use your pencil to create gradients and shadows on the building, giving it a three-dimensional appearance. Pay attention to the light source and add shading accordingly.
Step 7: Ink the Drawing
Once you’re satisfied with the pencil sketch, it’s time to ink the drawing. Use a fine-tip black marker or pen to trace over the pencil lines. This will make the drawing more defined and polished. Be careful not to smudge the ink, and let it dry completely before erasing any remaining pencil marks.
Step 8: Color the Drawing (Optional)
If you prefer a colored prison drawing, this is the step where you can bring it to life with your preferred coloring tools. Experiment with different color schemes and techniques to achieve the desired effect. You can choose a realistic approach or opt for a more stylized and imaginative interpretation.
Conclusion
Congratulations! You have successfully learned how to draw a prison. By following these step-by-step instructions, you’ve created a detailed and realistic prison drawing that showcases your artistic skills. Remember to practice, experiment, and have fun with your drawings. Whether you’re interested in architectural drawings or just want to explore different art styles, drawing a prison is a great way to challenge yourself and refine your techniques.