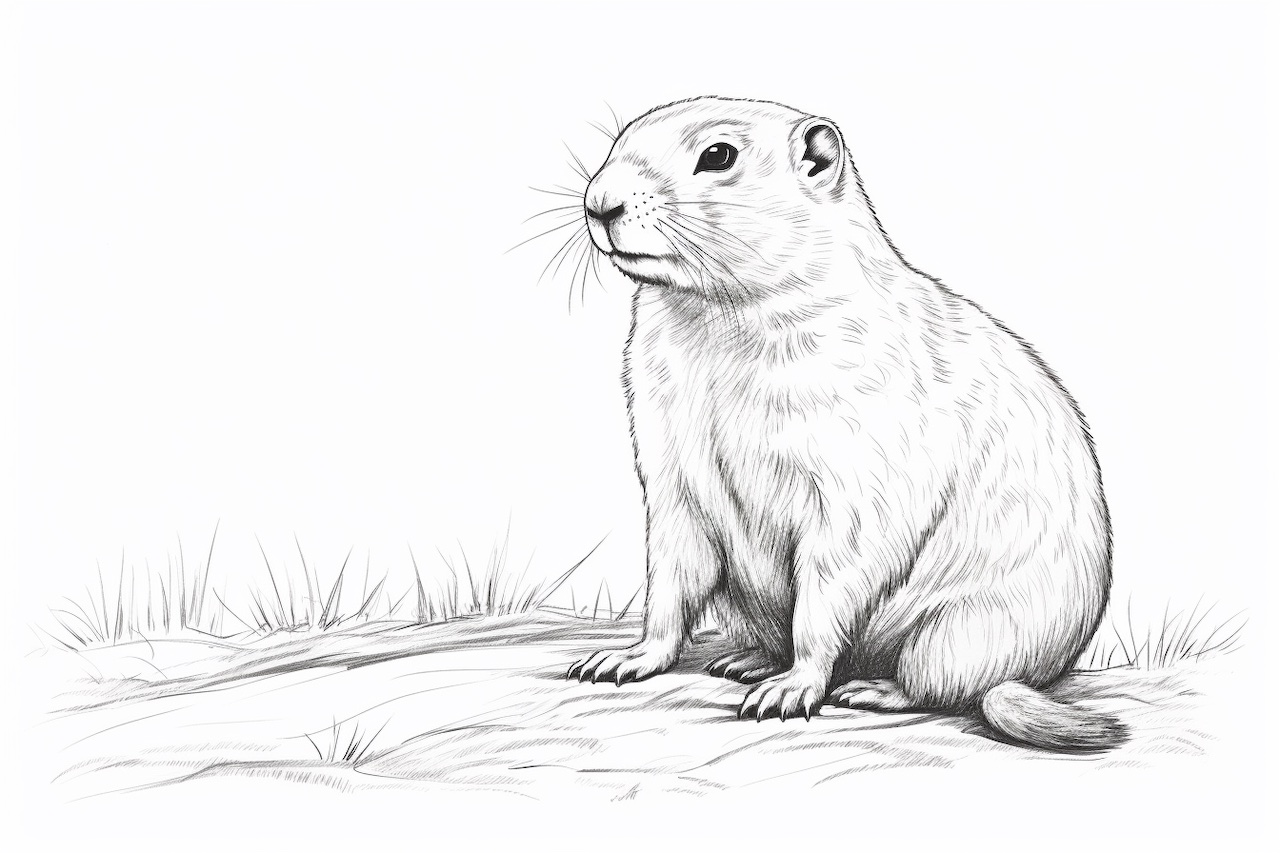
Welcome to this step-by-step guide on how to draw a prairie dog! Whether you’re a beginner or an experienced artist, this tutorial will walk you through the process of creating a realistic and detailed prairie dog drawing. So let’s grab our materials and get started!
Materials Required
Before we begin, make sure you have the following materials:
- Pencil: Use a pencil with a medium or soft lead for sketching and shading.
- Paper: Choose a smooth, heavyweight paper that is suitable for drawing.
- Eraser: Have a good-quality eraser handy for making corrections.
- Fine-tip pen: This will be used for adding detailed lines at the end.
- Reference image: Find a clear and high-resolution photo of a prairie dog to work from. You can use a physical printout or have it open on a digital device.
Now that we have our materials ready, let’s dive into the step-by-step process of drawing a prairie dog!
Step 1: Sketch the Basic Shapes
Start by lightly sketching a circle for the head and an oval shape for the body. These shapes will serve as the foundation for the prairie dog’s form. Take your time to get the proportions right and remember to keep your lines light at this stage, as they will be erased later.
Step 2: Add Facial Features
Using your reference image as a guide, add the prairie dog’s facial features. Draw two small circles for the eyes and a smaller oval shape for the nose. Place the eyes slightly above the middle of the head and the nose below them. Add a curved line for the mouth, making sure to capture the prairie dog’s characteristic expressions.
Step 3: Refine the Body Shape
Next, refine the body shape by adding the legs, tail, and other details. Prairie dogs have fairly short legs and a long, thin tail. Use simple lines to indicate the position and proportion of these features. Pay attention to the angles and curves, as they will contribute to the overall pose and appearance of the prairie dog.
Step 4: Build the Fur Texture
Now it’s time to add some texture and depth to our drawing. Start by sketching short, curved lines around the body to represent the fur. Pay attention to the direction of the fur and follow the natural contours of the prairie dog’s body. Vary the length and intensity of these lines to create a realistic effect.
Step 5: Refine the Facial Features
Go back to the prairie dog’s face and add more detail. Darken the eyes and draw small circles inside them to represent the pupils. Add some shading around the eyes and nose to give them dimension. Use short, curved lines to indicate the fur around the face, paying attention to the flow and direction.
Step 6: Add Shadows and Highlights
To make your drawing really pop, it’s important to add shadows and highlights. Shadows will create depth and dimension, while highlights will bring out the form and add a sense of realism. Study your reference image to identify areas of shadow and light, and lightly shade them in with your pencil. Use a blending tool or your finger to smooth out the shading for a more realistic effect.
Step 7: Refine and Add Details
Take a step back and assess your drawing so far. Look for any areas that need refinement or additional details. Add more fur texture where needed, paying attention to the body, legs, and tail. Use your reference image as a guide to capture the unique characteristics of the prairie dog you’re drawing. Take your time and make adjustments as necessary.
Step 8: Ink the Final Lines
Once you’re satisfied with your pencil drawing, it’s time to ink the final lines. Use a fine-tip pen to carefully trace over the main lines of your drawing. Start with the outline of the prairie dog’s body and then move on to the facial features and fur details. Feel free to omit any unnecessary construction lines as you go. Take your time and work slowly and confidently.
Step 9: Erase the Pencil Guidelines
After the ink has dried, erase any remaining pencil guidelines with a soft eraser. Take care not to erase your inked lines. Use a gentle touch and erase in small, controlled motions. Once all the guidelines are removed, your prairie dog drawing will be clean and ready for the final touches.
Step 10: Add Final Touches
At this stage, you can add any final touches to your drawing. Use your pen to add more details and texture, such as fine lines for individual strands of fur or small dots for whiskers. Pay attention to the light source in your reference image and add additional shading and highlights accordingly. Take your time and don’t rush this step.
Conclusion
Congratulations! You have successfully learned how to draw a prairie dog. By following these step-by-step instructions, you have created a realistic and detailed representation of this fascinating creature. Remember to practice regularly and explore different drawing techniques to further develop your skills. Happy drawing!