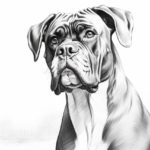
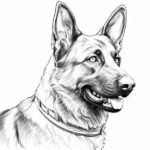
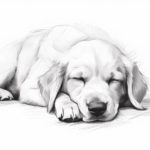
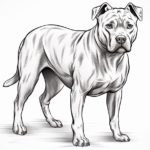
Are you a dog lover and want to learn how to draw your favorite furry friend? Drawing a big dog may seem like a daunting task, but with a step-by-step approach, you’ll be able to capture the essence of these majestic animals in no time. In this tutorial, I will guide you through the process of how to draw a big dog, focusing on its basic structure and proportions. So grab your pencil and paper, and let’s get started!
Materials Required
Before we begin, let’s gather the materials you’ll need for this drawing tutorial:
- Drawing paper
- Pencils (HB and 2B)
- Eraser
- Ruler
- Reference photo of a big dog
Now that we have our materials ready, let’s dive into the step-by-step process of drawing a big dog.
Step 1: Define the Outline
Start by lightly sketching the basic outline of the dog’s body. Use simple geometric shapes like circles and rectangles to block in the main body, head, and limbs. Keep the shapes loose and don’t worry too much about getting everything perfect at this stage – we’ll refine the details later.
Step 2: Add the Head and Facial Features
Using the circle as a guide, start adding the dog’s head. Pay attention to the proportions – big dogs tend to have larger heads in relation to their bodies. Sketch in the basic shapes of the ears, eyes, nose, and mouth, making sure to capture the unique characteristics of the breed you’re drawing.
Step 3: Outline the Body
Next, start defining the dog’s body by adding details to the initial outline. Use the rectangles as a guide for the chest, abdomen, and legs. Remember to keep your lines light and sketchy, as we’ll be refining them later on.
Step 4: Refine the Face
Now it’s time to refine the dog’s facial features. Start by adding more detail to the eyes, nose, and mouth. Pay close attention to the placement and shape of these features, as they play a crucial role in capturing the dog’s expression.
Step 5: Add Fur Details
To make your drawing come to life, start adding some fur details. Observe the direction and flow of the dog’s fur, and use short, light strokes to convey its texture. Take your time with this step, as fur can greatly contribute to the overall realism of your drawing.
Step 6: Define the Body
With the basic outline in place, it’s time to refine the dog’s body. Pay attention to the curves and muscle definition, using reference images to guide you. Add more detail to the legs, paws, and tail, making sure they are proportionate to the rest of the body.
Step 7: Add Shading and Highlights
To give your drawing depth and dimension, it’s important to add shading and highlights. Identify the light source in your reference photo and shade the areas that are in shadow accordingly. Use a blending tool or your finger to smooth out the shading and create a more realistic look.
Step 8: Refine and Clean Up
Take a step back and evaluate your drawing. Are there any areas that need further refinement or adjustment? Use an eraser to clean up any stray lines or smudges, and make any necessary tweaks to the overall composition.
Conclusion
Congratulations! You have successfully learned how to draw a big dog. By following these step-by-step instructions, you were able to capture the distinct features and proportions of a big dog. Remember, practice makes perfect, so keep honing your skills and experimenting with different breeds of dogs. Happy drawing!