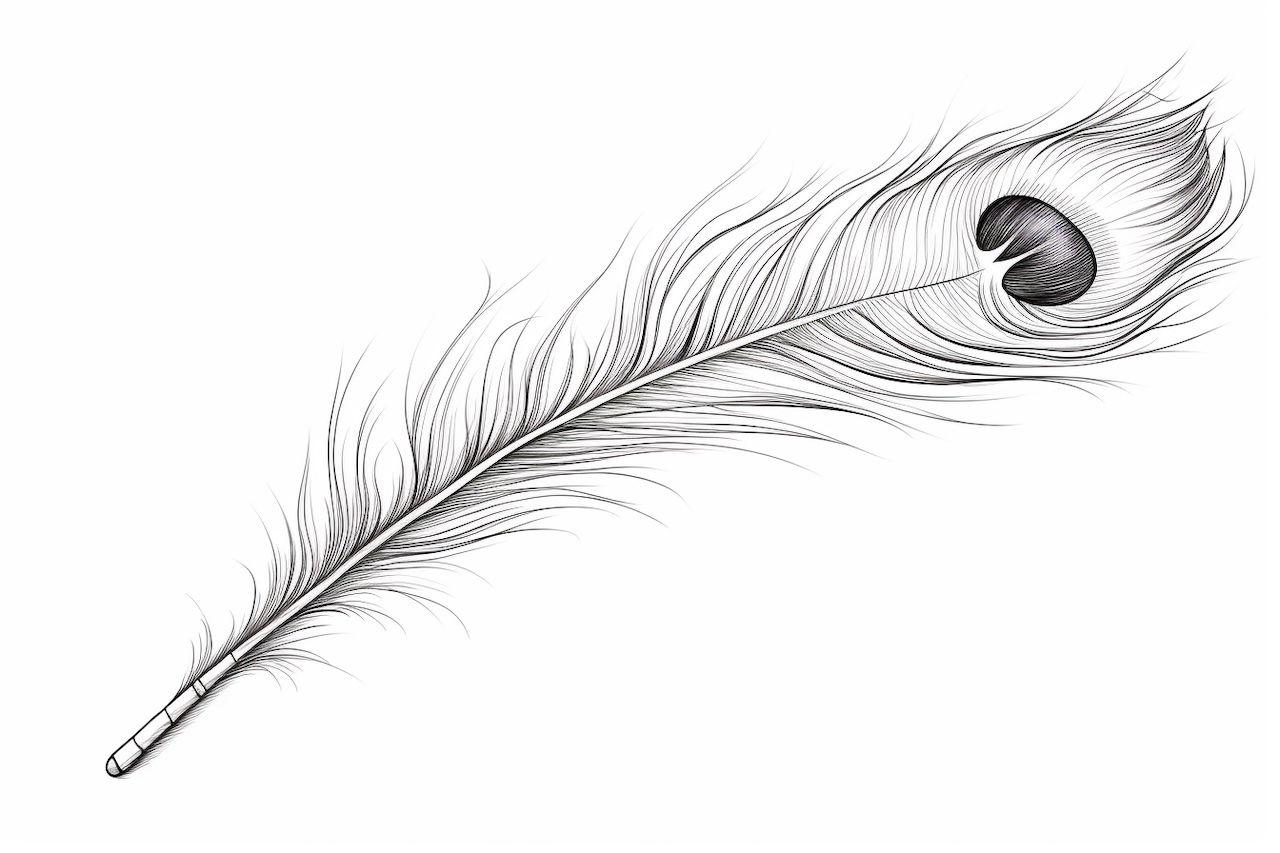
Peacock feathers are known for their vibrant colors and intricate patterns, making them a popular subject for artists. If you’re looking to draw a peacock feather, you’ve come to the right place! In this step-by-step guide, I will walk you through the process of creating a realistic peacock feather using simple techniques. So grab your pencils and let’s get started!
Materials Required
Before we dive into the drawing process, make sure you have the following materials handy:
- Pencil: Use a range of pencil grades, such as 2H, HB, 2B, and 4B, for different tones and shading.
- Eraser: A kneaded eraser works best for lifting graphite and correcting mistakes.
- Paper: Choose a smooth-surface drawing paper that can handle detailed work.
- Drawing Board: A sturdy drawing board or clipboard will provide a stable surface to work on.
- Reference Image: Find a clear and detailed reference image of a peacock feather to guide your drawing.
Once you have gathered all the necessary materials, let’s begin the drawing process!
Step 1: Basic Outline
Start by lightly sketching the basic outline of the peacock feather using a 2H pencil. Use light and loose strokes to create the shape of the central stem and the outline of the feather’s structure. Keep in mind that peacock feathers are long and curved, so try to capture their graceful shape.
Step 2: Feather Details
Next, observe the reference image carefully and start adding the fine details to the feather. Use a combination of HB and 2B pencils to create the thin lines that compose the feather’s structure. Pay attention to the small branches, or barbs, that extend from the central stem, and sketch them using short, curved lines.
Step 3: Barbs and Barbules
To give the feather a realistic look, focus on drawing the barbs and barbules. Barbs are the parallel lines that come off the central stem, while barbules are the smaller lines that connect the barbs, creating a feathery texture.
Use a softer lead, such as a 4B pencil, to darken the barbs and create contrast. Draw the barbules by adding smaller curved lines that connect the barbs. Remember to follow the natural flow of the feather and vary the length and thickness of the barbules for a more organic appearance.
Step 4: Shading
Now it’s time to add depth and dimension to your peacock feather through shading. Start by identifying the light source in your reference image. This will determine where the highlights and shadows fall on the feather.
Using a combination of HB and 2B pencils, gently shade the areas of the feather that are in shadow. Gradually build up the darkness by layering the pencil strokes, mimicking the texture of the barbs and barbules. Use your reference image as a guide to achieve a realistic shading effect.
Step 5: Adding Color
Peacock feathers are renowned for their vivid colors. To bring your drawing to life, add color to your peacock feather using colored pencils or other preferred coloring mediums. Study the reference image to accurately replicate the colors and patterns.
Start by adding a base layer of green on the central stem of the feather. Then, layer shades of blue, purple, and turquoise on the barbs, using short, light strokes to mimic the shimmer of the feathers.
Step 6: Finishing Touches
To complete your drawing, take a step back and assess the overall composition. Look for areas that may need further refinement or adjustment. Pay attention to the smaller details, such as stray barbules or uneven shading, and make any necessary corrections with your eraser or additional pencil strokes.
Conclusion
Drawing a peacock feather requires careful observation and attention to detail. By following these step-by-step instructions and dedicating time to practice, you can create a realistic and visually stunning representation of this beautiful natural design.
Remember to start with a basic outline, add intricate details, and focus on shading and coloring to bring your peacock feather drawing to life. Don’t be afraid to experiment and let your creativity shine through!
Now that you have learned the techniques to draw a peacock feather, grab your materials and start sketching. With practice and patience, you’ll be able to create breathtaking peacock feather drawings that showcase your artistic skills.