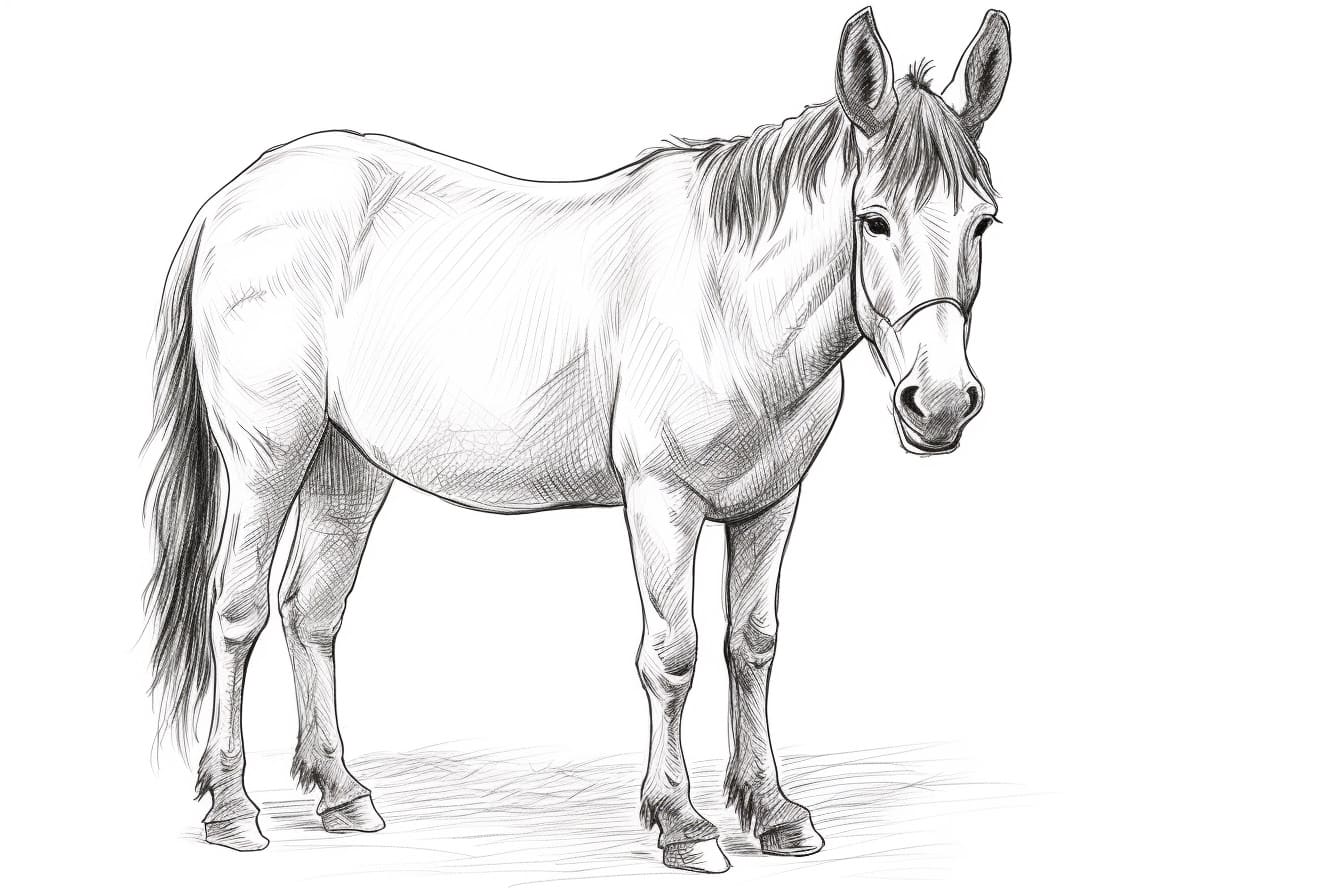
Are you ready to embark on a creative journey and learn how to draw a mule? Mules are fascinating animals with unique characteristics that make them a fun subject to draw. In this step-by-step guide, I will walk you through the process of drawing a mule, from capturing its distinctive features to adding the finishing touches. So grab your drawing materials, and let’s get started!
Materials Required
Before we begin, gather the following materials:
- Drawing paper or sketchbook
- Pencils (HB, 2B, and 4B)
- Eraser
- Blending stump (optional)
- Reference photo of a mule (preferably in a pose you like)
Now that you have your materials ready, let’s dive into the steps of drawing a mule.
Step 1: Study the Anatomy
To successfully draw a mule, it’s important to understand its anatomy. Take some time to study the skeletal structure and proportions of a mule. Notice the length and size of its ears, the shape of its head, and the muscular structure of its body. This understanding will help you create a more accurate and realistic drawing.
Step 2: Outline the Head
Start by drawing a basic oval shape to form the head of the mule. Then, add two intersecting lines that cross at the center of the oval. These lines will serve as guidelines for positioning the facial features later on.
Step 3: Add the Facial Features
Using the guidelines, sketch the eyes, nose, and mouth of the mule. Pay close attention to the shape and size of the eyes, as they are a defining feature of mules. Don’t forget to include the long ears, positioned slightly above the eyes.
Step 4: Define the Body
Extend the outline of the head to form the neck and body of the mule. Mules have a sturdy build, so make sure to portray the muscular structure correctly. Pay attention to the curves and proportions of the body as you sketch.
Step 5: Detail the Eyes and Ears
Now, shift your focus to the details of the mule’s eyes and ears. Add shading to the eyes to create depth and capture the expression of the mule. Use short, curved lines to illustrate the texture of the ears, following the direction of the fur.
Step 6: Outline the Legs and Hooves
Carefully outline the legs of the mule, paying attention to the joint placement and proportions. Mules have strong, sturdy legs, so make sure to convey their strength in your drawing. Add the hooves, using curved lines to indicate their shape.
Step 7: Refine the Body and Muscles
Now that the basic structure is in place, start refining the body and adding more details. Observe the muscles of the mule and the way they connect. Use shading and hatching techniques to give the body depth and volume.
Step 8: Add Fur Texture
Mules have a short and thick coat of fur. To create a realistic texture, use short, overlapping lines to simulate fur. Vary the pressure and direction of your pencil strokes to create depth and dimension.
Step 9: Finalize the Drawing
Take a step back and assess your drawing. Make any necessary adjustments or refinements to the proportions, shading, and overall composition. Use an eraser to remove any stray lines or smudges. If desired, you can use a blending stump to smooth out the shading and create a more polished look.
Conclusion
Congratulations on completing your mule drawing! By following the step-by-step instructions in this guide, you have learned how to capture the unique characteristics of a mule on paper. Remember to practice regularly to improve your skills and refine your technique. Now, go ahead and showcase your artwork with pride.