Welcome to this step-by-step guide on how to draw a Mastiff! Whether you’re an aspiring artist or just looking to improve your drawing skills, this tutorial will provide you with the necessary steps to create a realistic depiction of this majestic breed. So let’s get started!
Materials Required
To begin your journey in drawing a Mastiff, gather the following materials:
- Pencil: Start with a medium-hard graphite pencil (H or HB) for initial sketching.
- Paper: Use a high-quality drawing paper that can handle shading and erasing.
- Eraser: Have a kneaded eraser handy for lightening pencil lines and correcting mistakes.
- Pencil Sharpener: Keep your pencil sharp for precise lines and details.
- Reference Image: Find a clear reference photo of a Mastiff to use as a guide.
Now that you have all the necessary materials, let’s dive into the step-by-step process of drawing a Mastiff.
Step 1: Basic Guidelines
Start by lightly sketching the basic shapes and proportions of the Mastiff. Use simple shapes like circles and ovals to form the head, body, and limbs. Focus on capturing the overall pose and stance of the Mastiff.
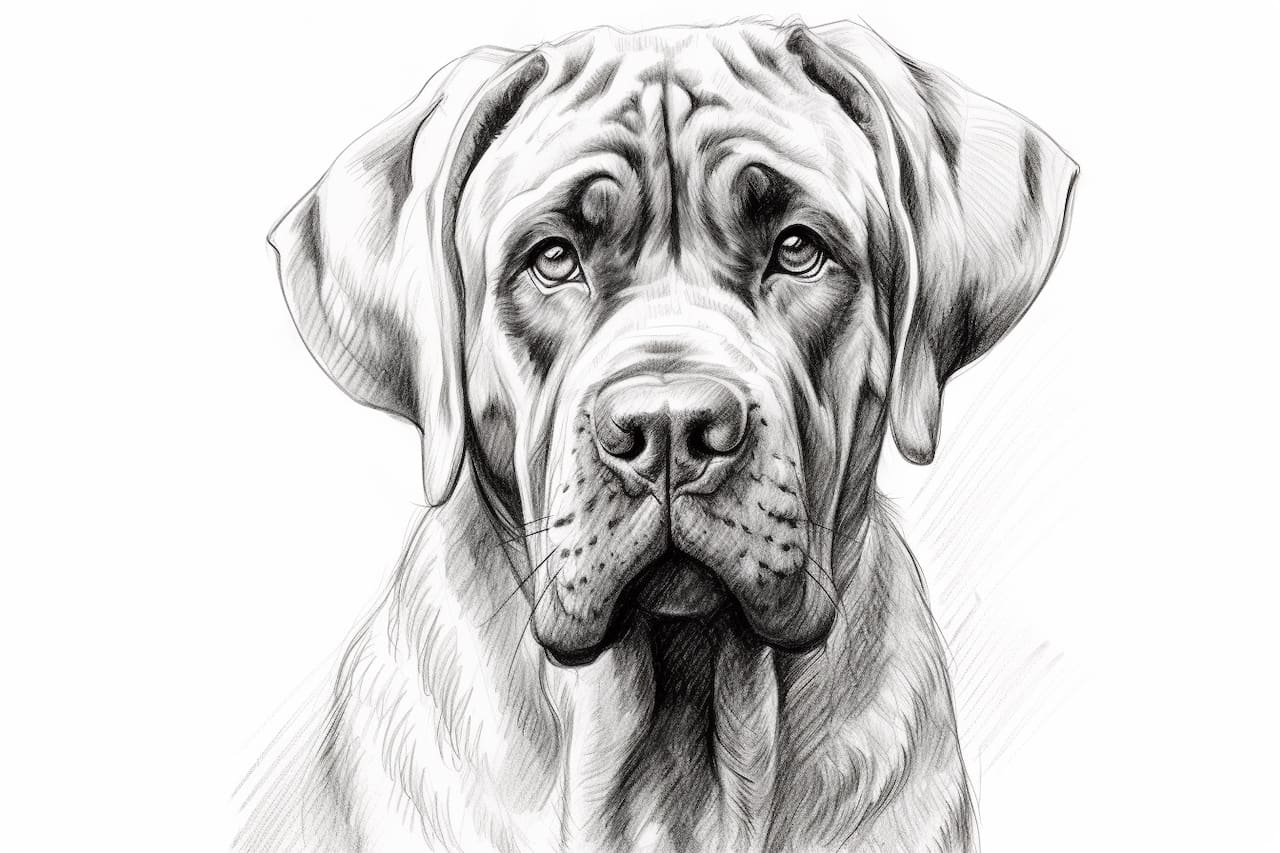
Step 2: Head and Facial Features
Refine the shape of the head, paying attention to the unique features of a Mastiff. Draw the distinctive droopy jowls, wrinkled forehead, and a strong, square-shaped muzzle. Add the eyes, nose, and mouth with accurate proportions, referring to your reference image.
Step 3: Ears and Neck
Sketch the large, hanging ears of the Mastiff on either side of the head. Pay attention to the shape and placement of the ears to maintain accuracy. Then, continue the lines to form the neck, indicating the strong muscles and folds.
Step 4: Body and Shoulders
Extend the guidelines to shape the body of the Mastiff. Define the broad chest, barrel-like torso, and the muscular shoulders. Pay attention to the natural curves and proportions of the breed, keeping your reference image as a guide.
Step 5: Legs and Paws
Draw the front and hind legs of the Mastiff, focusing on the bone structure and muscles. Capture the size and strength of the legs accurately, as they are essential characteristics of this breed. Add the paws, paying attention to the large, rounded shape of each paw pad.
Step 6: Tail and Back
Sketch the thick and tapering tail of the Mastiff, emphasizing its natural curve and texture. Define the back, highlighting the strong muscles and the slight arch in the breed’s posture.
Step 7: Shading and Detailing
Once you have the basic structure of the Mastiff in place, it’s time to add depth and detail through shading. Start by observing the reference image for areas of light and shadow. Use your pencil to create gradual tonal values, applying more pressure for darker areas and less for lighter areas. Pay close attention to the wrinkles, folds, and textures of the breed to capture its unique characteristics.
Step 8: Refine and Finalize
Take a step back and evaluate your drawing. Make any necessary adjustments to enhance the overall proportions, shapes, and details. Use your eraser to lighten any unnecessary guidelines or mistakes. Add any additional details or highlights to bring your drawing to life.
Conclusion
Congratulations! You have successfully learned how to draw a Mastiff. By following these step-by-step instructions, you’ve created a realistic portrayal of this majestic breed. Remember, practice is key to improving your skills, so keep drawing and experimenting with different techniques. We hope you enjoyed this tutorial and feel inspired to continue exploring the world of art.