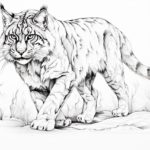
The lynx is a majestic and fascinating creature with its unique appearance and powerful presence. If you are a fan of wildlife and want to learn how to capture the essence of this incredible animal on paper, you’ve come to the right place! In this step-by-step guide, I will show you how to draw a lynx in a clear, clean, and concise style. So grab your pencil and let’s get started!
Materials Required
Before we delve into the step-by-step instructions, let’s gather the materials you will need for this drawing:
- Drawing paper or sketchbook
- Pencils (HB, 2B, and 4B)
- Eraser
- Sharpener
- Blending stump or cotton swabs
- Reference photo of a lynx (you can find numerous images online or use a wildlife photography book)
Now that we have everything we need, let’s begin the drawing process.
Step 1: Basic Guidelines
Start by lightly sketching a circle for the lynx’s head. Then, draw a vertical line that intersects the circle slightly off-center. This line will serve as the lynx’s centerline and will help with the placement of facial features.
Next, draw two lines extending downward from the circle, indicating the lynx’s neck. Finally, sketch a large oval shape below the neck, representing the body of the lynx. These basic guidelines will provide a framework for the rest of the drawing.
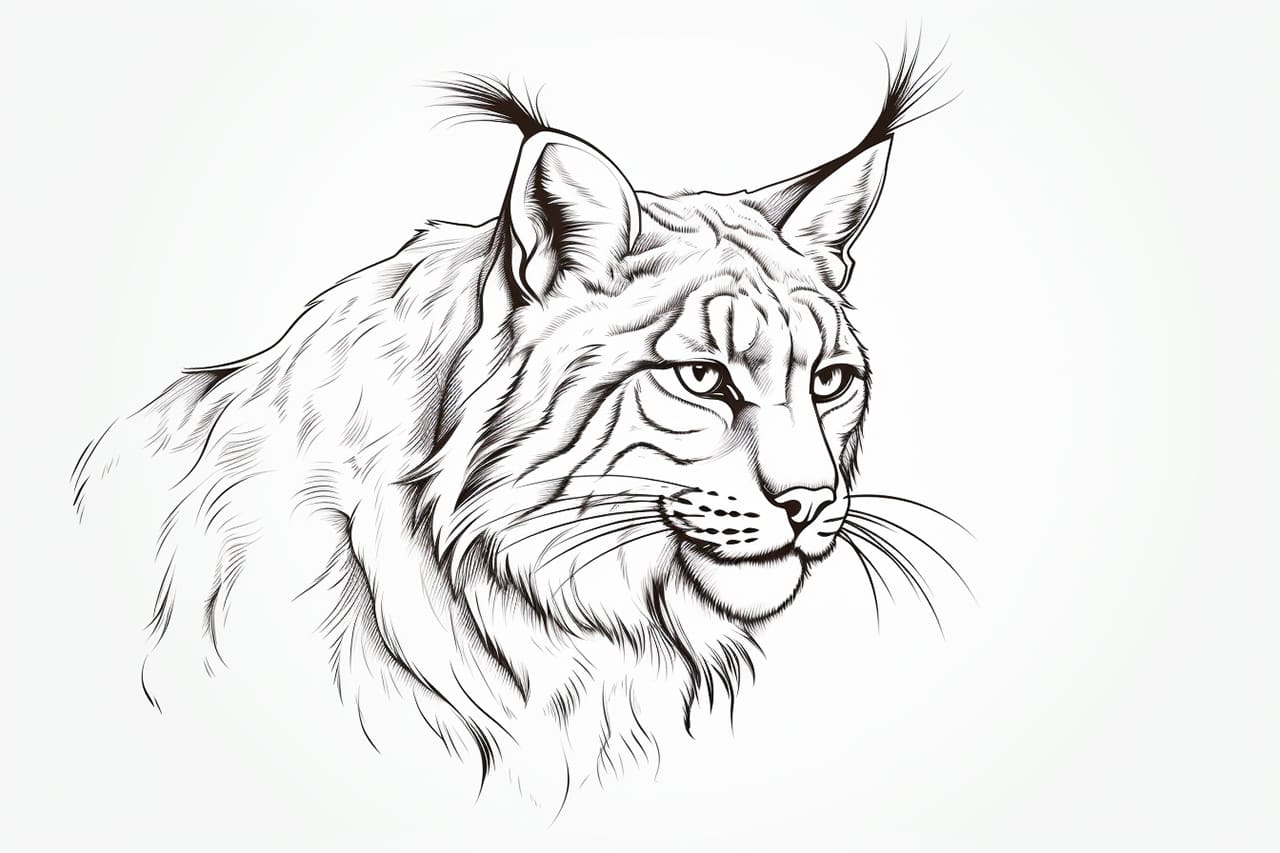
Step 2: Head and Facial Features
Using the circle as a guide, start rendering the head of the lynx. Add more detail to the circle by drawing the lynx’s pointed ears, which are one of its distinctive features. Lynx have long tufts of fur on the tips of their ears, so make sure to capture that detail.
Next, sketch the facial features. Start with the lynx’s eyes, placing them on either side of the centerline. Lynx have intense, almond-shaped eyes, so be sure to capture their characteristic gaze. Draw a small triangle for the lynx’s nose, slightly below the eyes. Then, add the mouth, extending a curved line from each side of the nose.
Step 3: Fur and Facial Details
Now it’s time to add more detail to the lynx’s face and fur. Start by adding short strokes around the lynx’s eyes to represent the fur on its face. Lynx have distinctive markings on their face, including dark lines extending from the inner corner of their eyes to their ears. Sketch these lines lightly to indicate this feature.
Next, add shading and texture to the lynx’s fur. Use short, quick strokes to simulate the appearance of fur on the top of the head and around the ears. Pay attention to the lynx’s color patterns and try to replicate them as accurately as possible.
Step 4: Body and Limbs
Moving on to the body, start by adding more definition to the lynx’s neck. Use curved lines to depict the muscles and contours of the neck. Then, begin shaping the lynx’s body by adding a curved line below the head. This line will outline the back of the lynx.
Next, draw the front limbs by adding two lines extending from the body. The lynx’s limbs are muscular and robust, so make sure to capture their strength. Add another set of lines below the body to represent the hind limbs, making them slightly longer than the front limbs.
Step 5: Tail and Paws
The lynx’s tail is an essential part of its anatomy, so let’s add it to our drawing. Start by drawing a long, tapered shape extending from the back of the lynx. The tail should be fluffy and thick, so add some fur texture using short, curved lines.
Moving on to the paws, carefully observe the reference photo for the lynx’s paw structure. Sketch the outline of the lynx’s front paws, paying attention to the individual toes and their positions. Repeat this process for the hind paws as well, adjusting the size and shape accordingly.
Step 6: Final Details and Shading
Now that we have our lynx’s basic structure, it’s time to refine our drawing and add the finishing touches. Start by erasing any unnecessary guidelines and refining the shape of the lynx’s body, head, and facial features.
Next, add more detail to the lynx’s fur by using a combination of short strokes and cross-hatching to create texture. Pay close attention to areas where the fur is thicker or darker, such as around the lynx’s neck, tail, and limbs.
Conclusion
Congratulations! You have successfully learned how to draw a lynx, capturing its unique beauty and essence on paper. By following these step-by-step instructions and paying attention to details, you can create a stunning artwork of this magnificent creature. Remember, practice is key, so keep honing your drawing skills and exploring the wonders of wildlife.
I hope you have enjoyed this tutorial on how to draw a lynx. Happy sketching!