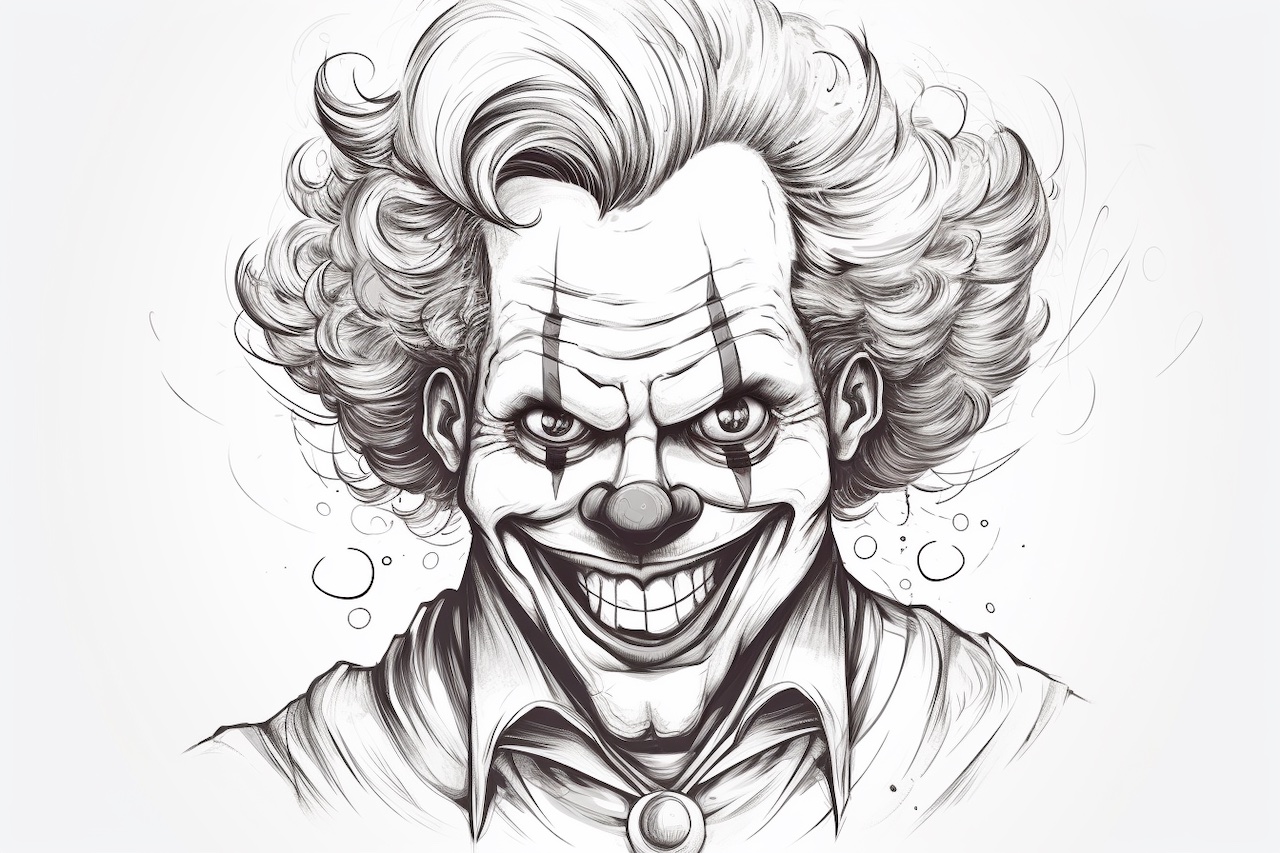
Clown faces are a popular subject for artists of all levels. Whether you’re a beginner or an experienced artist, drawing a clown face can be a fun and creative project. In this step-by-step guide, I will walk you through the process of how to draw a clown face. So grab your materials and let’s get started!
Materials Required
To draw a clown face, you will need the following materials:
- Drawing paper or sketchbook
- Pencil
- Eraser
- Colored pencils or markers (optional)
Step 1: Outline the Shape of the Face
Start by drawing a circle or oval shape to outline the face of the clown. This will serve as the base for your drawing. You can use light, loose strokes so that you can easily make adjustments later on.
Step 2: Add Facial Features
Next, draw the eyes of the clown. Clowns often have exaggerated and expressive eyes, so feel free to get creative with their shape and size. You can also draw a curved line for the eyebrows, giving the clown a playful expression.
After drawing the eyes, sketch a small triangle shape for the clown’s nose. Make sure it’s centered on the face and slightly below the eyes. Clowns are known for their big red noses, so you can color it in later to make it stand out.
Step 3: Draw the Mouth and Lips
Now it’s time to draw the clown’s mouth. Clowns often have wide, exaggerated smiles with big, round lips. Start by drawing a curved line for the mouth, and then add the upper and lower lips underneath.
To make the mouth even more expressive, you can draw some exaggerated lines extending from the corners of the mouth. These lines will give the clown a cheerful and lively appearance.
Step 4: Sketch the Hair
Clown hair is one of the most distinctive features of their appearance. To draw the hair, start by lightly sketching the basic shape and direction of the hair. Clowns often have messy and colorful hair, so don’t be afraid to add some wild spikes or curls.
Once you’re happy with the basic shape, you can darken the lines and add more details and texture to the hair. Remember to keep it playful and fun!
Step 5: Add Details and Accessories
Now that the main features of the clown face are complete, it’s time to add some additional details and accessories to make your clown unique. You can draw some freckles or face paint on the cheeks, or even add some stars or hearts around the eyes.
Clowns often wear hats, so you can draw a hat on top of the hair. Feel free to get creative with the design and decoration of the hat. You can also add other accessories like a bow tie or a big, floppy collar around the neck.
Step 6: Color Your Clown
If you want to take your drawing to the next level, you can add color to your clown face. Use colored pencils or markers to bring your drawing to life. Clowns are typically associated with bright and vibrant colors, so don’t be afraid to experiment and have fun with your color choices.
Color the hair, nose, and mouth in bold and contrasting colors. You can also add shading and highlights to make your drawing more three-dimensional. Remember, there are no rules when it comes to coloring a clown, so let your creativity run wild!
Conclusion
Drawing a clown face can be a rewarding and enjoyable creative exercise. By following these step-by-step instructions, you can create your very own clown face masterpiece. Remember to start with a rough sketch and make adjustments as needed. Don’t be afraid to add your own unique touches and color choices to make your clown face truly one-of-a-kind.
So grab your pencil and paper, and let your imagination soar as you bring your clown face to life. Happy drawing!