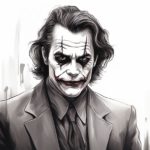
The Joker is an iconic and complex character that has captivated audiences for years. With his sinister smile and colorful appearance, he has become a popular subject for artists to recreate. If you’ve ever wanted to learn how to draw a Joker face, then you’re in luck! In this article, I will guide you through the steps to create your very own Joker masterpiece.
Materials Required
Before we begin, let’s gather the materials you will need:
- Drawing paper or sketchbook
- Pencils (preferably a range of HB to 6B)
- Eraser
- Sharpener
- Fine-tipped black marker
- Colored pencils or markers (optional)
Now that you have everything ready, let’s get started on drawing the Joker face!
Step 1: Basic Facial Guidelines
Begin by lightly sketching the basic guidelines for the Joker’s face. Start with an oval shape for the head and add a vertical line down the center. Then, draw a horizontal line across the middle of the oval. This line will help you place the eyes.
Step 2: Eyes and Eyebrows
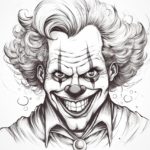
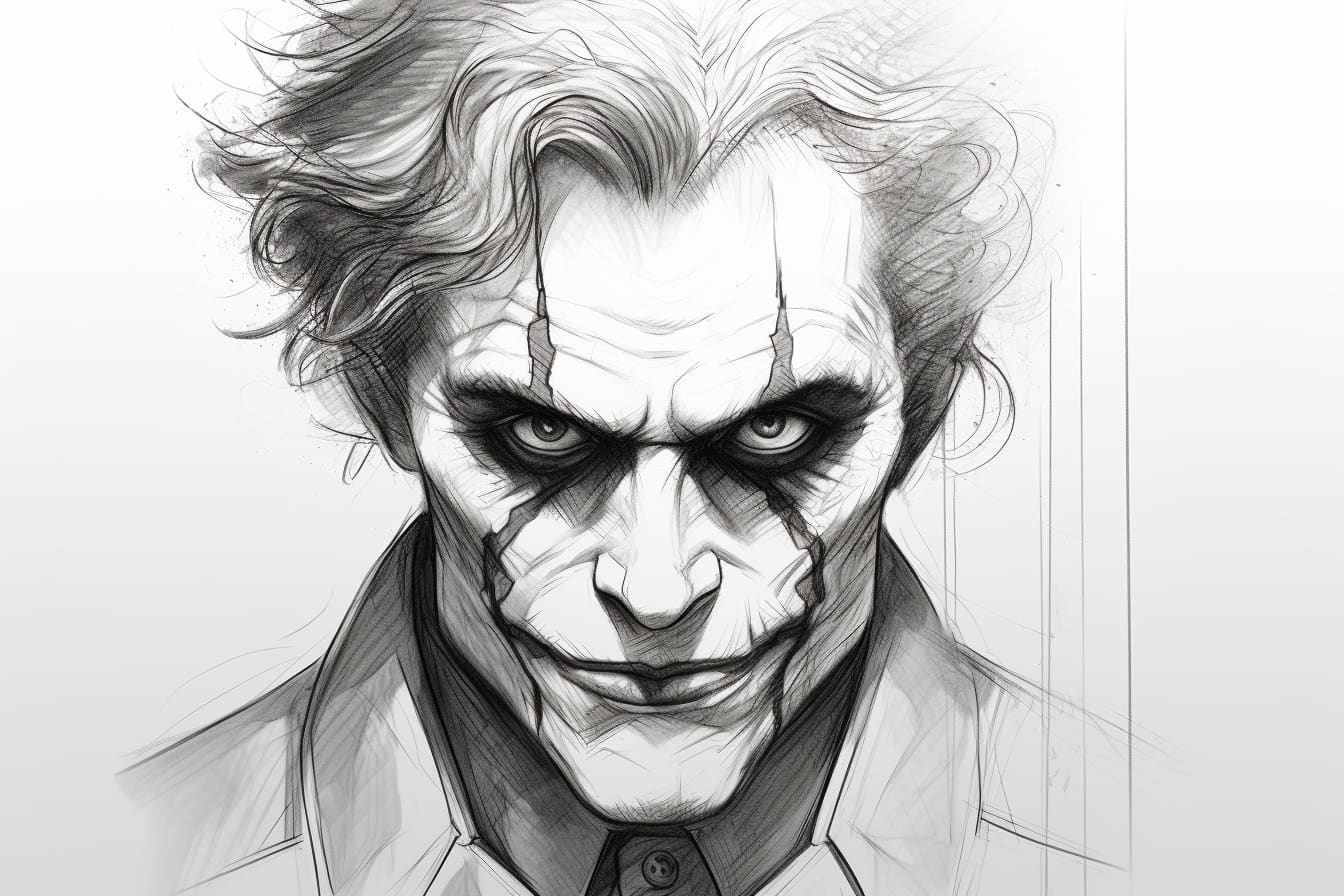
Using the guidelines, draw the Joker’s eyes. Make them large, wide, and expressive. Add a curved line above each eye to represent the eyebrows. The Joker’s eyebrows should be arched and exaggerated, giving him a mischievous and villainous look.
Step 3: Nose and Mouth
Next, draw the Joker’s distinctive nose. It should be long and sharp, with a slight curve towards the end. Beneath the nose, sketch a wide smile for the mouth. The Joker’s smile should be exaggerated, stretching from ear to ear. Add some jagged teeth to complete the look.
Step 4: Facial Details
Now it’s time to add some details to the Joker’s face. Draw the outlines of his face, paying attention to his cheekbones and chin. Then, add wrinkles and creases around the eyes and mouth to give him a weathered and deranged appearance. Don’t forget to sketch his signature facial scars, if desired.
Step 5: Hair and Hat
The Joker’s hairstyle is as important as his face. Draw wild, unkempt hair that sticks out in different directions. Feel free to get creative and give him a unique hairstyle that matches his personality. You can also add a hat, such as a top hat or a jester’s hat, to complete his look.
Step 6: Clothing and Accessories
To finish off the drawing, sketch the Joker’s clothing and accessories. He is often depicted wearing a colorful suit, so use your imagination and create a suit that reflects his eccentric personality. Don’t forget to add any accessories like gloves, a bowtie, or a flower lapel pin. These small details will enhance the overall look of your drawing.
Step 7: Inking and Outlining
Once you are satisfied with your sketch, carefully go over the lines with a fine-tipped black marker. This will give your drawing a bold and defined appearance. Be patient and take your time to ensure that your lines are smooth and clean. Once the ink has dried, erase any remaining pencil lines.
Step 8: Coloring (Optional)
If you want to take your drawing to the next level, you can add color using colored pencils or markers. The Joker is known for his vibrant appearance, so don’t be afraid to use bold and contrasting colors. Experiment with different shading techniques to add depth and dimension to your drawing.
Conclusion
Congratulations! You have successfully learned how to draw a Joker face. By following these step-by-step instructions, you have created a unique and captivating piece of art. Remember, drawing is a skill that takes practice, so don’t be discouraged if your first attempt isn’t perfect. Keep honing your skills and experimenting with different styles. With time and dedication, you will continue to improve.
So grab your pencils and get started on your next artistic adventure. Create your own version of the Joker face and unleash your creativity!