Welcome to this step-by-step guide on how to draw a bear head! Whether you’re an aspiring artist or just looking for a fun and creative activity, drawing a bear head can be a great way to showcase your artistic skills. In this tutorial, we will break down the process into simple steps, making it accessible for artists of all levels. So grab your drawing materials and let’s get started!
Materials Required
Before we begin, make sure you have the following materials at hand:
- Pencil: A pencil with a good eraser is ideal for sketching and making light outlines.
- Paper: Choose a smooth and sturdy paper that can handle erasing and shading.
- Eraser: A soft eraser will allow you to correct any mistakes without damaging the paper.
- Fine-tip marker or pen: This will come in handy for inking and finalizing your drawing.
- Colored pencils or markers (optional): If you wish to add color to your bear head drawing, have some colored pencils or markers available.
Now that we have all the necessary materials, let’s dive into the step-by-step process of drawing a bear head.
Step 1: Basic Shapes
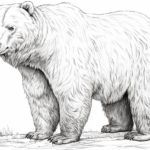
To start, we will outline the basic shapes that make up the bear head. Begin by drawing a large oval shape in the center of your paper. This will serve as the main framework for the head.
Next, draw a smaller circle connected to the bottom of the oval. This circle will represent the snout of the bear.
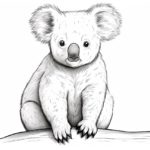
Lastly, add two smaller circles on either side of the oval near the top. These circles will form the ears of the bear.
Step 2: Adding Details
Now that we have the basic shapes in place, let’s start adding some details to bring our bear head to life.
Using the outline of the oval, draw two slightly curved lines towards the bottom of the shape. This will outline the bottom part of the snout.
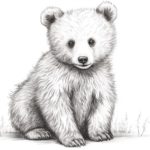
Next, draw two small circles towards the top of the snout to represent the bear’s nostrils.
Moving on to the ears, sketch the inner details by drawing a circular shape inside each ear. This will give the ears a more realistic appearance.
Step 3: Shading and Texture
Now that we have the basic structure and details in place, let’s add some shading and texture to our bear head drawing. This step is optional, but it can greatly enhance the overall look and feel of the artwork.
Start by identifying the light source in your drawing. This will determine where the shadows fall. Shade the areas of the bear’s face that would be in shadow, such as the sides of the head and the area under the snout.
To create a fur-like texture, use short, light strokes with your pencil. Follow the contours of the bear’s head, paying attention to the direction in which the fur would naturally flow.
Step 4: Inking
Once you are satisfied with your pencil drawing, it’s time to ink your bear head. Carefully trace over the final lines of your drawing using a fine-tip marker or pen. This will make the lines more defined and bold.
Take your time and proceed with caution, making sure not to smudge the ink as you work. Start from the top of the head and work your way down, following the contours of the bear’s features.
Step 5: Coloring (Optional)
If you want to add some color to your bear head drawing, now is the time to do it. Use colored pencils or markers to bring your artwork to life.
Decide on the color palette you want to use for your bear head. Browns and grays are common choices, but feel free to get creative with different shades and tones.
Start by adding base colors to the different areas of your drawing. Then, gradually build up the colors by adding layers and blending them together. Remember to leave some areas lighter for highlights and others darker for shadows.
Congratulations! You have successfully drawn a bear head.
Conclusion
Drawing a bear head may seem like a challenging task, but with this step-by-step guide, you can create a realistic and stunning artwork. Remember to take your time, be patient with yourself, and practice regularly. Each attempt will bring you closer to mastering the art of drawing. So grab your materials, start sketching, and let your creativity shine!