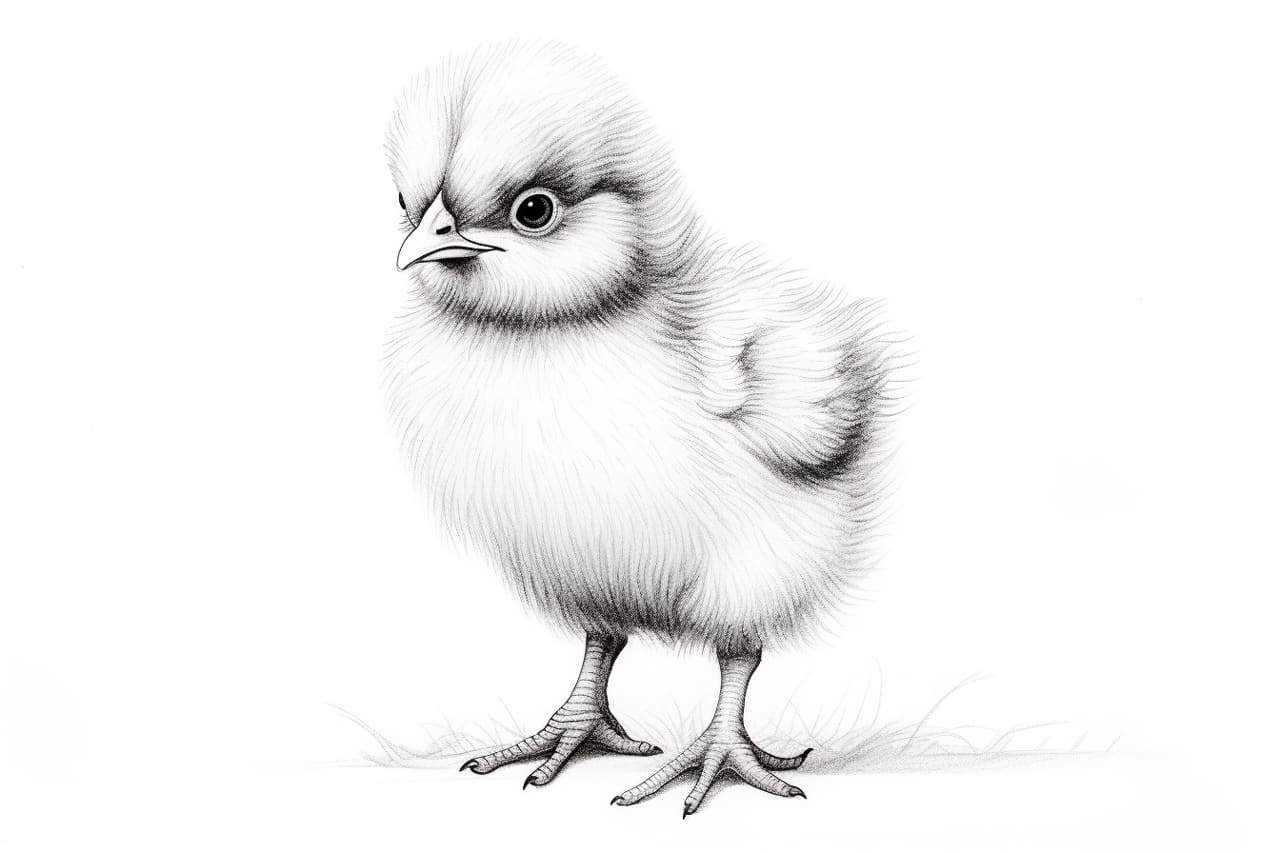
Welcome to this step-by-step tutorial on how to draw a baby chick! Whether you’re a beginner or an experienced artist, this guide will help you create an adorable and lifelike representation of these fluffy little creatures. So, grab your drawing tools and let’s get started!
Materials Required
Before we dive into the drawing process, let’s gather the materials you will need:
- Pencil (HB or 2B recommended)
- Eraser
- Paper (preferably a sketchpad)
- Colored pencils or markers (optional)
Now that you have everything you need, let’s begin!
Step 1: Basic Shapes
To start, let’s create a simple framework for our baby chick. Begin by drawing a large oval shape for the body. This will serve as the foundation for our drawing.
Next, draw a smaller circle on top of the oval shape. This will be the chick’s head. Position it slightly towards the left side of the oval.
Step 2: Beak and Eyes
Now, let’s add some facial features to our baby chick. Draw a small triangular shape emerging from the bottom of the head circle for the beak. Make it slightly curved to give it a soft and cute appearance.
Next, towards the upper area of the head circle, draw two small oval shapes for the eyes. Leave a small gap between the eyes for the chick’s forehead.
Step 3: Wings and Tail
Moving on, we’ll add the wings and tail to our baby chick. Starting from the left side of the oval body, draw a slightly curved line extending outward. Repeat this on the right side to create the wings. Keep the curvature gentle to maintain a cute and fluffy look.
For the tail, draw a small, curved triangle shape at the bottom of the oval body, pointing downwards.
Step 4: Feet and Legs
Now it’s time to give our baby chick some legs to stand on! Draw two short, curved lines extending from the bottom of the oval body. These will serve as the legs.
Next, at the end of each leg, draw a small oval shape to create the feet of the chick. To make it extra adorable, add a small curved line on each foot to represent the chick’s toes.
Step 5: Feather Details
Let’s add some detail to our baby chick’s feathers. Use curved lines to create a pattern on the oval body. These lines should follow the shape of the body and give the impression of soft, fluffy feathers.
Repeat this pattern on the wings as well, following the curve of each wing.
Step 6: Facial Details
Now it’s time to bring our baby chick to life by adding some facial details. Begin by drawing small circles inside each eye to represent the pupils. Leave a small, unshaded area within the pupils to create a reflection effect.
Next, draw a small, curved line above each eye to define the chick’s eyebrows. This will give the chick a more expressive and endearing look.
Step 7: Beak and Feet Details
Let’s make our chick’s beak and feet more defined. Draw a small, curved line inside the beak to create the mouth and give it some dimension.
For the feet, add two small, curved lines on each leg to represent the joints. This will make them look more realistic.
Step 8: Color (Optional)
If you’d like to add some color to your drawing, now is the time! Baby chicks are often yellow, but feel free to get creative with different shades and patterns. Use colored pencils or markers to bring your chick to life. Remember to add light shades and highlights to give the feathers a fluffy appearance.
Conclusion
Congratulations on completing your adorable baby chick drawing! We hope you enjoyed this step-by-step tutorial and found it helpful in creating your fluffy little friend. Remember, practice makes perfect, so don’t be afraid to try drawing different poses and expressions for your chick. Keep honing your skills and embrace your artistic journey!