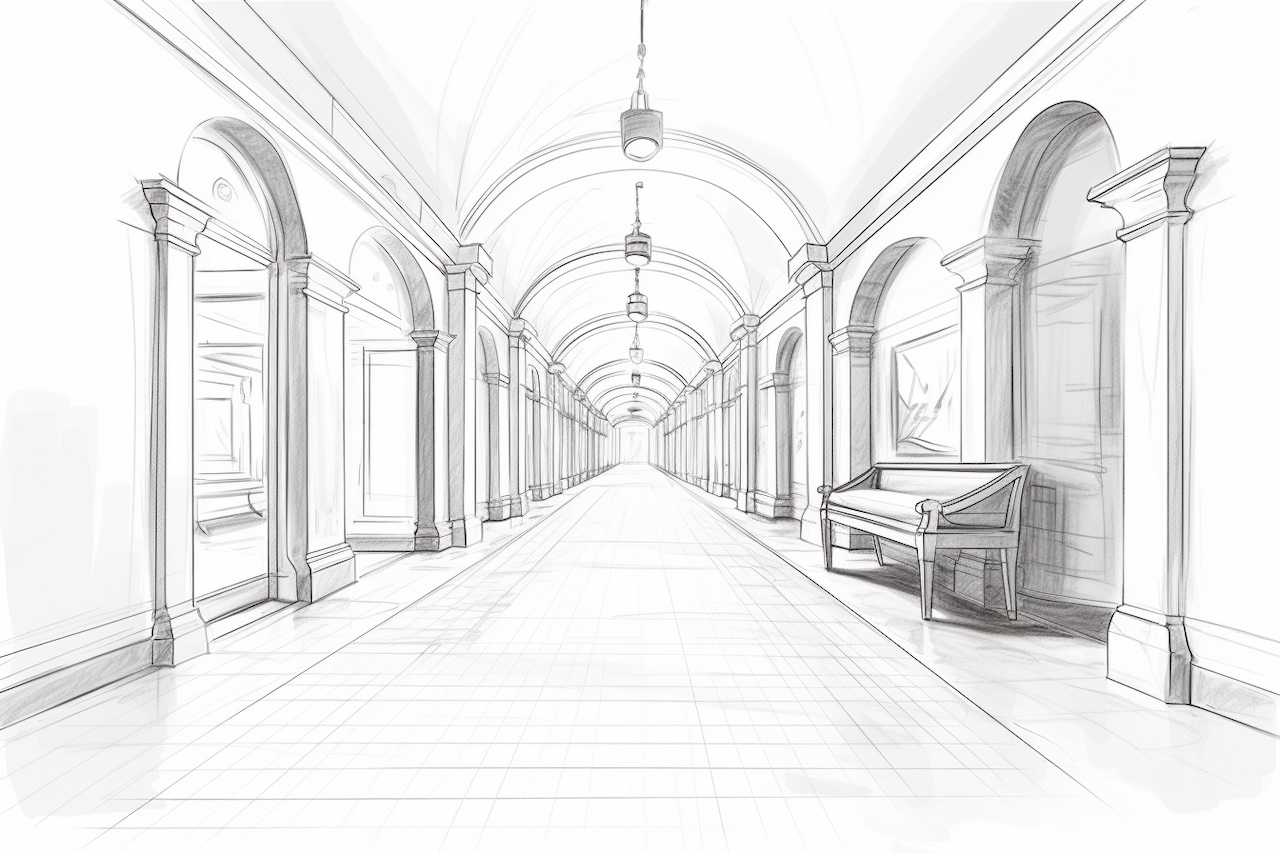
Welcome to this step-by-step tutorial on how to draw a hallway. Whether you’re an aspiring artist or simply interested in learning a new skill, drawing a hallway can be a great exercise in perspective and composition. With a few simple steps and some attention to detail, you’ll be able to create a realistic and inviting hallway scene. So grab your drawing materials and let’s get started!
Materials Required
Before diving into the drawing process, gather the following materials:
- Drawing paper or sketchbook
- Pencil (HB or any preferred hardness)
- Eraser
- Ruler
- Compass (optional)
- Colored pencils or markers (optional)
Now that you have everything you need, let’s begin drawing our hallway!
Step 1: Start with the Horizon Line
The horizon line is an essential element in any perspective drawing, as it represents the viewer’s eye level. To begin, draw a straight horizontal line across the paper using your ruler. This line will serve as the foundation for the rest of the scene.
Step 2: Determine the Vanishing Points
In perspective drawing, vanishing points are points on the horizon line where parallel lines converge. They play a crucial role in creating the illusion of depth and distance. Decide where you want your vanishing points to be, and mark them on the horizon line.
Step 3: Draw the Walls
Using your ruler, draw two vertical lines from each vanishing point to create the walls of your hallway. These lines will determine the width and height of the hallway. Make sure they are evenly spaced and parallel to each other.
Step 4: Add the Ceiling and Floor
Extend two horizontal lines from the top and bottom of the walls to create the ceiling and floor of the hallway. These lines should be parallel to the horizon line and evenly spaced.
Step 5: Sketch the Doorways and Windows
Decide where you want to place the doorways and windows in your hallway. Use your ruler to draw rectangular shapes for the doorways and long vertical rectangles for the windows. Pay attention to the perspective and make sure the lines match the angle of the walls.
Step 6: Detail the Doorways and Windows
Add details to the doorways and windows by drawing smaller rectangles for the panels and adding handles or knobs. You can also draw curtains or blinds on the windows, adding depth and character to your hallway.
Step 7: Create the Floor Tiles
Draw the floor tiles by dividing the floor into even sections. Choose a pattern you like, such as squares or rectangles, and draw each tile individually. To make it easier, you can use your ruler or a compass to measure and create consistent tile sizes.
Step 8: Add Texture and Shading
To give your hallway drawing a more realistic look, add texture and shading. Use your pencil to lightly shade areas that would be in shadow, such as the corners and underneath the furniture. You can also add texture to the walls, floor, and doors by using small, light strokes.
Step 9: Add Furniture and Decorations
To make your hallway more interesting, consider adding furniture and decorations. Draw a table, a mirror, or a painting on the walls. Be mindful of the perspective and how they fit into the overall composition. Feel free to get creative and personalize your hallway drawing.
Step 10: Finalize with Colors (Optional)
If you prefer a colored drawing, grab your colored pencils or markers and add color to your hallway. Choose a color scheme that complements the overall mood of your drawing. Color the walls, floor tiles, and any furniture or decorations you’ve added. Don’t be afraid to experiment and have fun with colors!
Conclusion
Congratulations on completing your hallway drawing! By following these step-by-step instructions, you’ve learned how to create depth, perspective, and detail in your artwork. Remember to practice regularly to improve your skills and explore different compositions. Whether you’re drawing for fun or pursuing a career in art, this guide has provided you with the foundation to draw realistic hallways and incorporate your own creative touches. Enjoy the journey of artistic expression!