How to Draw a Griffin
Learn how to draw a griffin in this step-by-step guide. Follow expert instructions to create a stunning mythical creature using pencils and shading techniques.
Materials You'll Need
- Pencil
- Paper
- Eraser
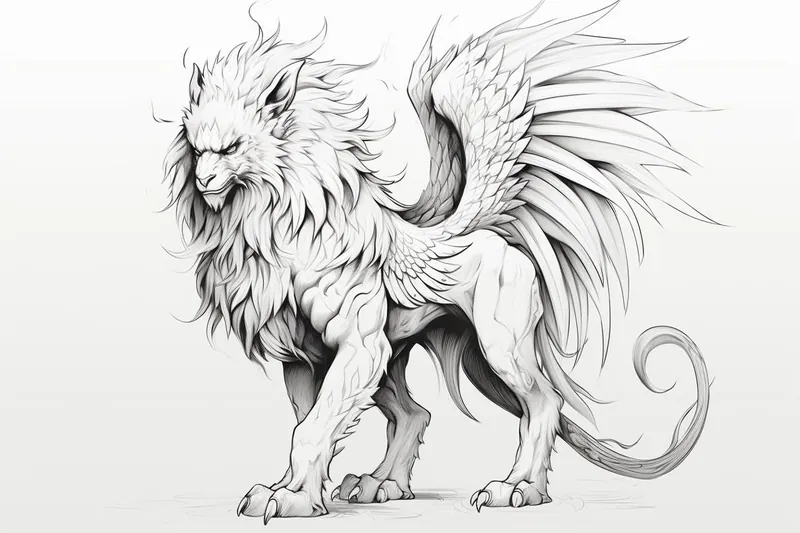
Welcome to this detailed, step-by-step guide on how to draw a griffin! Griffins are fascinating mythical creatures that have captured the imagination of artists and storytellers for centuries. With the regal body of a lion and the majestic head and wings of an eagle, griffins symbolize strength, courage, and guardianship. They frequently appear in ancient legends, heraldic designs, and fantasy art, making them a popular and inspiring subject for artists of all ages. By learning how to draw a griffin, you'll not only be adding a legendary beast to your portfolio, but also developing your ability to combine different animal forms into one harmonious creation.
Drawing a griffin is a fantastic exercise for anyone interested in both fantasy art and improving their observation skills. Whether you're a beginner looking to practice basic shapes and anatomy, or a more advanced artist wanting to challenge your understanding of texture and detail, this tutorial will guide you through the process. We'll break down the griffin's complex features—such as the eagle's beak and wings, and the lion's muscular body—into manageable steps, using techniques like light sketching, layering, and shading. Don't worry if you're new to drawing mythological creatures; with a bit of patience and creativity, you'll be amazed at what you can accomplish.
So, gather your drawing materials and get ready to unleash your imagination! Remember, every artist brings their own unique style to mythical creatures, so feel free to experiment and make your griffin your own. By the end of this guide, you'll not only have learned how to draw a griffin, but you'll also have gained valuable experience in blending realism with fantasy. Let's dive in and bring this legendary creature to life together!
Materials Required:
To draw a griffin, you will need the following materials:
- Drawing paper: Use smooth, heavyweight paper that can handle pencil strokes without smudging.
- Pencils: Use a range of graphite pencils with different hardness levels, such as HB, 2B, and 4B. These will help you achieve different levels of shading and depth in your drawing.
- Eraser: Have a kneaded eraser or a soft eraser on hand to correct any mistakes or lighten areas of your drawing.
- Sharpener: Keep a pencil sharpener handy to ensure that your pencils are always sharp and ready to use.
Now that you have all your materials ready, let's dive into the step-by-step process of drawing a griffin!
Step 1: Basic Shapes
Start by drawing a large oval for the body of the griffin. This will be the main framework for your drawing. Then, draw a smaller oval on top of the first one for the head.
Step 2: Wings and Tail
From the sides of the body, extend two curved lines to create the wings of the griffin. Remember that wings are usually larger towards the base and taper towards the tips. Add some feather details to the wings by drawing a series of small, curved lines.
Next, draw a long, curved line extending from the back of the body to create the tail of the griffin. Make sure the tail is long and feathery, resembling that of an eagle.
Step 3: Legs and Feet
Now, let's draw the legs of the griffin. Start by drawing two lines extending downward from the body, slightly angled towards the front. These will be the front legs. Add another set of lines for the back legs, angling them slightly towards the back. At the end of each leg, draw the feet of the griffin with sharp, bird-like claws.
Step 4: Head and Beak
Tip: As you work through the steps of drawing your griffin, consider using reference images of both lions and eagles to better understand their anatomy and textures. Observing real-life examples can help you capture the unique features of each creature and create a more realistic and dynamic griffin. Additionally, don't hesitate to experiment with different poses and expressions to give your griffin character and personality.
Refine the shape of the griffin's head by adding more details. Sketch the outline of the beak, which will be curved and pointed. Add the eyes by drawing two small circles and a curved line above them to define the brow ridge. You can also add some feathery details around the head to give it a more realistic look.
Step 5: Facial Features and Mane
Add the final details to the griffin's face. Draw the pupils within the eyes and add some shading to give them depth. Sketch the ears on top of the head, resembling those of a lion. Next, draw the mane, which should be thick and flowing, starting from the back of the head and extending towards the neck and shoulders.
Step 6: Shading and Texturing
To give your griffin a more three-dimensional appearance, add shading and texture to your drawing. Begin by determining the direction of the light source. Shade the areas that are further away from the light, using the side of your pencil to create smooth gradients. Pay attention to the contours of the body, wings, and mane, and use a combination of light and dark shading to add depth and dimension.
Add texture to the feathers and fur by using short, feathery strokes with your pencil. Vary the pressure on your pencil to create different levels of darkness and texture. Take your time with this step and observe reference images or real-life examples of feathers and fur for guidance.
Step 7: Final Touches
Review your drawing and make any final adjustments or corrections. Erase any unnecessary guidelines or stray marks. Add more detail to the feathers, mane, and other areas that may require additional definition. Take a step back and assess your drawing as a whole to ensure that everything flows well and looks balanced.
Conclusion
Congratulations, you have successfully learned how to draw a griffin! By following these step-by-step instructions, you have created a stunning mythical creature on paper. Remember to practice regularly to improve your skills and always have fun with your drawings. Keep exploring different art styles and techniques to develop your own unique approach. Happy drawing!
Fun Facts About Griffins
- The griffin is a legendary creature with the body of a lion and the head and wings of an eagle, symbolizing strength and courage in many cultures.
- Griffins have been featured in ancient art and mythology since as early as 3000 BCE, especially in Ancient Persia and Egypt.
- In medieval heraldry, griffins were often used on coats of arms to represent guardianship and vigilance.
- The griffin was believed to guard treasures and priceless possessions.
- Some legends claim that griffins mated for life and would never seek a new partner if one died, a fact noted by Ancient Origins.
- Griffins appear in the works of famous authors such as Dante and Lewis Carroll.
- The word "griffin" comes from the Latin "gryphus," which is derived from the Greek "gryps," meaning "curved" or "hooked."
- In some stories, griffins are said to lay eggs made of gold.
Suggestions for Scenes and Settings for Griffin Drawings
- A griffin perched atop ancient castle ruins, gazing over a misty valley at sunrise.
- An epic sky battle between a griffin and a dragon above a snowy mountain range.
- A gentle griffin protecting a nest of eggs in a lush, enchanted forest clearing.
- A heroic knight riding a griffin into a medieval tournament, banners fluttering in the wind.
- A young griffin learning to fly, flapping its wings beside its majestic parent on a cliff edge.
- A regal griffin standing guard at the gates of a mythical city, with elaborate architecture in the background.
- A playful scene of a griffin cub chasing butterflies in a sunlit meadow dotted with wildflowers.
- A mystical nighttime scene of a griffin silhouetted against a full moon, with stars twinkling overhead.
- A griffin soaring above a turbulent sea, rescuing a stranded sailor from a shipwreck below.
- An ancient temple courtyard where a wise, elderly griffin imparts knowledge to a group of eager apprentices.