Welcome to this step-by-step tutorial on how to draw a grasshopper. Whether you are an aspiring artist or just looking for a fun and creative activity, drawing can be a delightful way to express yourself. In this guide, we will walk you through the process of how to draw a grasshopper, starting from the basic shapes and gradually adding more intricate details. So grab your drawing supplies and let’s get started!
Materials Required
To complete this drawing, you will need the following materials:
- Pencil: A medium-soft graphite pencil (such as 2B) is recommended for sketching the initial outlines and shapes.
- Eraser: A soft eraser will come in handy for removing any mistakes or unwanted lines.
- Drawing Paper: Use a clean and smooth paper that is suitable for pencil drawings. A heavier weight paper is preferable to prevent smudging.
- Colored Pencils (optional): If you want to add color to your grasshopper drawing, colored pencils can be used to bring it to life.
Now that you have your materials ready, let’s dive into the step-by-step process of drawing a grasshopper!
Step 1: Basic Shapes
Start by lightly sketching the basic shapes that make up the body of the grasshopper. Begin with an oval shape for the head, followed by a larger oval for the thorax (the middle part of the body). Connect the thorax to the head with a curved line. Then, draw a longer oval shape as the abdomen (the rear part of the body).
Step 2: Legs and Antennae
Next, it’s time to add the legs and antennae to our grasshopper sketch. Grasshoppers have six legs, so add three pairs of thin and elongated shapes coming out from the bottom of the thorax. For the antennae, draw two small curved lines on top of the head, starting from the base of the oval.
Step 3: Eyes and Mouth
Now, let’s bring our grasshopper to life by adding some details to the head. Draw two large oval shapes, one on each side of the head, for the eyes. Inside each eye, add a smaller circle to represent the pupil. Next, draw a small triangle shape just below the middle of the head to indicate the mouth.
Step 4: Wing Outlines
Grasshoppers have wings, so let’s sketch the outlines of the front wings, also known as tegmina. Start by drawing two parallel lines that extend from the thorax towards the abdomen. These lines should curve slightly as they go along. Then, draw another set of parallel lines below the previous ones, mirroring their shape.
Step 5: Wing Details
Add more details to the wings by drawing small triangular shapes along the outlines. These shapes represent the overlapping segments of the wings. You can also add curved lines within the wings to suggest the veins.
Step 6: Body Details
To make our grasshopper drawing more realistic, let’s add some details to the body. Draw a series of horizontal lines across the thorax and abdomen to represent segments. On the thorax, add some curved lines to indicate the muscles. You can also add a few small dots along the abdomen to represent the spiracles.
Step 7: Fine-tuning and Refinement
Now that we have the basic structure and details in place, take a moment to review your grasshopper sketch. Use an eraser to remove any unwanted lines or correct any mistakes. Make sure that all the proportions and shapes look balanced and accurate.
Step 8: Adding Color (Optional)
If you prefer a colored drawing, you can use colored pencils to bring your grasshopper to life. Grasshoppers come in a variety of colors, so feel free to get creative with your choice. Pay attention to the different shades and tones on the body, wings, and legs of the grasshopper. Add light layers of color gradually, building up the intensity as needed.
Conclusion
Congratulations, you have successfully drawn a grasshopper! By following these step-by-step instructions and adding your own personal touches, you have created a beautiful artwork. Whether you are an experienced artist or just starting your artistic journey, drawing provides a wonderful way to explore your creativity and improve your skills. We hope you enjoyed this tutorial and found it helpful. Keep practicing, and have fun with your future drawings!
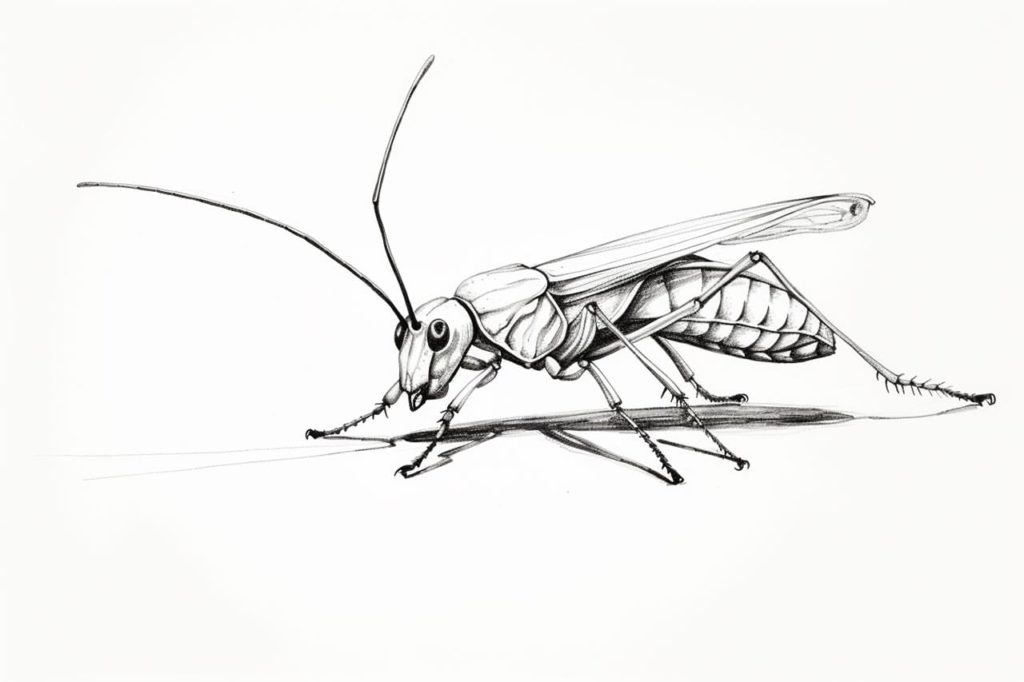
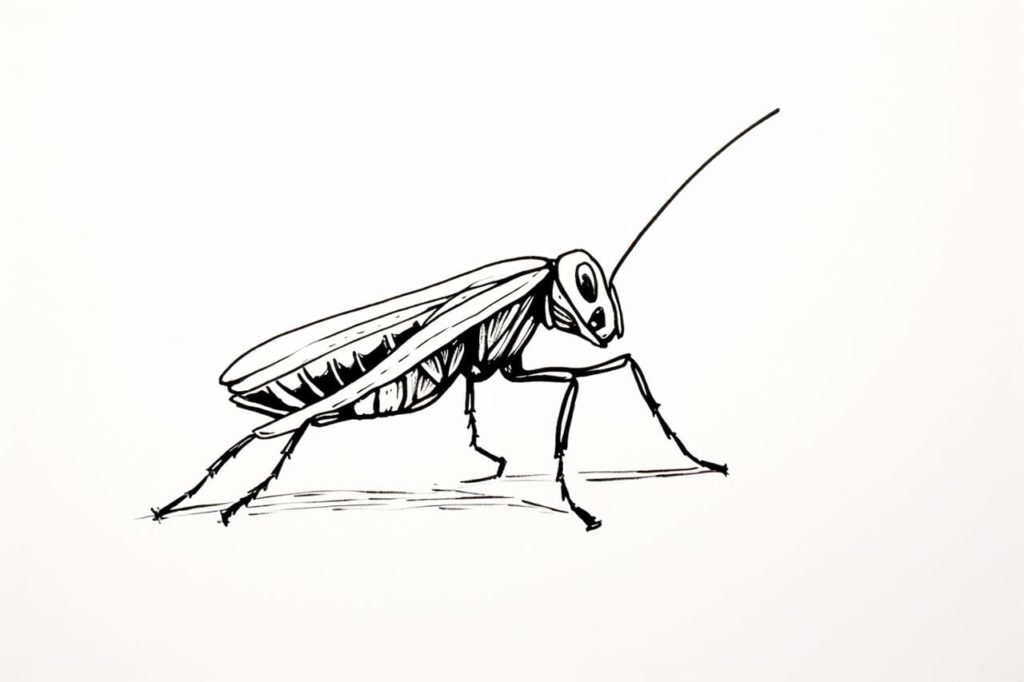
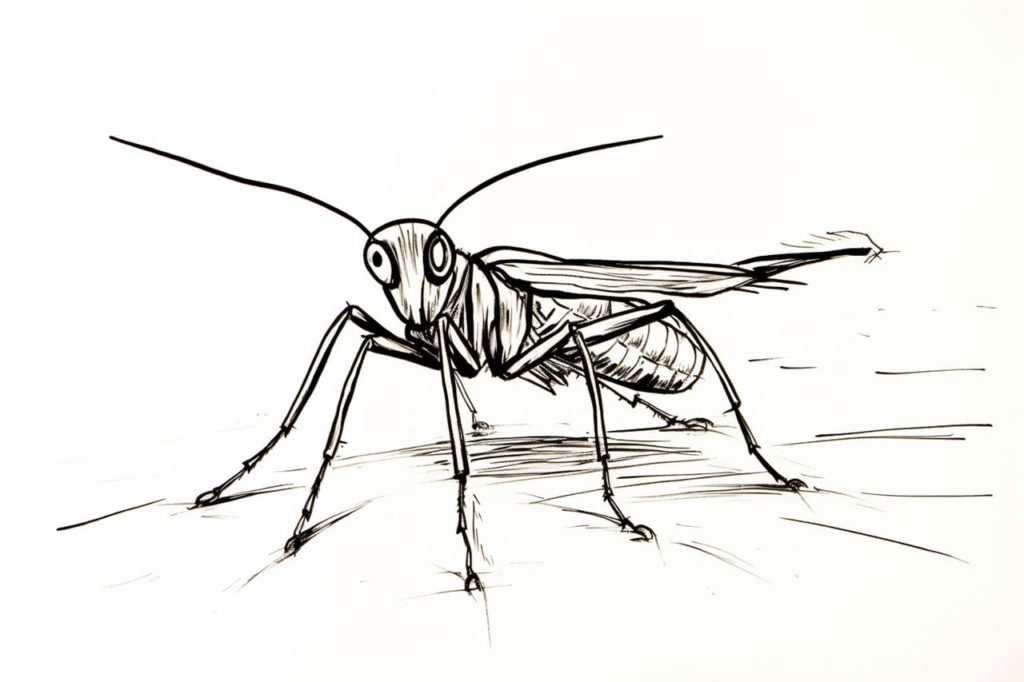
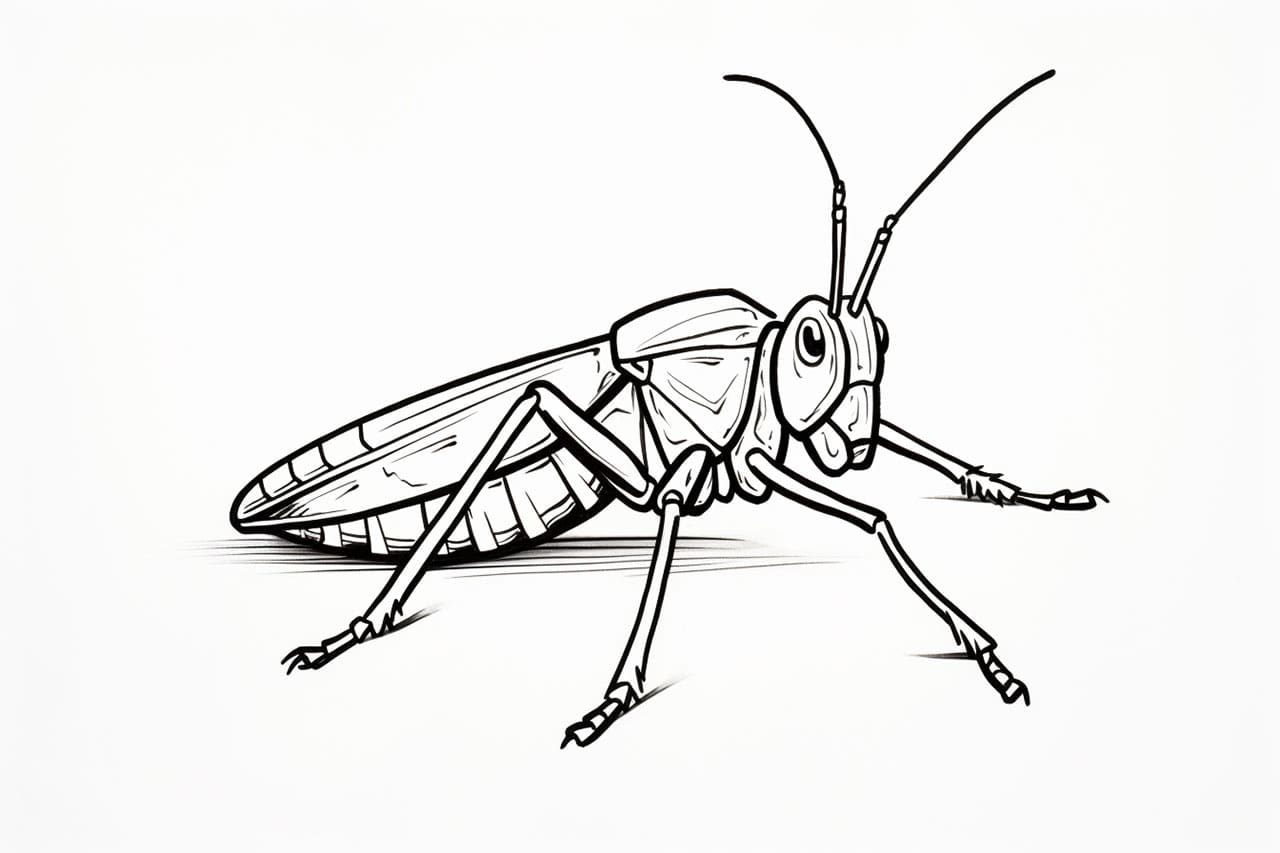
Gallery of Grasshopper Drawings