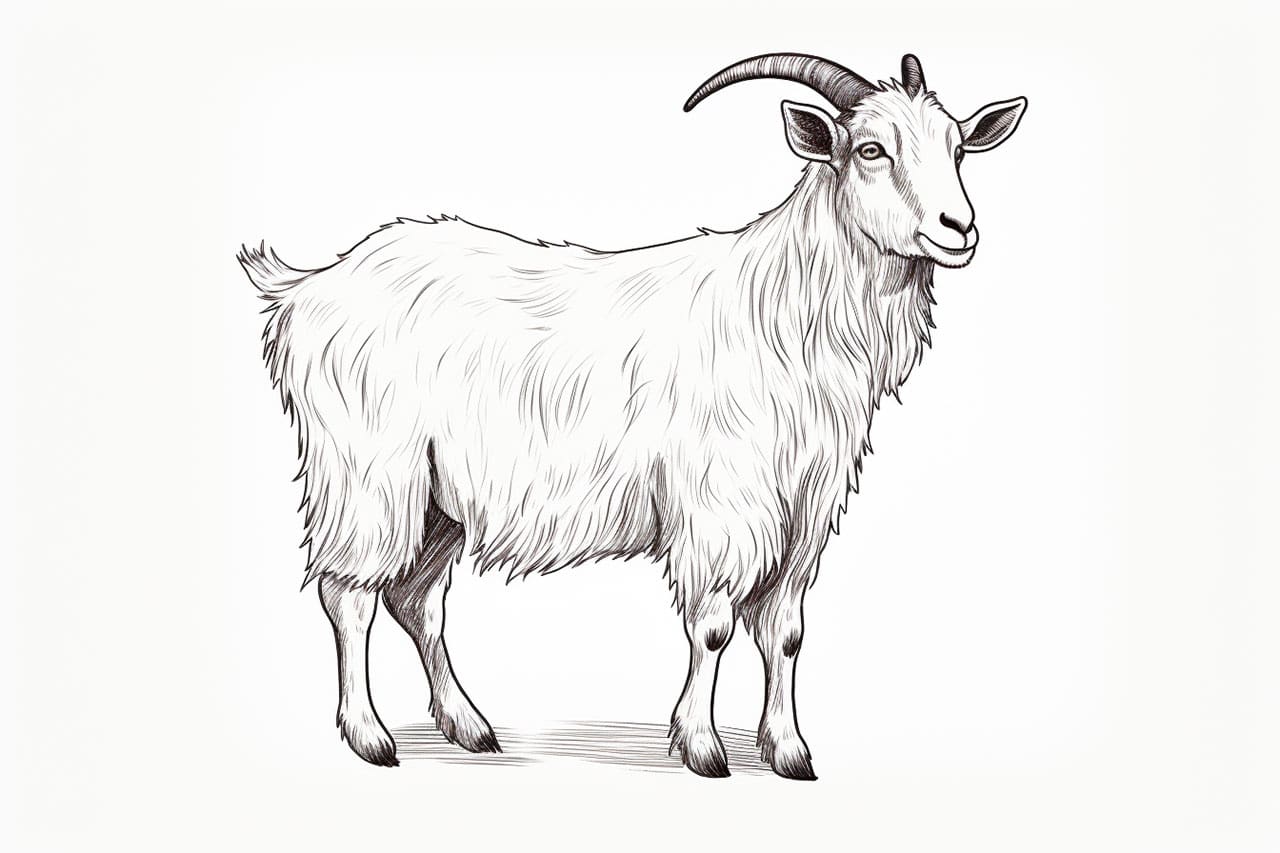
Welcome to this step-by-step guide on how to draw a goat! In this article, I will show you an easy and enjoyable way to create your very own goat drawing. Whether you are a beginner or an experienced artist looking to improve your skills, this tutorial will provide you with the necessary guidance to create a realistic and detailed goat illustration.
Materials Required
Before we get started, let’s gather the materials you will need for this drawing:
- Drawing paper
- Graphite pencils (HB, 2B, 4B, and 6B)
- Eraser
- Blending stump (optional)
- Pencil sharpener
Now that we have everything we need, let’s dive right into the drawing process!
Step 1: Basic Outline
Begin by lightly sketching a basic outline of the goat’s body using an HB pencil. Start with a circle for the head, followed by a larger oval shape for the body. Add two small circles for the ears, and two curved lines for the goat’s horns. Remember to keep your lines light and loose, as this is just a preliminary sketch.
Step 2: Facial Features
Next, focus on the goat’s facial features. Sketch two almond-shaped eyes, making sure they are evenly spaced and positioned slightly above the horizontal midpoint of the head. Add a small triangular shape for the nose and a curved line for the mouth. Don’t forget to include the goat’s ears as well, making them slightly pointy at the top.
Step 3: Shading the Face
Now, let’s add some depth and dimension to the goat’s face by applying shading. Start by using a 2B pencil to shade the areas around the eyes and beneath the nose to create shadows. Gradually build up the shading by applying more pressure on the pencil to achieve a range of values. Use a blending stump or gently smudge the shading with your fingers to create a smooth transition between dark and light areas.
Step 4: Adding Details
It’s time to bring your goat to life by adding some details. Use a 4B pencil to carefully outline the goat’s eyes, adding eyelashes and a small highlight to each eye to make them appear more realistic. Add texture to the goat’s horns by lightly sketching curved lines along their length. Pay attention to the direction of the fur and use quick, short strokes to replicate its texture throughout the goat’s body.
Step 5: Body Proportions
Now that we have completed the goat’s face, let’s move on to its body. Use the existing outline as a reference and add the goat’s legs and hooves. Pay close attention to the proportions and angles to ensure that they look natural. Remember to keep your lines light and flexible, allowing for adjustments as needed.
Step 6: Shading the Body
Apply shading to the goat’s body using a combination of 4B and 6B pencils. Focus on creating depth and dimension by shading the areas that would naturally be in shadow, such as the underside of the body and the inner parts of the legs. Keep in mind the direction of the light source and use lighter shading towards the areas that receive more light.
Step 7: Final Touches
Take a step back and evaluate your drawing so far. Make any necessary adjustments to ensure that the proportions and details are accurate. Use an eraser to clean up any stray lines or smudges. Add final details, such as the hooves, facial features, and any other small elements that you may have missed. Take your time and be patient with this step, as these final touches can greatly enhance the overall appearance of your goat drawing.
Conclusion
Congratulations, you have successfully learned how to draw a goat! By following these step-by-step instructions and using the materials listed, you have created a realistic and detailed goat illustration. Remember, drawing is a skill that requires practice, so don’t be discouraged if your first attempt isn’t perfect. With time and perseverance, you will continue to improve your drawing abilities.
I hope you enjoyed this tutorial on how to draw a goat. Happy drawing!