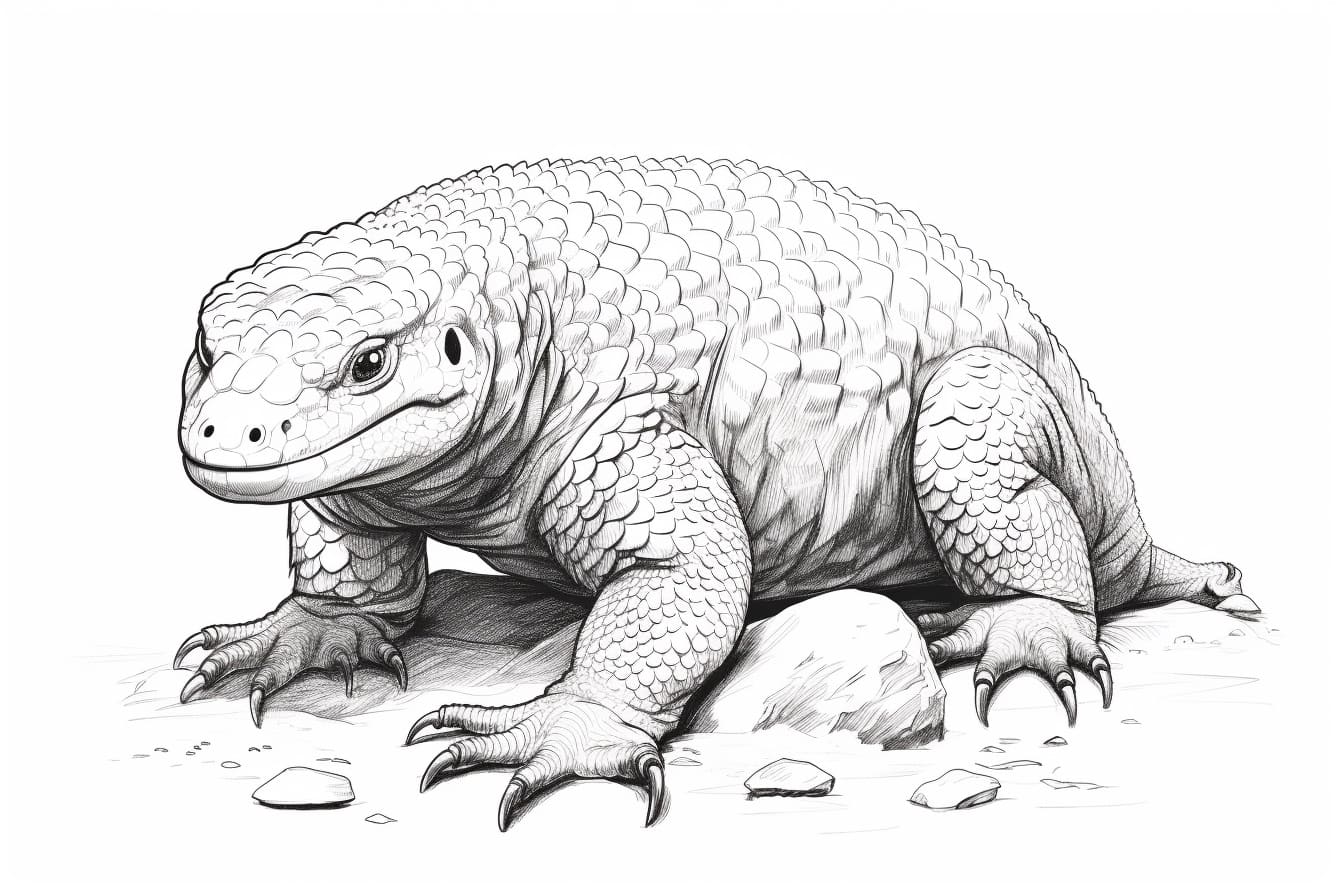
Welcome to this step-by-step guide on how to draw a Gila Monster. This unique reptile found in the deserts of the southwestern United States and Mexico is known for its striking patterns and distinctive appearance. By following these simple instructions, you’ll be able to capture the essence of this fascinating creature on paper. So, let’s get started!
Materials Required
Before we begin, let’s make sure you have all the necessary materials to create your masterpiece. Here’s what you’ll need:
- Drawing paper or sketchbook
- Pencil (preferably a mechanical pencil for easy shading and detailing)
- Eraser
- Fine-tip black marker or pen (optional)
- Colored pencils or markers (optional)
Now that you have everything ready, let’s dive into the step-by-step process of drawing a Gila Monster.
Step 1: Sketch the Basic Shape
Start by lightly sketching the basic shape of the Gila Monster’s body. Begin with an oval for the head and a larger oval for the body. Leave enough space between the two for the neck. Remember to keep your pencil lines light and easy to erase, as we will be refining the details later.
Step 2: Outline the Head and Neck
Next, refine the shape of the Gila Monster’s head and neck. Pay attention to the placement of the eyes, mouth, and nostrils. The head should have a triangular shape with rounded corners, and the neck should gradually taper towards the body. Once you’re satisfied with the proportions, darken the lines to make them more visible.
Step 3: Add Details to the Face
Now, let’s add some details to bring the Gila Monster’s face to life. Start by sketching the eye, which is circular in shape with a small, almond-shaped pupil. Then, draw a curved line for the mouth, and add small triangular teeth along the line. Finally, include the nostrils as two small dots on the snout.
Step 4: Draw the Body Pattern
The Gila Monster is famous for its unique pattern of dark, diamond-shaped scales on a lighter background. Begin by sketching the outline of these scales along the body. They should be irregular in shape and vary in size. Take your time with this step, as the pattern is key to capturing the Gila Monster’s appearance accurately.
Step 5: Refine the Body and Limbs
It’s time to refine the rest of the Gila Monster’s body and limbs. Use curved lines to outline the body, paying attention to the rounded belly and the slight bulge of the tail. Add the legs, using short lines to indicate the joints. The Gila Monster has four sturdy limbs with sharp claws, so be sure to include these details as well.
Step 6: Erase Unnecessary Guidelines
With the main structure of the Gila Monster now in place, erase any unnecessary guidelines and overlapping lines. This will give your drawing a cleaner and more polished appearance. Take a moment to evaluate your work so far and make any adjustments if needed.
Step 7: Add Texture and Shading
To bring your Gila Monster to life, it’s time to add texture and shading. Begin by using your pencil to create a stippled effect on the scales, giving them a rough, pebbled appearance. Then, start shading the areas that would naturally be darker, such as the shadows beneath the body, limbs, and head. Gradually build up the shading to create depth and dimension.
Step 8: Ink or Trace Your Drawing (optional)
If you prefer a cleaner and more defined look, you can use a fine-tip black marker or pen to ink or trace over your pencil lines. This step is optional but can enhance the overall appearance of your drawing. Take your time and work carefully to avoid any mistakes.
Step 9: Add Color (optional)
If you’d like to add some color to your drawing, now’s the time to do so. Study reference images of Gila Monsters to get an idea of their coloration. Typically, they have a base color of black or dark gray with patterns of orange, pink, or yellow. Explore different color combinations and experiment with shading techniques using colored pencils or markers.
Conclusion
Congratulations! You’ve successfully learned how to draw a Gila Monster. With some practice, patience, and attention to detail, you can create stunning illustrations of this remarkable reptile. Remember to have fun and enjoy the process of bringing your artwork to life. Happy drawing!