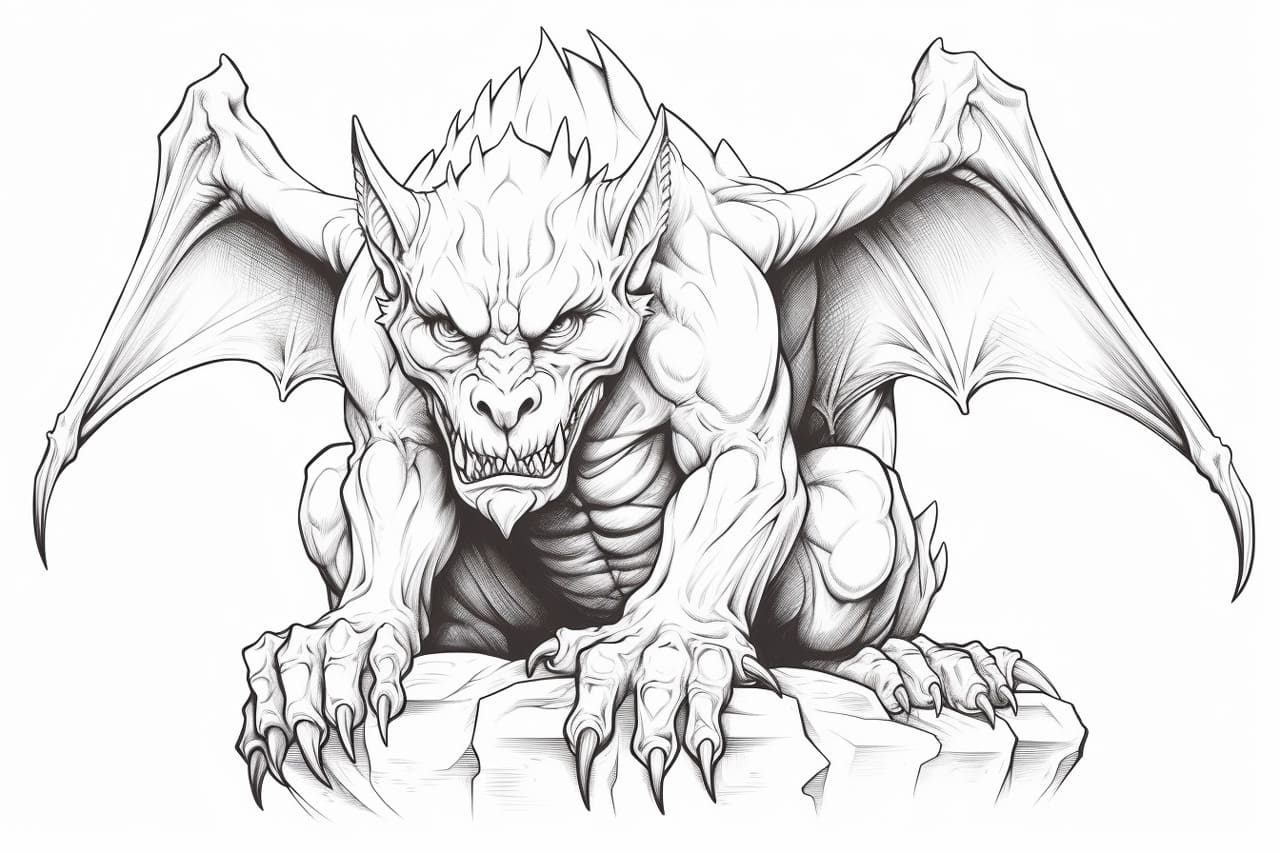
Welcome to this step-by-step guide on how to draw a gargoyle! In this tutorial, I will walk you through the process of creating your very own gargoyle drawing. Whether you’re an aspiring artist or just looking for a fun and creative project, drawing a gargoyle can be an exciting challenge. So let’s get started!
Materials Required:
Before we begin, let’s gather all the materials you’ll need for this drawing:
- Drawing paper or sketchbook
- Pencil (preferably HB or 2B)
- Eraser
- Fine-tipped black pen or marker (optional)
- Colored pencils or markers (optional)
Having these materials on hand will ensure that you have everything you need to bring your gargoyle to life on paper. So let’s dive in and start drawing!
Step 1: Research and Inspiration
Before you begin drawing, it’s always a good idea to do some research and gather inspiration. Look up images of gargoyles online or in books to get an idea of the different styles and features they can have. Take note of the various shapes, textures, and facial expressions that you find interesting. This research will help you develop your own unique gargoyle design.
Step 2: Basic Shapes
Start by lightly sketching the basic shapes that will form the foundation of your gargoyle’s body. Gargoyles typically have a muscular and stocky appearance. Begin with a large oval or circle for the head, and then add a smaller oval or rectangle for the body. Use simple shapes like rectangles for the limbs, and circles or ovals for the hands and feet.
Step 3: Refine the Body
Once you have the basic shapes in place, it’s time to refine the body of your gargoyle. Start by adding more detail to the head, such as the facial features. Gargoyles often have exaggerated features like big eyes, sharp teeth, and a prominent brow ridge. Study your reference images to get a sense of the different variations you can incorporate.
Next, add more definition to the body by adding muscle definition and details like ribcages or scales. Experiment with different textures and patterns to make your gargoyle unique.
Step 4: Wings and Tail
Gargoyles are often depicted with wings and a tail, so let’s add those next. Use long, curved lines to create the wing structure, starting from the shoulders and extending outwards. Gargoyle wings can be either bat-like or more like bird wings, so explore different styles to find the one that appeals to you.
For the tail, use curved and tapered lines to create a flowing shape that complements the overall design of your gargoyle. Don’t be afraid to experiment with different tail shapes and lengths.
Step 5: Details and Textures
Now it’s time to add more intricate details and textures to your gargoyle drawing. Use smaller lines and shapes to define the muscles, scales, and other features. Pay attention to the different textures you observed in your research and try to incorporate them into your drawing.
If you’re using a pen or marker, you can trace over your pencil lines to create bold and defined outlines. This step is optional, but it can add a more finished look to your drawing.
Step 6: Coloring (Optional)
If you want to take your gargoyle drawing to the next level, you can add color using colored pencils or markers. Think about the mood and atmosphere you want to convey with your gargoyle. Will it be dark and menacing, or colorful and whimsical? Experiment with different color combinations to bring your gargoyle to life.
Start by laying down base colors and then gradually add shading and highlights to create depth and dimension. Use reference images or your imagination to guide your color choices.
Conclusion
Congratulations! You have completed your gargoyle drawing. By following these step-by-step instructions, you have created a unique and captivating gargoyle that showcases your artistic skills. Remember, drawing takes practice, so don’t be discouraged if your first attempt doesn’t turn out exactly as you imagined. Keep experimenting, learning, and exploring different styles to develop your own distinct artistic voice. Enjoy the process, and have fun with your creative journey!

