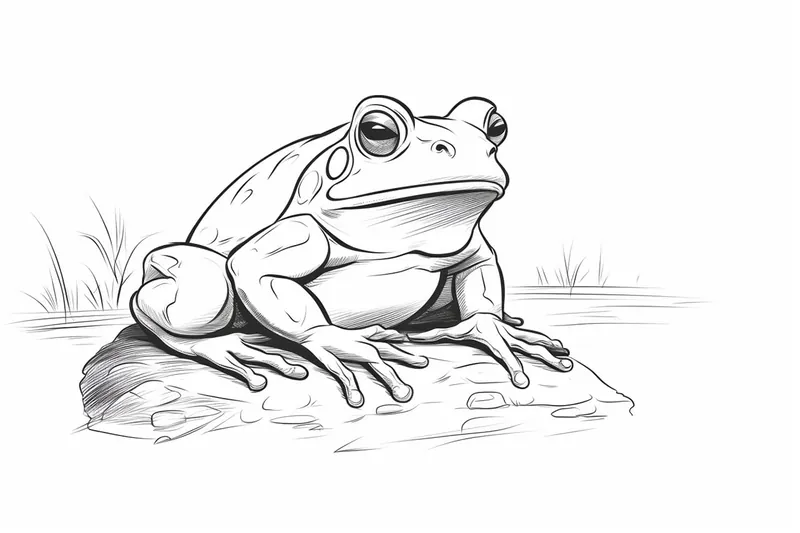
How to Draw a Frog
Learn how to draw a frog with this step-by-step tutorial. Follow the simple instructions and create a detailed and realistic frog drawing. Perfect for beginners!
Materials You'll Need
- Pencil
- Paper
- Eraser
Frogs are fascinating creatures, known for their unique appearance, vibrant colors, and playful personalities. Their distinctive body shapes—with large eyes, webbed feet, and smooth skin—make them a favorite subject for artists of all ages. Learning how to draw a frog not only helps you practice capturing organic forms and textures, but also teaches you about animal anatomy and proportion. Frogs can be depicted in countless ways, from cartoonish and whimsical to highly realistic, making them both versatile and rewarding to draw.
People are often inspired to draw frogs because of their delightful features and the creative possibilities they offer. Whether you want to illustrate a scene from nature, add a charming character to your sketchbook, or simply improve your observational skills, drawing a frog is a fun way to hone your artistic abilities. This tutorial on how to draw a frog is designed for artists at any skill level. Beginners will find step-by-step guidance that breaks down complex shapes into manageable parts, while more experienced artists can challenge themselves by adding extra details, shading, or experimenting with different poses and perspectives.
Throughout this guide, you'll learn essential techniques such as sketching basic shapes, refining outlines, and adding texture and depth to bring your frog to life. With a little patience and practice, you'll be amazed at how much your drawing skills can grow. So grab your favorite drawing materials, and let's leap into the world of amphibian art together—remember, every artist starts somewhere, and mastering how to draw a frog is a great step on your creative journey!
Materials Required
Before we begin, make sure you have the following materials ready:
- [Drawing paper or sketchbook](https://yonderoo.com/best-sketchbooks-for-artists/)
- Pencil (preferably an HB or 2B pencil)
- Eraser
- Fine-tip black pen or marker (optional, for outlining)
Now that you have all the necessary materials, let's dive into the step-by-step process of drawing a frog.
Step 1: Basic Shapes
Start by drawing an oval shape for the body of the frog. This will serve as the foundation for the rest of the drawing. Then, add two smaller circles on top of the oval for the frog's eyes. Position them slightly towards the top and center of the oval.
Step 2: Eyes and Nostrils
Inside the circles, draw smaller ovals to represent the irises of the frog's eyes. Add pupils to the irises by drawing small circles or ovals. Next, place two small dots above the eyes to indicate the nostrils of the frog.
Step 3: Legs and Feet
Extend two curved lines from the bottom of the oval to form the front legs of the frog. Add three toes to each front foot by drawing small curved lines. Repeat the process for the hind legs, using larger curved lines and adding longer toes.
Step 4: Mouth and Details
Draw a curved line beneath the eyes to represent the frog's mouth. Add a small line to indicate the upper lip and a longer line for the lower lip. To give the frog a more realistic appearance, add some bumps or warts on its body. You can do this by drawing small irregular shapes or circles throughout the frog's skin.
Step 5: Shadows and Highlights
Now that you have the basic frog shape, it's time to add some depth with shading. Start by identifying the light source in your drawing, which will determine where the shadows and highlights should be. Use your pencil to darken the areas that are away from the light source, creating shadows. Lightly shade the areas that receive direct light to create highlights.
Step 6: Refine the Details
Take a closer look at your drawing and make any necessary adjustments. Add more details to the frog's body, such as additional bumps or texture lines. Pay attention to the proportions and make sure everything looks balanced.
Step 7: Outlining (Optional)
If you want to make your frog drawing stand out, you can use a fine-tip black pen or marker to outline the main features. This step is optional and depends on your personal style and preference. If you choose to outline, do it carefully and confidently to create a clean and bold look.
Tip: Start your frog drawing by lightly sketching the main body parts as simple shapes—an oval for the body, circles for the eyes, and elongated ovals or rectangles for the legs and feet. This approach helps you map out the frog's unique proportions before committing to details, making it easier to adjust the pose or size as needed. When you're happy with the overall structure, gradually refine the contours and add characteristic features like the wide mouth, bulging eyes, and webbed toes. If you want to capture the frog's smooth, moist skin, use gentle, layered pencil strokes or soft blending with a kneaded eraser to create subtle shading. Don't be afraid to reference real frog photos for inspiration—observing how the limbs bend or how the light hits their skin can really enhance the realism and character of your drawing!
Conclusion
Congratulations! You have successfully learned how to draw a frog. Following these step-by-step instructions, you can create a realistic and detailed frog drawing. Remember to take your time and practice regularly to improve your skills. Happy drawing!
[Want to learn how to draw different types of frogs? Try our tutorials on how to draw a tree frog and how to draw a bullfrog](https://yonderoo.com/how-to-draw-a-bullfrog/).
Fun Facts About Frogs
- There are over 7,000 known species of frogs worldwide, making them one of the most diverse groups of vertebrates.
- Frogs absorb water and oxygen through their skin, which must stay moist for them to survive.
- Some frogs can leap more than 20 times their own body length in a single jump.
- The golden poison dart frog is one of the most poisonous animals on Earth.
- Frogs start life as aquatic tadpoles before undergoing metamorphosis into adults.
- Male frogs croak to attract mates, and each species has its own unique call.
- Some frogs can survive being frozen during winter and thaw out in spring.
- Frogs have excellent night vision and can see in color even in low light.
Suggestions for Scenes and Settings for Frog Drawings
- Lily pad pond: Draw a frog sitting on a vibrant green lily pad surrounded by colorful flowers and dragonflies buzzing around.
- Rainforest tree: Illustrate a tree frog clinging to a branch in a lush, tropical rainforest setting with exotic plants and cascading waterfalls in the background.
- **Urban alleyway:**Create a gritty urban scene with a streetwise frog navigating a city alleyway filled with graffiti, trash cans, and flickering streetlights.
- [Underwater world: Imagine a whimsical underwater scene with a frog swimming among coral reefs, sea anemones](https://yonderoo.com/how-to-draw-a-sea-anemone/), and schools of colorful fish.
- Moonlit swamp: Capture the mysterious beauty of a frog croaking under a full moon in a misty swamp teeming with fireflies, cattails, and twisted gnarled trees.
- Desert oasis: Picture a desert oasis where a frog seeks refuge in a lush palm grove surrounded by golden sand dunes and a shimmering mirage in the distance.
- Enchanted forest: Transport your viewers to an enchanted forest where an elegant frog prince lounges on a mossy log under a canopy of sparkling fairy lights and glowing mushrooms.
- Arctic tundra: Depict a resilient frog adapting to the icy landscape of the Arctic tundra, camouflaged among snowdrifts, frost-covered rocks, and the shimmering Northern Lights.
- Japanese garden: Draw a serene Japanese garden with a contemplative frog meditating by a tranquil koi pond amidst bonsai trees, Zen rock formations, and a wooden bridge.
- Fantasy realm: Let your imagination run wild and create a fantastical realm where frogs ride on the backs of giant snails, soar through the sky on dragonflies, and explore magical forests filled with mystical creatures.