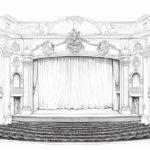
Welcome to this step-by-step guide on how to draw a courthouse. Whether you are an aspiring artist, a student working on a project, or simply someone who loves to doodle, this tutorial will provide you with clear instructions on creating a detailed and realistic representation of a courthouse. So grab your drawing supplies and let’s get started!
Materials Required
Before we begin, make sure you have the following materials ready:
- Drawing paper or sketchbook
- Pencil (preferably with different lead hardness, such as H, HB, and B)
- Eraser
- Ruler
- Compass (optional, for drawing circular elements)
- Fine-tipped markers or colored pencils (optional, for adding details and color)
Now that we have all our materials, let’s dive into the drawing process.
Step 1: Research and Reference
To make your courthouse drawing as accurate as possible, it’s essential to gather some visual references. Look up images of courthouses online or visit a courthouse in person to observe its architectural details. Pay attention to features such as columns, windows, doors, and any unique elements that make the courthouse distinct.
Step 2: Start with Basic Shapes
Begin by lightly sketching the basic shapes that form the foundation of the courthouse. Use your pencil to draw a rectangle for the main body of the building, and add additional rectangular shapes for any attached wings or extensions. Don’t worry about the details just yet, focus on getting the proportions and overall shape right.
Step 3: Add Building Features
Next, start adding the architectural elements that define the courthouse. Use a ruler to draw straight lines for columns, windows, and doorways. If there are any ornamental details such as arches or moldings, sketch them lightly as well. Remember to refer to your visual references to ensure accuracy.
Step 4: Refine the Details
Now it’s time to refine the details of the courthouse drawing. Begin by giving more definition to the columns, adding fluting or other decorative elements if necessary. Add windows and doors, making sure they align properly with the building’s structure. Pay attention to small details that give the courthouse character, such as window grilles, cornices, or balustrades.
Step 5: Work on the Roof
Move on to drawing the roof of the courthouse. Depending on the style of the building, it may have a flat roof, a sloping roof, or even a dome. Use your ruler and compass to create precise lines and curves for a polished look. Don’t forget to add any roof vents, chimneys, or other architectural features that are present.
Step 6: Finalize the Drawing
At this stage, take a moment to review your drawing and make any necessary adjustments. Erase any unnecessary sketch lines and darken the important outlines to give your drawing more definition. Pay attention to the overall balance and proportions of the courthouse. Take your time to add any additional details, such as flagpoles, signs, or landscaping, to enhance the realism of your artwork.
Conclusion
Congratulations! You have successfully learned how to draw a courthouse using a step-by-step method. By following these instructions and adding your own artistic touch, you can create a stunning representation of this iconic architectural structure. Remember to practice regularly to improve your skills and explore different variations of courthouses in various styles and settings. Happy drawing!


