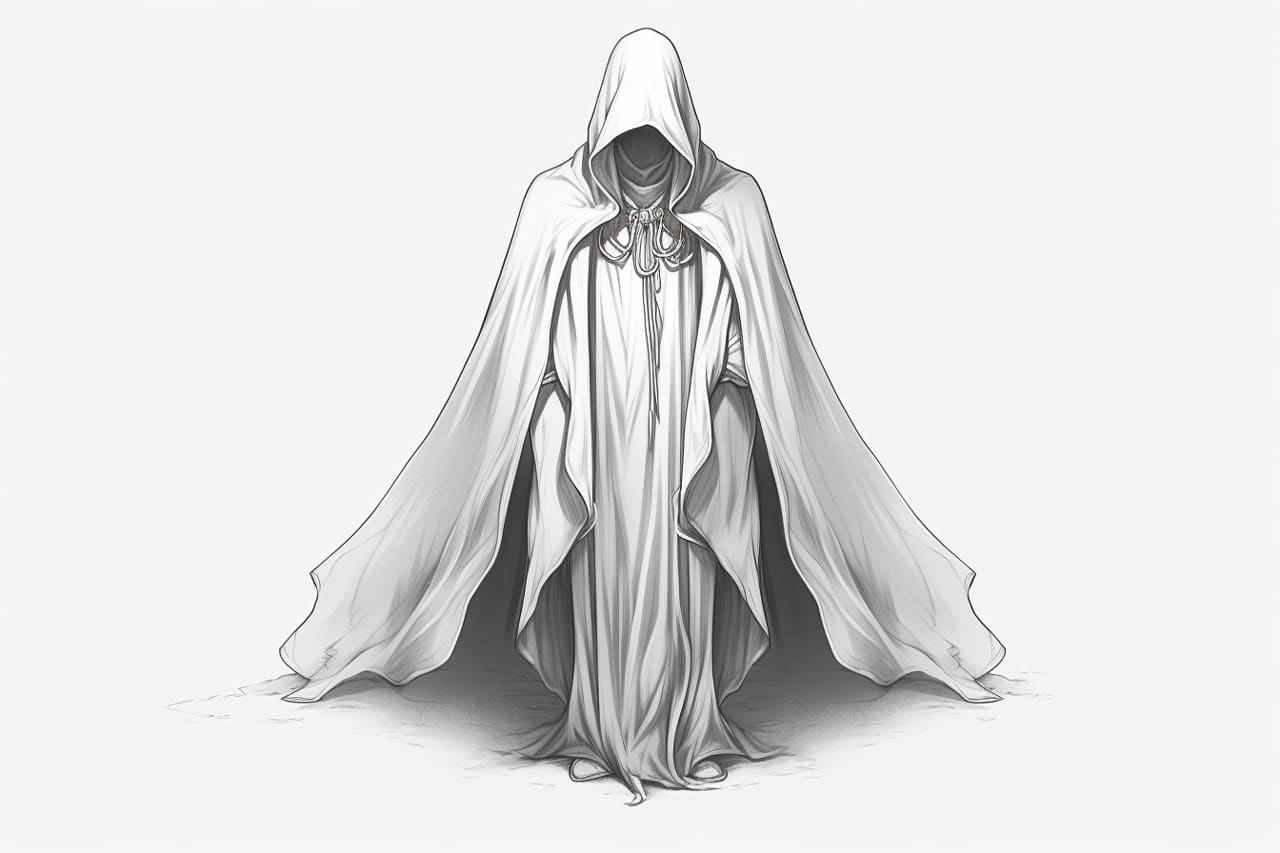
Welcome to this step-by-step guide on how to draw a cloak. Whether you’re an aspiring artist or just looking to enhance your drawing skills, this tutorial will teach you how to create a realistic and detailed representation of a cloak. With clear and concise instructions, you’ll be able to bring your artwork to life. So grab your pen and paper, and let’s get started!
Materials Required
Before we dive into the drawing process, let’s make sure we have all the necessary materials. To draw a cloak, you will need:
- Drawing paper: A smooth and sturdy surface is essential for creating detailed artwork. Choose a paper that suits your preferred medium, whether it’s pencil, pen, or markers.
- Pencils: Different grades of pencils will allow you to achieve various shading effects. It’s recommended to have a range from 2H (light) to 6B (dark).
- Eraser: A kneaded eraser or a soft eraser will be useful for correcting mistakes and adding highlights to your drawing.
- Blending tools: You can use a blending stump or a tortillon to create smooth transitions and gradients in your cloak drawing.
- Reference image: It’s always helpful to have a reference image to guide you in terms of shape, folds, and overall appearance of the cloak. You can find reference images online or use your own.
Now that we have all the necessary materials, let’s move on to the step-by-step process of drawing a cloak.
Step 1: Outline the Shape
Start by lightly sketching the basic shape of the cloak on your drawing paper. Determine the position and size of the cloak, and then use light pencil strokes to outline its silhouette. Remember, this is just a rough guideline, so don’t worry about making it perfect.
Step 2: Add Folds and Drape
Now, begin adding the folds and drape of the cloak. Cloaks are known for their loose and flowing nature, so make sure to create irregular and organic curves. Study your reference image closely to understand how the fabric falls and drapes over the body. Use varying pencil pressure to create depth and dimension in the folds.
Step 3: Define the Edges
Next, it’s time to define the edges of the cloak. Start by darkening the outline you sketched earlier, using a darker pencil grade. Then, carefully add details to the edges, making sure they are clean and well-defined. Pay attention to any trim or decorative elements the cloak may have.
Step 4: Shading and Texturing
To give your cloak a realistic appearance, it’s important to add shading and texturing. Begin by identifying the light source in your drawing and create shading accordingly. Use lighter pencil grades for the areas that receive more light and darker grades for the shadowed regions. Gradually build up the shading, paying close attention to the folds and creases.
To add texture to the cloak, consider using cross-hatching techniques. This involves drawing a series of intersecting lines to create the illusion of texture and depth. Experiment with different angles and spacing to achieve the desired effect.
Step 5: Refine and Add Details
Now that the basic structure is in place, it’s time to refine your drawing and add additional details. Take a step back and assess your work so far. Are there any areas that need adjustment or further definition? Use your reference image to guide you in adding smaller folds, textures, and any other intricate elements that will bring your cloak to life.
Step 6: Blending and Highlights
To enhance the realism of your cloak drawing, use a blending tool such as a blending stump or tortillon to smooth out any harsh lines or transitions. This will help create a seamless appearance and soften the shading. Additionally, you can use an eraser to add highlights to certain areas, emphasizing the light source and giving the cloak a more polished look.
Conclusion
Congratulations! You have successfully learned how to draw a cloak step by step. By following these instructions and using your creativity, you can create stunning cloak illustrations. Remember to practice regularly and study different types of cloaks to expand your drawing skills. With persistence and dedication, you’ll continue to improve. Happy drawing!