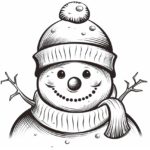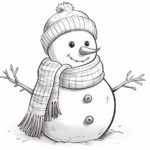
Whether you are sketching a winter landscape or designing a festive greeting card, knowing how to draw a snowman hat is a valuable skill to have in your artistic repertoire. In just a few simple steps, you can bring a touch of charm and whimsy to your artwork. So grab your pencils and let’s get started!
Materials Required:
To draw a snowman hat, you will need the following materials:
- A sheet of paper
- A pencil
- An eraser
- Black markers or pens (optional for inking)
Now that you have gathered your materials, let’s dive into the step-by-step process of drawing a snowman hat.
Step 1: Draw the Snowman’s Head
Begin by drawing a simple circle near the top of your paper. This circle represents the head of the snowman. Keep in mind that the size of the head will determine the proportions of the hat.
Step 2: Sketch the Brim of the Hat
Next, draw a slightly curved line extending outwards from the bottom of the circle. This line will serve as the brim of the snowman hat. Feel free to make the brim as wide or narrow as you like, depending on the style you want to achieve.
Step 3: Add the Body of the Hat
Extend two parallel lines downward from the ends of the brim to create the body of the hat. Keep these lines straight or slightly curved to give the hat a three-dimensional appearance. Remember that the height of the body will determine the overall height of the hat.
Step 4: Give the Hat Texture
To add some texture to the snowman hat, draw a series of short, curved lines horizontally across the body of the hat. This will give the hat a knitted or woven appearance. Be sure to space the lines evenly and keep them parallel to one another.
Step 5: Draw a Band for the Hat
Towards the bottom of the body, draw a horizontal line to serve as a band for the hat. This band can be as thick or thin as you prefer. If you want, you can add some details to the band, such as small dots or stripes, to enhance its visual appeal.
Step 6: Create a Buckle (Optional)
If you want to add a touch of detail to the snowman hat, consider drawing a buckle on the band. Begin by sketching a small rectangle in the center of the band. Then, add a smaller rectangle inside the first one to complete the buckle. This step is optional, so feel free to skip it if you prefer a simpler design.
Step 7: Refine and Ink Your Drawing (Optional)
At this point, you have completed the basic sketch of the snowman hat. Take a moment to review your drawing and make any necessary adjustments. If you’re confident with your sketch, you can use black markers or pens to outline and ink your drawing. Inking can help make your lines appear bolder and more defined, giving your artwork a polished look.
Conclusion
Drawing a snowman hat is a delightful addition to any winter-themed artwork. By following these step-by-step instructions, you can easily create charming snowman hats that bring a touch of frosty fun to your drawings and designs. Remember to experiment with different styles and sizes to suit your artistic vision. So grab your pencil and paper, and let your creativity take flight with the whimsical charm of a snowman hat.