Ho ho ho! Get ready to spread some Christmas cheer by learning how to draw your very own Santa Claus. Drawing Santa can be a fun and rewarding activity, whether you’re creating holiday cards and decorations or simply enjoying the festive spirit. In this step-by-step guide, I will walk you through how to draw a Santa Claus clearly and concisely. So grab your pencils, erasers, and paper, and let’s get started!
Materials Required
Before we dive into the steps, let’s make sure you have all the necessary materials to draw Santa Claus:
- Drawing paper or sketchbook
- Pencils (HB or 2B recommended)
- Eraser
- Fine-tipped black pen or marker (optional)
- Colored pencils, markers, or paints (optional)
Now that you have all your materials ready, let’s begin our creative adventure!
Step 1: Head and Body
To start drawing Santa Claus, begin by sketching a circle for his head and a large oval shape beneath it for his body. These shapes will serve as the basic framework for our jolly old fellow. Remember, don’t worry about perfection at this point – we can refine the details later!
Step 2: Facial Features
Now it’s time to bring Santa’s face to life! Add two small circles for his eyes inside the head circle. Between the eyes, draw a slightly curved line for his nose. Beneath the nose, draw a gentle curve for his smiling mouth. To complete the face, add a fluffy beard and mustache around the mouth area. Feel free to add some wrinkles and lines to make Santa look extra jolly!
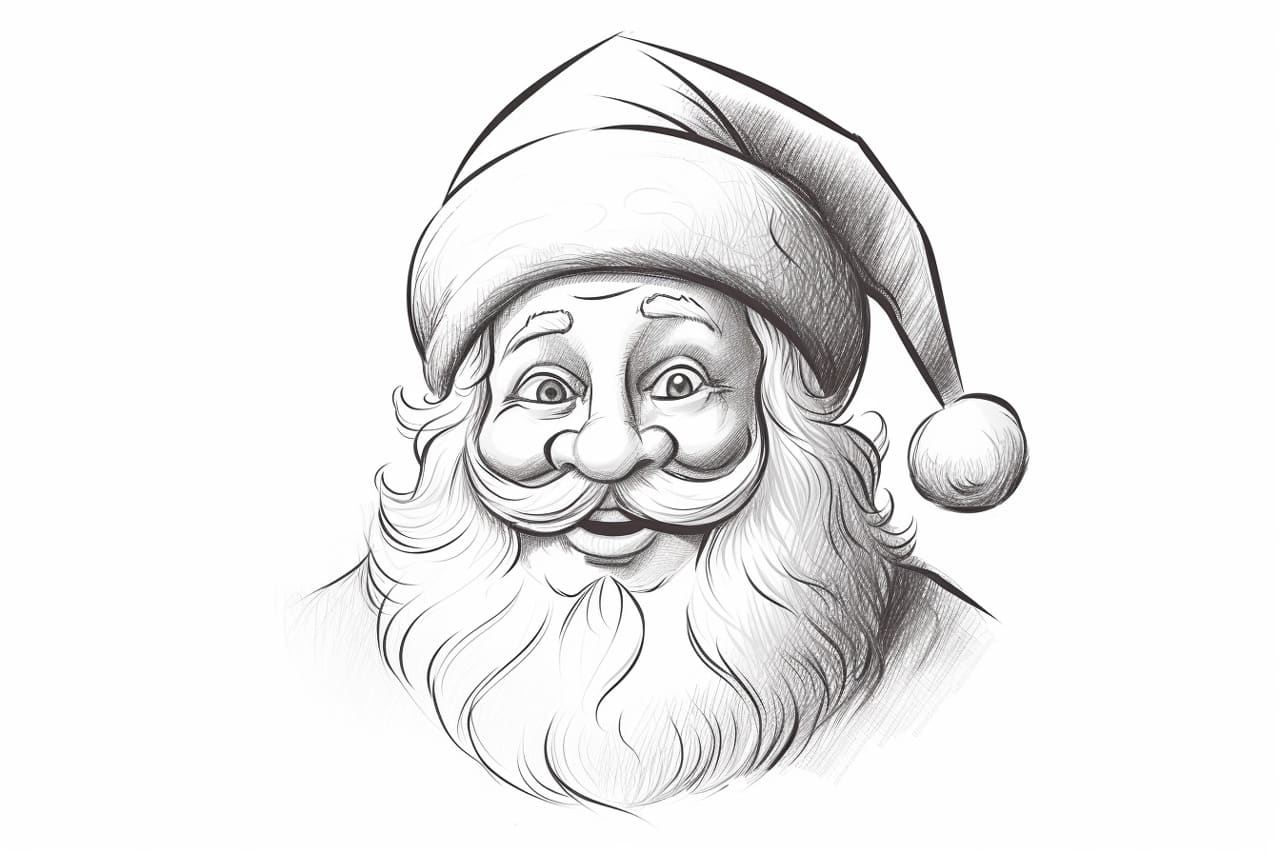
Step 3: Hat and Hair
Santa wouldn’t be Santa without his iconic hat and snowy-white hair. Sketch a large triangle-like shape on top of Santa’s head for his hat. Bring the sides of the triangle down to meet the sides of his head. Next, add some fluffy hair sticking out from underneath the hat. Don’t forget to erase any overlapping lines from the previous step!
Step 4: Eyes and Eyebrows
Let’s add some more detail to Santa’s face. Draw two small circles inside the eye shapes and shade them in to give Santa some twinkling eyes. Above the eyes, sketch a pair of curved lines for his eyebrows. The eyebrows should be thick and slightly furrowed to give Santa that classic serious-but-friendly expression.
Step 5: Glasses and Cheeks
If you want to give Santa a scholarly look, you can add glasses. Draw two small circles over his eyes and connect them with a bridge. Don’t worry if you prefer Santa without glasses – it’s all about personal style! Now, draw a pair of round, rosy cheeks on either side of Santa’s face. This will make him look even more jolly and inviting.
Step 6: Beard and Mustache
Santa’s beard and mustache are one of his most defining features. Use flowing, curved lines to add more detail and texture to his facial hair. Make the beard reach down to his chest, and the mustache should extend slightly beyond the sides of his mouth. Remember to erase any overlapping lines to keep the drawing clean and neat.
Step 7: Body and Arms
Let’s move on to Santa’s body and arms. Add two curved lines on each side of the oval shape we drew earlier to outline his round, plump body. For the arms, sketch two long, slightly curved lines extending from the sides of Santa’s body. Bend the lines near the bottom to indicate his hands and add a few fingers for detail.
Step 8: Santa’s Suit
Santa is known for his iconic red suit, so let’s add it to our drawing. Start by drawing a curved line beneath Santa’s body to form the bottom edge of his coat. Then, add some folds and creases to give the coat a realistic look. Extend two lines from Santa’s waist down to indicate his belt. Draw a small square-shaped buckle in the center of the belt.
Step 9: Legs and Boots
Santa’s boots are essential for his adventurous Christmas travels, so let’s not forget them! Draw two long, curved lines extending down from Santa’s coat to create his legs. At the bottom, add two rectangular shapes for his boots. You can also add some detail, like fur or buckles, to make the boots stand out.
Step 10: Final Touches and Coloring
Congratulations! You’ve almost completed your Santa Claus drawing. Take a moment to review your artwork and make any necessary adjustments or erasing. Once you’re satisfied with the overall look, you can add some color using colored pencils, markers, or paints. Remember to be creative and have fun with your coloring choices!
Conclusion
And there you have it – a step-by-step guide on how to draw Santa Claus. By following these instructions and using your own creative flair, you’ll be able to create your very own Santa drawings in no time. Whether you’re a beginner or an experienced artist, drawing Santa is a delightful activity that captures the magic of the holiday season. So, grab your pencils and get ready to spread some Christmas cheer with your artistic skills!