Welcome to this step-by-step guide on how to draw a magical carousel. Carousels are beautiful and enchanting structures that have been captivating people for generations. Whether you want to create a whimsical scene or simply practice your drawing skills, this tutorial will teach you how to bring a carousel to life on paper.
Materials Required
To begin drawing a carousel, gather the following materials:
- Paper: Choose a quality drawing paper that can handle the medium you will be using.
- Pencil: A regular HB pencil is perfect for sketching and adding details.
- Eraser: Use a soft eraser to correct any mistakes without damaging the paper.
- Fine-tip markers: Colored markers can add vibrancy to your drawing.
- Colored pencils: Use these to add shading and depth to your carousel.
- Ruler: A ruler is useful for creating straight lines and measuring proportions.
- Reference images: Collect pictures or visit carousels to get inspiration for your drawing.
With these materials in hand, let’s jump into the step-by-step process of drawing a carousel.
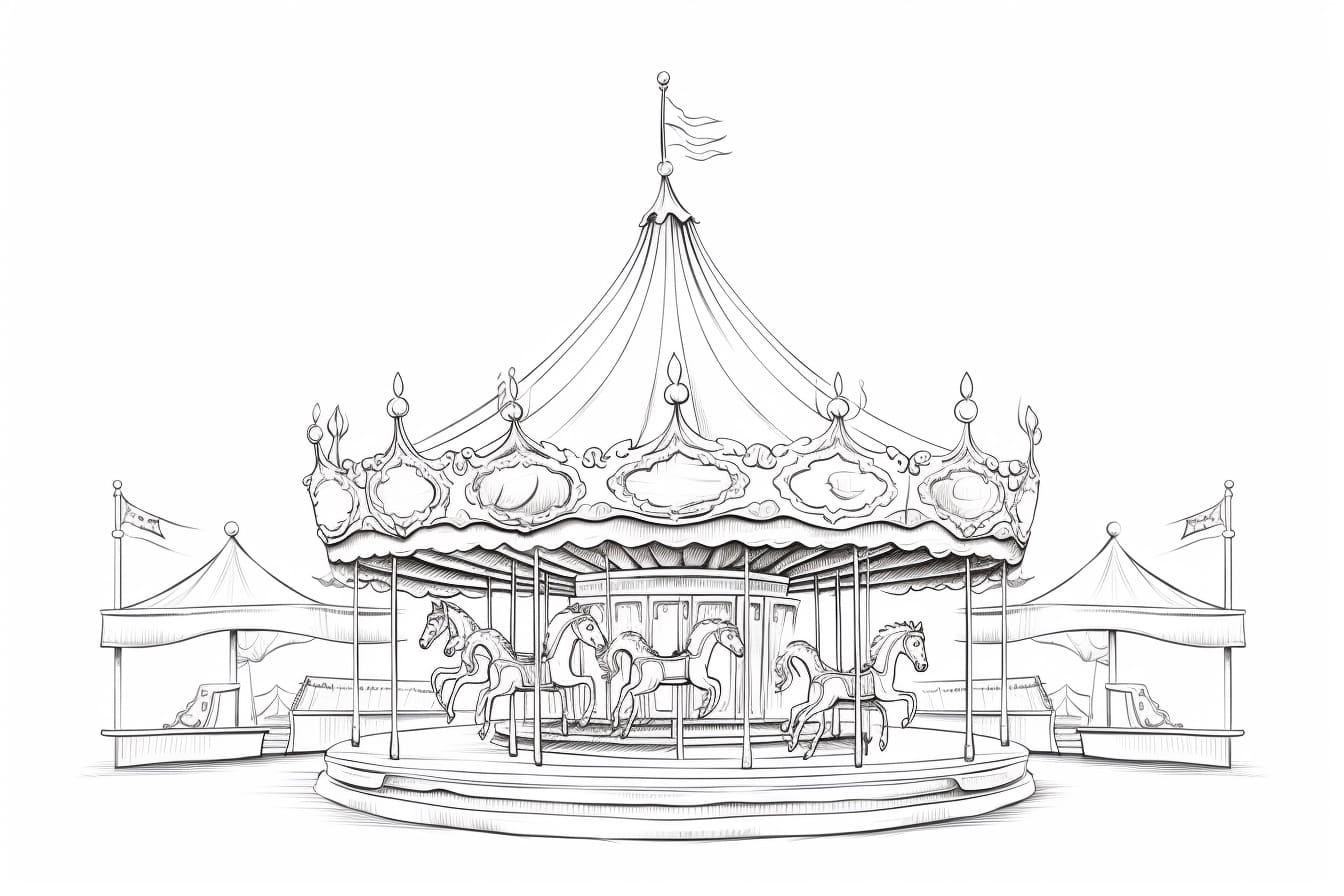
Step 1: Sketch the Base
Start by lightly sketching the base of the carousel. Draw a large circle to represent the platform. Then, add a smaller circle in the center to indicate the central column. Use your ruler to create straight lines extending from the central column to the outer edge of the platform, forming the spokes of the carousel.
Step 2: Draw the Columns and Roof
Next, draw the columns that support the roof of the carousel. Sketch two long rectangles extending vertically from the platform on opposite sides. Add decorative details to the columns, such as stripes or ornate carvings. Connect the columns at the top with a curved line to form the roof.
Step 3: Add the Horses
The horses are the highlight of any carousel. Draw a few horse outlines on the platform. Start by sketching the basic shape of the body and head. Then, add the legs, tail, and mane. Don’t worry about adding too much detail at this stage; focus on capturing the overall form and gesture of the horses.
Step 4: Refine the Horses
Now, it’s time to add more details to the horses. Define the facial features, such as the eyes, nose, and mouth. Add the intricate designs and decorations typically found on carousel horses, such as saddles, ribbons, and feathers. Take your time to make each horse unique and elegant.
Step 5: Draw the Platform Details
Enhance the carousel platform by adding decorative elements. Sketch intricate patterns, flowers, or geometric shapes around the edge of the platform. This will give your carousel a festive and charming look. Remember to maintain symmetry and balance as you draw these details.
Step 6: Add the Carousel’s Structure
To make your carousel more realistic, draw the supporting structure beneath the platform. Extend lines from the columns down to the ground, creating a sturdy foundation. Add additional supports and braces as necessary. This adds depth and dimension to your drawing.
Step 7: Finalize the Details
Now, it’s time to refine and add any remaining details to your drawing. Pay close attention to the smaller elements, such as the reins, harnesses, and stirrups on the horses. Add shading and highlights to create depth and make certain areas stand out. Take your time and be patient during this step to achieve the desired result.
Conclusion
Congratulations! You have successfully learned how to draw a carousel. Carousels are not only a joy to ride but also a joy to create on paper. By following this step-by-step guide, you have brought a magical carousel to life through your artistic skills. So grab your materials, let your imagination run wild, and enjoy the process of creating your very own carousel masterpiece.