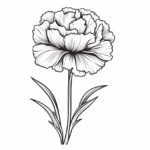
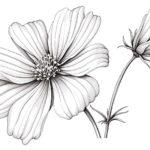
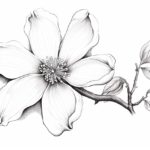
Carnations are beautiful flowers with delicate petals that come in various colors. Whether you want to create a realistic botanical illustration or enjoy doodling flowers, drawing a carnation can be a rewarding experience. In this step-by-step guide, I will show you how to draw a carnation in a clear, clean, and concise style. So let’s get started!
Materials Required
Before we begin, gather the following materials:
- Drawing paper or sketchbook
- Pencil (HB or 2B)
- Eraser
- Fine-tip marker
- Colored pencils or markers (optional)
Now that you have your materials ready, let’s dive into the drawing process.
Step 1: Start with the Center
Begin by drawing a small oval shape towards the center of your paper. This oval will represent the center of the carnation.
Step 2: Add Petal Guidelines
Next, lightly draw curved guidelines around the oval shape to indicate where the petals will be placed. These guidelines will help you maintain the proper proportions of the carnation.
Step 3: Draw the Outer Petals
Starting from the top of the oval, draw several petal shapes around the guidelines. Carnation petals are generally slender and have a slightly wavy or fringed edge. Vary the size and shape of the petals to add depth and a natural look to your drawing.
Step 4: Refine the Petal Shapes
Now, go over the rough petal shapes and refine them. Use smooth curves to create the petals’ contours, and make sure each petal overlaps the one before it, giving the carnation a layered appearance.
Step 5: Sketch the Inner Petals
Inside the oval shape, draw a few smaller petals that are partially hidden behind the outer petals. These inner petals should curve slightly inward towards the center of the flower.
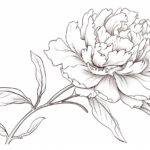
Step 6: Create Shading and Depth
To add depth to your carnation drawing, shade the areas between the petals lightly. Gradually darken the shading toward the center of the flower, where the petals overlap and cast shadows. This shading will give your carnation a three-dimensional look.
Step 7: Finalize the Details
With the basic structure and shading in place, it’s time to add the final details. Draw small lines or curves along the outer edges of the petals to enhance their texture. You can also add some subtle veins or lines to the inner petals for extra realism.
Step 8: Ink Your Drawing
Once you are satisfied with your pencil sketch, carefully go over the lines you want to keep with a fine-tip marker. This will give your drawing a clean and defined look. Let the ink dry before erasing any remaining pencil marks.
Step 9: Add Color (Optional)
If you prefer a colored carnation, you can use colored pencils or markers to bring your drawing to life. Carnations come in a variety of colors, so choose your preferred shades and carefully add color to your petals. Layer different shades to create depth and dimension.
Conclusion
Drawing a carnation is a delightful way to express your artistic skills and create a beautiful representation of a popular flower. By following these step-by-step instructions, you can create a stunning carnation drawing that showcases the delicate petals and captures the essence of this lovely flower. Remember to take your time, practice, and most importantly, have fun with your artwork!