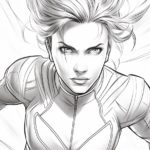
If you’re interested in creating dynamic and dramatic characters, learning how to draw a cape is a valuable skill to have in your artistic repertoire. Capes have been a staple of superhero and fantasy designs for decades, and adding this flowing garment to your characters can add a sense of movement and elegance. In this tutorial, we will guide you through the step-by-step process of how to draw a cape, providing clear and concise instructions for each stage. So grab your drawing tools and let’s get started!
Materials Required
Before we begin, it’s important to gather the necessary materials:
- Pencil: A graphite pencil in the range of 2B to 4B is recommended for sketching and creating initial outlines.
- Eraser: A kneaded eraser or a vinyl eraser can be used to correct mistakes and remove unwanted lines.
- Drawing Paper: Choose a smooth and sturdy paper suitable for pencil drawing. A size of 9″x12″ or larger will provide ample space for your drawing.
- Fine Liners or Pens: These are optional but can be used to ink your final lines for a clean and defined look.
- Colored Pencils or Markers: If you wish to add color to your cape drawing, these materials will come in handy.
Now that we have our materials ready, let’s proceed to the step-by-step instructions.
Step 1: Sketch the Basic Shape
Start by lightly sketching the basic shape of your character’s body. This will serve as a reference point for positioning the cape. Pay attention to the pose and stance of your character to determine how the cape will flow. Keep the lines loose and simple at this stage, as they will be refined later on.
Step 2: Outline the Cape’s Borders
Using your pencil, begin outlining the borders of the cape. Imagine how the cape would hang from the shoulders and visualize the flow of the fabric. Extend the lines from the character’s shoulders and curve them downwards to form the sides of the cape. Don’t worry about making it perfect; we will refine the shape in the following steps.
Step 3: Add Fold Lines and Details
To give the cape a more realistic appearance, add fold lines and details. Visualize how the fabric would fold and drape on the character’s body. Use curved lines to create folds and wrinkles. Remember that the folds should follow the direction of the fabric’s movement. Add more definition to the outline of the cape, making it bolder and more prominent.
Step 4: Refine the Shape
Now, it’s time to refine the shape of the cape. Take a critical look at your drawing and make any necessary adjustments. Pay attention to the proportions and ensure that the cape complements the overall composition of the character. Erase any unwanted lines to clean up the drawing and make it more polished.
Step 5: Add Volume and Flow
To make the cape appear more voluminous and dynamic, add additional lines to indicate movement and flow. These lines should follow the direction of the fold lines and accentuate the sense of motion. Consider the wind direction or the character’s movement to create a sense of drama and energy.
Step 6: Optional Inking
If you prefer a clean and defined look, you can now ink your final lines. Using fine liners or pens, carefully trace over the pencil lines to create bold and confident outlines. Allow the ink to dry before erasing any remaining pencil marks. Inking is optional, so feel free to skip this step if you prefer a pencil-only drawing.
Step 7: Adding Color (Optional)
If you want to add color to your cape drawing, now is the time to do so. Use colored pencils or markers to bring your artwork to life. Consider the lighting and shading of your character to determine the appropriate color choices. Experiment and have fun with different color combinations to achieve the desired effect.
Conclusion
Congratulations! You have successfully learned how to draw a cape. Capes are versatile and can be incorporated into various character designs, from superheroes to fantasy warriors. By following the step-by-step instructions provided in this tutorial, you now have the skills to create captivating and flowing capes for your characters. So grab your sketchbook and start drawing those dramatic poses with confidence!