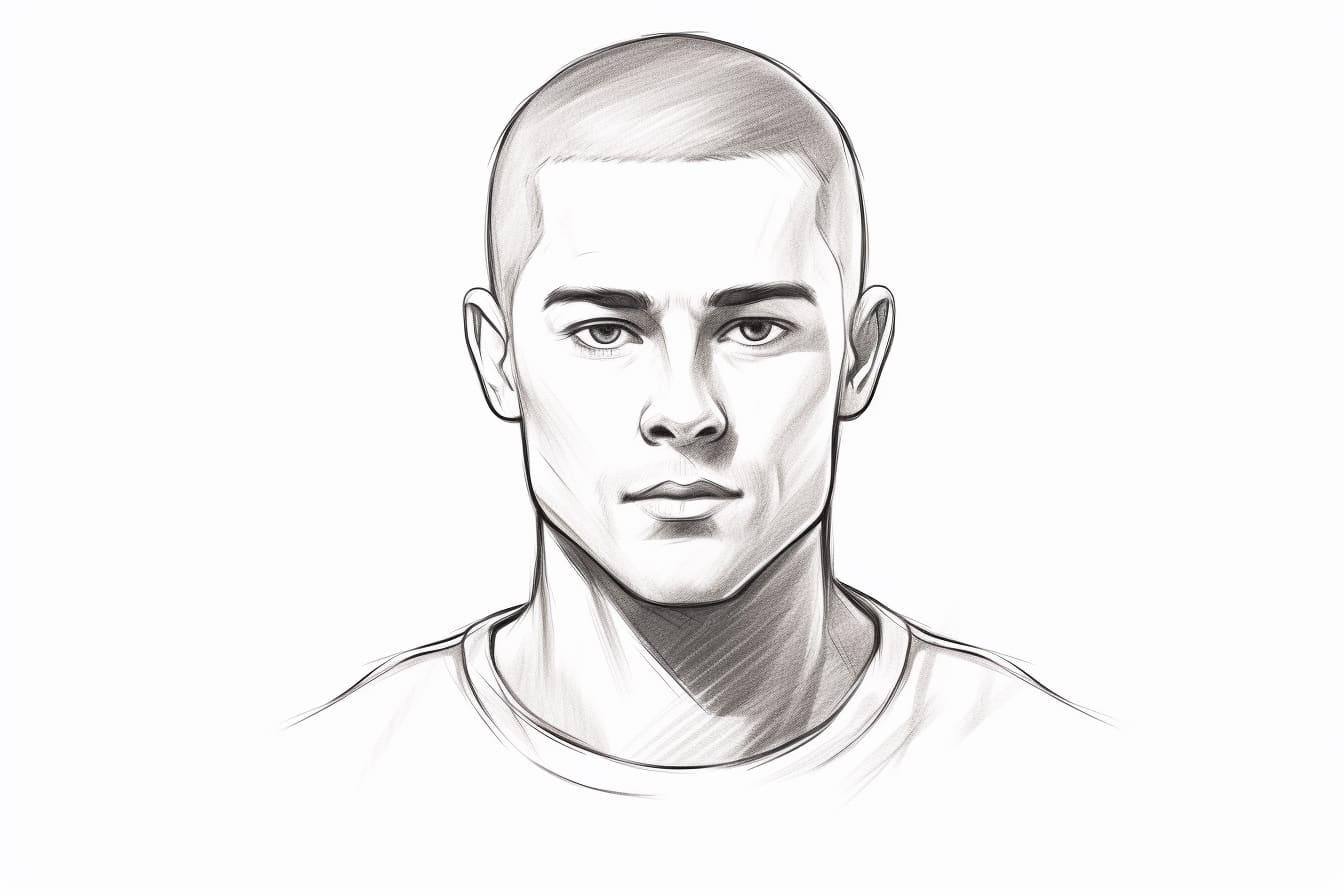
Are you interested in learning how to draw a buzz cut? Whether you’re an aspiring artist or simply looking to enhance your drawing skills, this step-by-step guide will help you create a realistic and stylish depiction of a buzz cut hairstyle. With attention to detail and a few basic techniques, you’ll be able to capture the essence of this popular haircut in no time.
Materials Required
Before we dive into the step-by-step instructions, let’s gather the necessary materials for this drawing tutorial. You’ll need:
- Drawing paper or sketchbook
- Pencil (preferably an HB or 2B)
- Eraser (kneaded or vinyl eraser)
- Fine tip marker or pen (optional, for outlining)
Now, let’s get started on creating your buzz cut masterpiece!
Step 1: Start with Basic Head Shape
Begin by sketching a circular shape to represent the head. Keep it light and loose, as it’s just a rough guideline for the overall proportions of the buzz cut.
Step 2: Outline the Hairline
Using light, curved lines, outline the hairline of the buzz cut. Start from the top center of the head and gradually curve down towards the sides and back. Remember that a buzz cut typically has a uniform length all around, so keep the hairline consistent.
Step 3: Add Texture and Depth
To add texture and depth to the buzz cut, lightly sketch small, overlapping lines within the hairline. These lines can be drawn in various directions to mimic the appearance of closely cropped hair. Focus on creating a balanced and natural-looking texture throughout.
Step 4: Refine the Hairline
Now, take a closer look at the hairline and refine its shape. Pay attention to any unique features, such as a widow’s peak or receding hairline, that may be present. Use more defined lines to outline the final shape of the buzz cut.
Step 5: Define the Sides and Back
Next, using gentle curves, define the sides and back of the buzz cut. Remember that the hair on the sides and back is usually shorter than the top. Avoid creating sharp angles or drastic transitions between areas.
Step 6: Add Detail to the Top
Focus on the top section of the buzz cut and add more texture and depth. Draw small, overlapping lines in various directions to represent the closely cropped hair. Pay attention to the hair’s natural flow and make sure it appears consistent and evenly distributed.
Step 7: Shade and Blend
To enhance the realism of the buzz cut, start shading the drawing. Use a pencil to add subtle shadows and highlights, especially in areas where the hair appears thicker or where light would naturally hit. Softly blend the shading with your finger or a blending stump to create a smooth transition between the different values.
Step 8: Refine the Details
Take a moment to refine and adjust any areas that need improvement. This could involve correcting proportions, refining texture, or adding additional details. Use your eraser to softly lift or lighten any unwanted lines or shading.
Step 9: Optional Outlining
If you want to add more definition to your buzz cut drawing, you can use a fine tip marker or pen to outline the main shapes and lines. Be careful not to overdo it, though. The outlining should enhance the overall drawing and not overpower it.
Step 10: Final Touches
Now that you’ve completed the main steps, take a step back and evaluate your buzz cut drawing. Make any final adjustments or refinements as needed. Pay close attention to the overall balance, proportions, and level of detail.
Conclusion
Drawing a buzz cut hairstyle doesn’t have to be intimidating. By following these step-by-step instructions and employing basic drawing techniques, you can create a realistic and stylish depiction of a buzz cut. Remember to be patient with yourself and allow for some experimentation and refinement along the way. With practice, you’ll be able to capture the unique characteristics of this haircut with ease.
So grab your materials and let your artistic skills shine as you create your own buzz cut masterpiece!