Are you interested in learning how to draw a bowling pin? Drawing a bowling pin may seem challenging, but with a bit of practice and the right technique, you’ll be able to create a realistic representation. In this step-by-step tutorial, I will guide you through the process of drawing a bowling pin, from its basic form to the finer details. So grab your sketchbook and let’s get started!
Materials Required
Before we begin, let’s gather the materials you’ll need to draw a bowling pin:
- Pencil: Choose a medium-soft pencil like a 2B or 4B, as it will allow you to create darker lines and easily make adjustments to your drawing.
- Eraser: A kneaded eraser is ideal, as it can be molded into different shapes to effectively remove unwanted lines.
- Sketchbook or Drawing Paper: Select a smooth surface to work on, preferably a sketchbook or drawing paper suitable for pencil drawings.
- Ruler: You may find a ruler helpful for measuring and ensuring that your lines are straight and accurate.
Now that you have your materials ready, let’s dive into the step-by-step process of drawing a bowling pin!
Step 1: Sketch the Basic Shape
Start by lightly sketching the basic shape of the bowling pin. Use your pencil to draw a tall, narrow rectangle that tapers towards the top. The bottom part of the rectangle should be slightly wider than the top. Don’t worry about adding any details at this stage, as we will refine the shape later on.
Step 2: Add Curves
Next, add curves to the sides of the rectangle to give the bowling pin its characteristic shape. Starting from the top corners of the rectangle, draw two curved lines that gradually converge towards the bottom. The curves should be smooth and symmetrical, aiming to create a sleek and polished appearance.
Step 3: Define the Neck
Now, let’s define the neck of the bowling pin. Draw a horizontal line across the top of the rectangle, slightly below the tapered part. This line will serve as a reference point for the neck’s position. Then, draw two diagonal lines that connect the corners of the tapered part to the horizontal line, forming a triangular shape.
Step 4: Refine the Shape
In this step, we will refine the overall shape of the bowling pin. Start by erasing any unnecessary lines and smoothening out the curves. Pay attention to the proportions and ensure that the bottom part of the pin is wider than the top. Use your pencil to adjust the shape as needed, making it more accurate and visually appealing.
Step 5: Add Details
Now that we have the basic shape completed, let’s add some details to our bowling pin. Start by drawing a thin horizontal line near the top of the pin, marking the separation between the neck and the body of the pin. Then, draw a series of narrow, vertical lines down the body of the pin. These lines will represent the seams or ridges usually found on a real bowling pin.
Step 6: Shade and Shadow
To add depth and dimension to your drawing, it’s time to shade and add shadows. Start by determining the light source in your scene. Once you’ve identified the light source, shade the opposite side of the pin accordingly. Use your pencil to create subtle shading along the curves and sides of the pin, gradually increasing the pressure to darken the shadows. Remember to blend the shading smoothly to achieve a realistic effect.
Step 7: Final Touches
In this final step, take a moment to review your drawing and make any necessary adjustments. Pay attention to the overall proportions, curves, and shadows. Use your eraser to lighten any areas or lines that seem too dark, and refine the details as needed. Take your time and don’t rush this step, as it can greatly enhance the final look of your drawing.
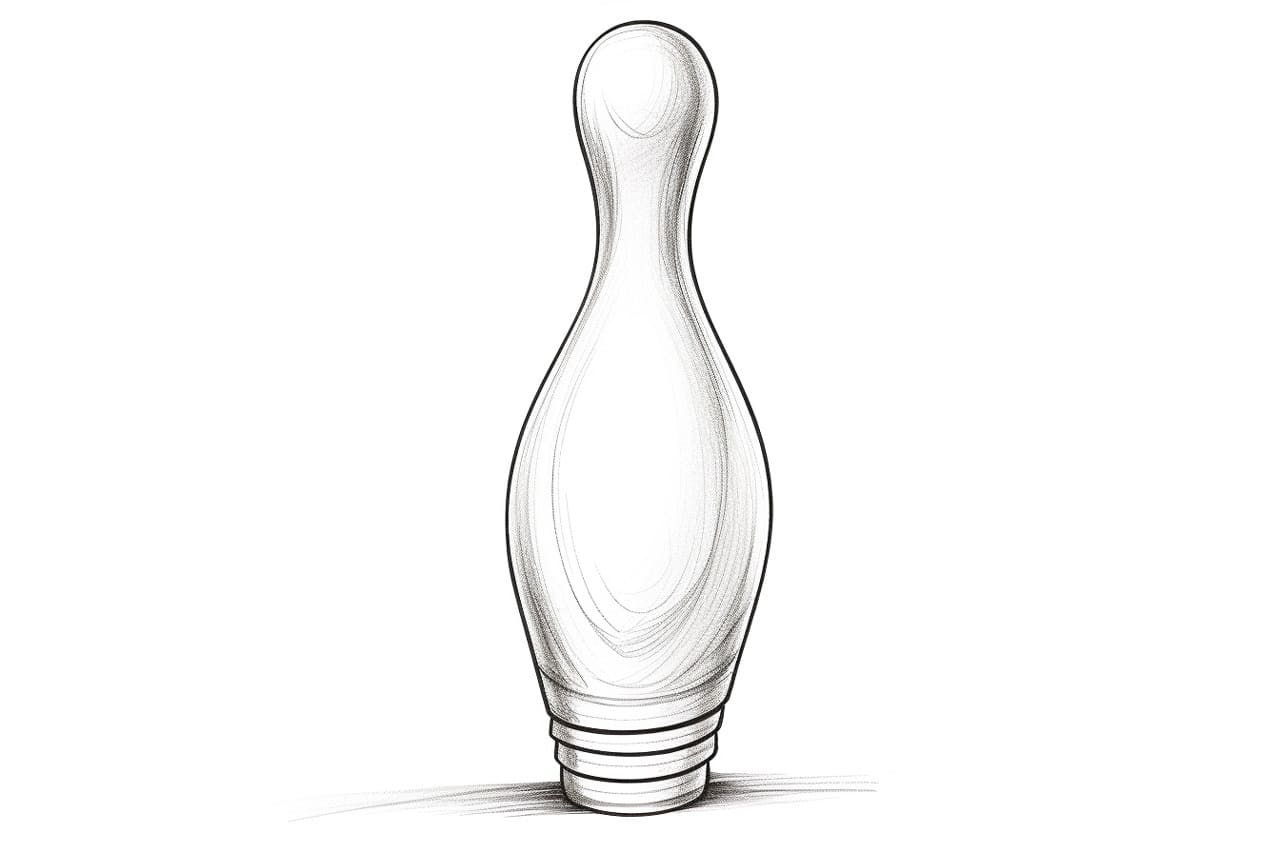
Congratulations! You have successfully drawn a bowling pin. With practice, each new attempt will bring you closer to perfection. Keep exploring and experimenting with different techniques to develop your own unique style as an artist.
Conclusion
Drawing a bowling pin may seem like a daunting task, but by following these step-by-step instructions, you can create a realistic representation. Remember to start with the basic shape, gradually add details, and then refine the drawing to achieve accuracy and depth. With practice and patience, you’ll soon be able to draw bowling pins effortlessly. So grab your pencil and sketchbook, and let your creativity flow!