How to Draw a Body
Learn how to draw a body step by step with this clear and concise guide. Explore the art of capturing human proportions and adding detail. Perfect for beginners and art enthusiasts.
Materials You'll Need
- Pencil
- Paper
- Eraser
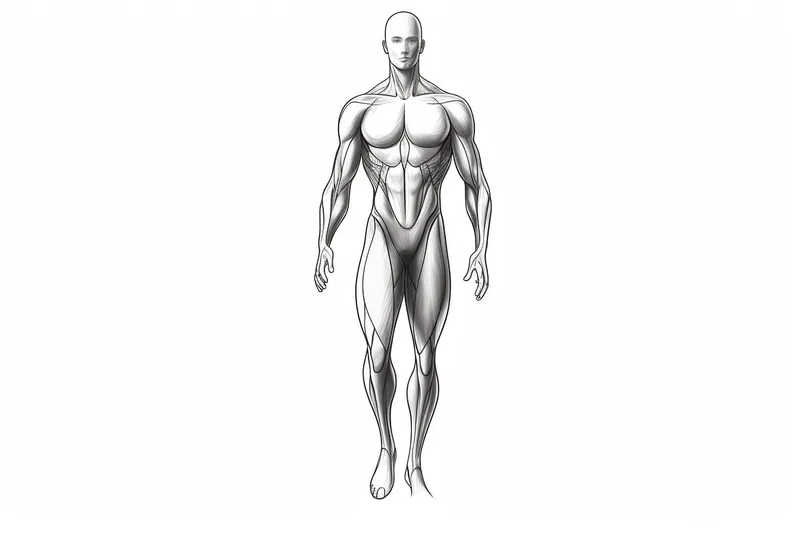
The human body is one of the most fascinating and challenging subjects in art, celebrated for its complexity, movement, and expressive potential. Artists throughout history have studied the body to better understand anatomy, proportion, and gesture, making it an essential foundation for any aspiring illustrator or painter. Learning how to draw a body not only helps you create realistic characters but also gives you the skills to express emotion and action in your artwork. Whether you want to draw figures for comics, animation, fashion design, or classical art, mastering the human form is a crucial step on your artistic journey.
This tutorial is designed to break down the process into manageable steps, so artists of all levels can follow along and gain confidence. If you're a beginner, you'll learn basic techniques like establishing proportions, constructing simple shapes, and observing the body's natural curves. For those with some experience, this guide will help you refine your understanding of anatomy and improve your ability to capture dynamic poses. Understanding how to draw a body opens the door to endless creative possibilities, allowing you to populate your sketchbooks and stories with lifelike, expressive figures.
Remember, every artist starts somewhere, and practice is the key to improvement. Don't be discouraged if your first attempts aren't perfect—each drawing is a valuable step forward. Grab your materials, follow along, and let's embark on the rewarding process of learning how to draw a body together!
Materials Required
Before we dive into the steps, let's gather the materials you'll need:
- Drawing paper or sketchbook
- Pencils of different grades (2B and 4B recommended)
- Eraser
- Fine-tip black marker or pen (optional for final outlining)
- Reference images or a live model (if available)
- Patience and enthusiasm!
Now that you have your materials ready, let's begin!
Step 1: Basic Proportions
Start by drawing a vertical line down the center of your paper. This line will act as the spine of your body. Next, add a horizontal line towards the bottom third of the vertical line. This horizontal line represents the hips.
Step 2: Adding the Head
Above the horizontal line, draw an oval shape to represent the head. The size of the head will determine the proportions of the rest of the body. Keep in mind that the average human body is about seven to eight heads tall.
Step 3: Drawing the Torso
Extend two slightly slanted lines down from the bottom of the head. These lines will form the sides of the torso. Connect them at the bottom with a curved line, creating the base of the torso. This shape should resemble an upside-down trapezoid.
Step 4: Outlining the Limbs
From the bottom of the torso, draw two long lines that taper towards the bottom. These will become the legs of your figure. Remember to keep the proportions in mind, making the legs roughly four to five heads long.
Step 5: Sketching the Arms
Start by drawing two lines that extend out from the sides of the torso slightly below the head. These lines will represent the upper arms. Then, add two more lines that angle down from the upper arms to create the lower arms. Finally, draw circles or ovals at the end of the lower arms to represent the hands.
Step 6: Adding Details to the Face
Within the oval shape you drew for the head, sketch in the facial features. Start by indicating the placement of the eyes, nose, and mouth. Remember to leave enough space for the ears on either side of the head. Add simple lines to suggest the shape and texture of the hair.
Step 7: Refining the Body Shape
Using the basic framework as a guide, start refining the body shape and adding more detail. Add curved lines to define the muscles and contours of the limbs. Pay attention to the joints, such as the elbows and knees, as they add realism to your drawing.
Step 8: Refining the Face and Features
Spend some time adding more details to the face. Refine the shape of the eyes, nose, and mouth, paying attention to the placement and proportions. Add shading to create depth and realism. Don't forget to add eyebrows, eyelashes, and any other features unique to your subject.
Step 9: Finalizing the Body
Once you're satisfied with the overall shape and details of the body, use a darker pencil or a fine-tip black marker to outline the figure. This step helps bring clarity and definition to your drawing. Erase any unnecessary guidelines or sketch lines.
Step 10: Adding Shadows and Highlights
Tip: To enhance your body drawing skills, consider integrating gesture drawing into your practice routine; this technique focuses on capturing the essence and movement of the figure in a short time, helping you develop a better understanding of the body's natural flow and posture. Set a timer for one to five minutes and sketch quick, loose outlines, allowing you to prioritize the overall shape and dynamic angles before refining details. This approach will improve your ability to depict more lifelike and expressive figures in your artwork.
To make your drawing more lifelike, introduce shading by adding darker tones to areas that are in shadow and lighter tones to areas that catch the light. Look closely at your reference images or observe how light falls on your model to guide your shading decisions.
Step 11: Adding Personal Style
Now that you have learned the basic technique, feel free to experiment and add your personal touch to the drawing. You can explore different poses, facial expressions, or clothing styles. Don't be afraid to get creative and let your imagination shine!
Mistake Alert: A common pitfall when drawing the human body is making the torso and limbs too stiff or straight, resulting in figures that look unnatural or mannequin-like. This usually happens because beginners focus so much on getting proportions right that they forget about the body's natural curves and the way it shifts weight. To avoid this, start your sketches with a loose gesture line that captures the overall flow and movement of the pose before adding structure. Pay attention to the subtle tilts of the shoulders, hips, and the curve of the spine—these small angles bring life and dynamism to your drawings. Practicing quick gesture sketches from reference photos can help train your eye and hand to see and recreate these organic forms.
Conclusion
Congratulations! You have learned how to draw a body step by step. With practice and patience, you can continue to improve your skills and develop your own unique drawing style. Remember, drawing is a lifelong journey, so enjoy the process and keep exploring new artistic horizons.
Fun Facts About Body
- The adult human body is made up of about 206 bones, forming the skeletal system.
- Skin is the largest organ of the body, covering about 2 square meters in an average adult.
- The human body contains trillions of cells, with estimates ranging from 30 to 37 trillion.
- Muscles make up about 40% of your total body weight.
- The heart beats around 100,000 times per day, pumping blood through the entire body.
- Each person has a unique fingerprint, making them a reliable form of identification.
- The human brain contains about 86 billion neurons.
- Red blood cells take about 20 seconds to circulate throughout the entire body.
- Humans shed about 600,000 particles of skin every hour, which adds up to about 1.5 pounds per year.
Suggestions for Scenes and Settings for Body Drawings
- A dynamic figure in mid-leap, as if caught in the middle of a dance or athletic jump.
- A relaxed pose of someone lounging on a sofa or lying in the grass, focusing on natural curves and foreshortening.
- Two figures in conversation, emphasizing gesture and body language to convey mood and interaction.
- A model stretching or warming up before exercise, capturing tension and muscle definition.
- Drawing the body in motion, such as running, cycling, or playing a sport.
- A close-up study of hands or feet in expressive positions, such as clapping, reaching, or gripping an object.
- A figure viewed from an unusual angle, like looking down from above or up from below, to practice perspective.
- A fantasy or sci-fi setting, where the body is adorned with unusual costumes, armor, or accessories.
- A group of figures in a crowd, focusing on overlapping bodies and varied poses.
- A classical pose inspired by famous sculptures or paintings, studying proportion and grace.