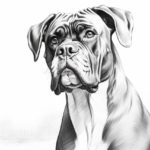
Welcome to this step-by-step guide on how to draw a pitbull dog! Whether you are a beginner or an experienced artist, this tutorial will help you create a realistic and impressive drawing of this powerful and energetic breed. By following these simple instructions, you’ll be able to capture the unique characteristics of a pitbull in your artwork.
Materials Required
Before we get started, gather the following materials:
- Drawing paper or sketchbook
- Pencil (preferably HB or 2B)
- Eraser
- Black ink pen or fine liner (optional)
- Colored pencils or markers (optional)
Having these materials ready will make the drawing process easier and more enjoyable.
Step 1: Start with Basic Shapes
Begin by lightly sketching the basic shapes that form the framework of the pitbull’s head. Start with an oval for the head and add a smaller circle to represent the snout. Then, draw two intersecting lines across the face to determine the placement of the eyes and nose.
Step 2: Define the Features
Using the basic shapes as a guide, start adding more details to the pitbull’s face. Draw the eyes, keeping in mind their almond-like shape. Add a small, triangular nose at the center of the intersecting lines. Next, sketch the pitbull’s ears, which are typically short and pointed. Pay attention to the angle at which they are positioned.
Step 3: Refine the Outline
Now, it’s time to refine the outline of the pitbull’s head. Start by erasing any unnecessary guidelines and sketching a more defined shape. Pay attention to the contours of the face and the shape of the snout. Use light, confident strokes to create a clean outline.
Step 4: Add Details to the Face
To bring the pitbull’s face to life, it’s important to add some key details. Sketch the eyes, including the pupils and any reflections to give them depth. Add some wrinkles around the nose and forehead, as pitbulls often have muscular and defined facial features.
Step 5: Draw the Body
Moving on to the body, draw a muscular neck by extending two curves down from the base of the head. Then, sketch the chest and the front legs, paying attention to the proportions and angles. Remember, pitbulls have a powerful build, so try to capture that in your drawing.
Step 6: Outline the Rest of the Body
Continue by outlining the back and hind legs of the pitbull. Pay attention to the curves and muscular structure of the body. Use confident strokes to create smooth lines. Don’t forget to indicate the joints and paws as well.
Step 7: Add Fur Texture
To make your drawing more realistic, it’s time to add some texture to the pitbull’s fur. Use short, flicking strokes to create the appearance of fur. Start at the top of the head and work your way down the body, following the direction of the fur. Vary the length and direction of your strokes to add depth and dimension.
Step 8: Finalize the Details
Now that the basic structure and texture are in place, it’s time to refine the details. Add more definition to the facial features, such as the mouth, teeth, and tongue. Pay attention to any wrinkles or creases on the body. You can use a black ink pen or fine liner to outline the drawing for a bolder look.
Step 9: Add Color (Optional)
If you prefer a colored drawing, you can now add colors to bring your pitbull to life. Use colored pencils or markers to carefully fill in the fur and create shading. Observe reference images or real pitbulls to accurately choose the colors and patterns.
Conclusion
Congratulations! You have successfully learned how to draw a pitbull dog. By following these step-by-step instructions, you should now have a detailed and realistic drawing of this majestic breed. Remember to practice regularly to improve your skills and try experimenting with different poses and expressions. Enjoy the process of bringing these beautiful animals to life on paper!