How to Draw a Cartoon Dog in 6 Simple Steps
Learn how to draw with this step-by-step tutorial.
Materials You'll Need
- Drawing paper
- Pencil (HB or 2B)
- Eraser
- Markers
Welcome to this exciting step-by-step tutorial on how to draw a cartoon dog! Cartoon dogs are the perfect blend of cuteness and creativity, making them a favorite subject for artists of all ages. Whether you're a beginner eager to explore your artistic side or an experienced artist looking to add some whimsical charm to your portfolio, this guide will help you create your very own lovable canine character.
In this tutorial, we'll break the process down into simple, easy-to-follow steps that make drawing a cartoon dog fun and approachable. You'll learn how to sketch the basic shapes, add personality with expressive features, and refine your dog's playful appearance with creative details.
So grab your pencil, paper, and a spark of imagination, and let's bring your adorable cartoon pup to life. Get ready to unleash your creativity and enjoy every step of this artistic adventure!
Materials Required
Before we begin, let's make sure you have all the necessary materials:
-
Pencil: A standard HB pencil will work perfectly for this tutorial.
-
Paper: Use a blank sheet of paper or a sketchpad.
-
Eraser: Make sure you have a good quality eraser for any necessary corrections.
-
Fine-tipped pen: You can use a pen to outline and add details if you prefer.
Now that we have everything we need, let's jump right into the drawing process!


How to Draw a Cartoon Dog Step-by-Step
Step 1: Lay the Foundation with Basic Shapes
Let's start by creating the building blocks for your cartoon dog. Begin by drawing a circle for the head—it doesn't need to be perfect, just round enough to house your pup's charming face. Below the head, sketch a slightly larger oval for the body. Position the oval so it overlaps slightly with the circle to create a natural connection between the head and body. These simple shapes will serve as the foundation for your cartoon canine, so take your time to get the proportions just right.
Step 2: Add Playful Facial Features
Now, let's give your dog a face full of personality! Inside the head circle, draw two large, round eyes. Make sure to leave some space between them for the nose. For the nose, sketch a small oval near the bottom center of the head. Beneath the nose, draw a curved line to create a friendly, open mouth. To complete the face, add two small, floppy ears at the top of the head—these can be rounded or triangular depending on your dog's style.
Step 3: Shape the Body
Next, let's define the body and legs of your cartoon dog. Use curved lines to connect the head and body, forming a smooth neck and back. From the bottom of the body oval, draw two curved lines extending downward for the front legs. Add small ovals at the base of each leg for the paws. For the back legs, sketch two slightly shorter curved lines on either side of the body, adding small ovals for the rear paws.
Step 4: Add Expression to the Face
Now, it's time to bring your dog's face to life! Inside each eye, draw a smaller circle to create pupils, leaving a tiny white spot in each for a lively sparkle. Above the eyes, add two arched lines for eyebrows—these will give your dog personality and expression. Refine the nose by adding a small curved line inside the oval to suggest shine. Lastly, outline the mouth more clearly, and add a little curve at the corners for a friendly smile.
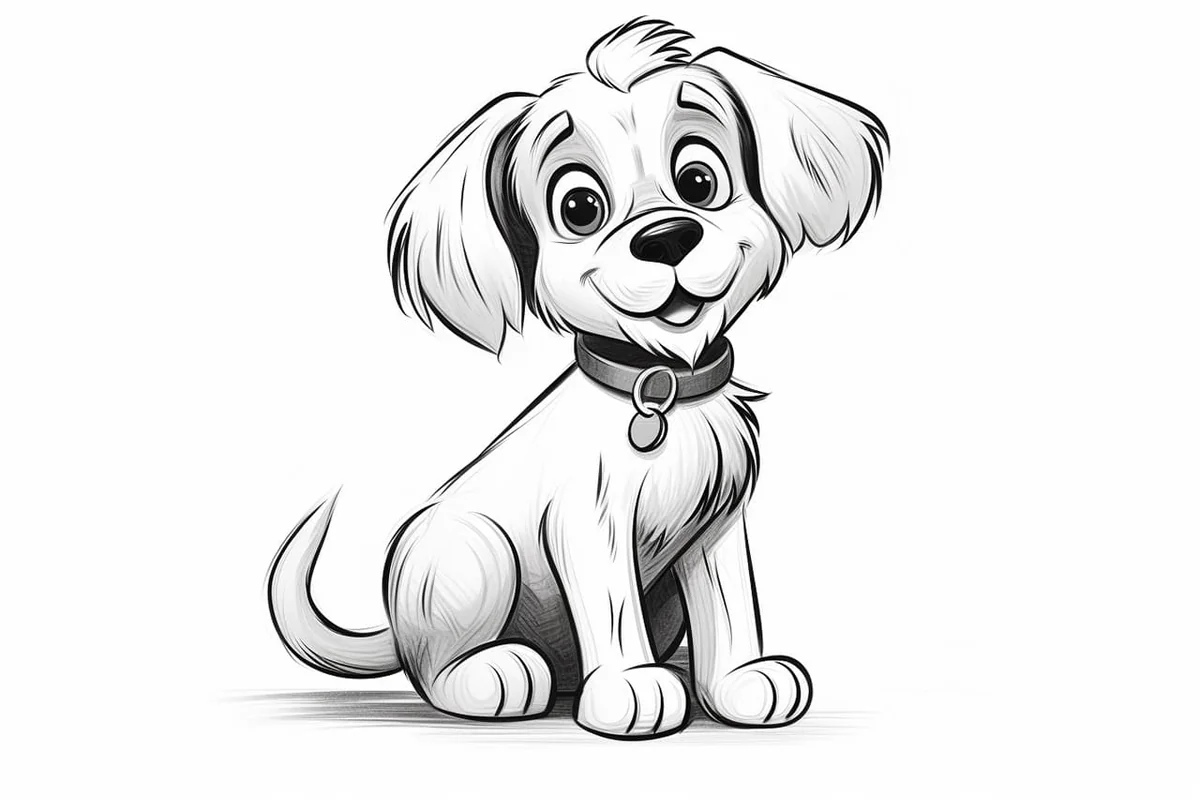
Step 5: Add Fluffy Fur and Fun Details
Let's make your cartoon dog extra adorable by adding texture and details. Use short, curved strokes around the head, ears, and body to create the illusion of fluffy fur. For an extra touch of character, draw a collar around the neck and add a tag—perhaps a bone or heart shape. If you want to get creative, sprinkle some spots or patterns on the dog's fur, or give it a patch over one eye for a playful twist.
Step 6: Finalize the Outline
Once you're happy with your cartoon dog's look, it's time to finalize the drawing. Grab a fine-tipped pen or marker and carefully trace over your pencil lines. Focus on the main features—like the head, body, and legs—and refine the smaller details, like the eyes and fur texture. Be mindful to avoid tracing any guidelines or unnecessary construction lines. Allow the ink to dry completely, then gently erase the remaining pencil marks for a crisp, polished finish.
Wrapping It Up: Your Cartoon Dog is Complete!
Congratulations! You've successfully created your very own cartoon dog, brimming with charm and character. From its expressive face to its fluffy details, your drawing is a delightful tribute to one of our favorite furry friends.
Keep practicing to refine your technique, and don't hesitate to experiment with different poses, expressions, and styles. Try drawing a whole pack of cartoon dogs—each with their own unique personality! Remember, art is all about having fun and letting your creativity run free. Happy drawing! ✨
Tip: To bring your cartoon dog to life, focus on using soft, rounded shapes when sketching the body and features. Start with basic geometric forms like circles and ovals for the head, body, and paws, which will give your character a friendly, approachable appearance. Utilize a light hand while drawing, as this will allow for easy erasing and adjustments; don't be afraid to refine your lines as you go. Once you have the basic outlines, switch to a darker pencil or ink for the final details—this will help your cartoon dog pop off the page! Finally, consider adding playful elements like floppy ears or a wagging tail to infuse even more personality into your drawing.
Gallery of Cartoon Dogs


