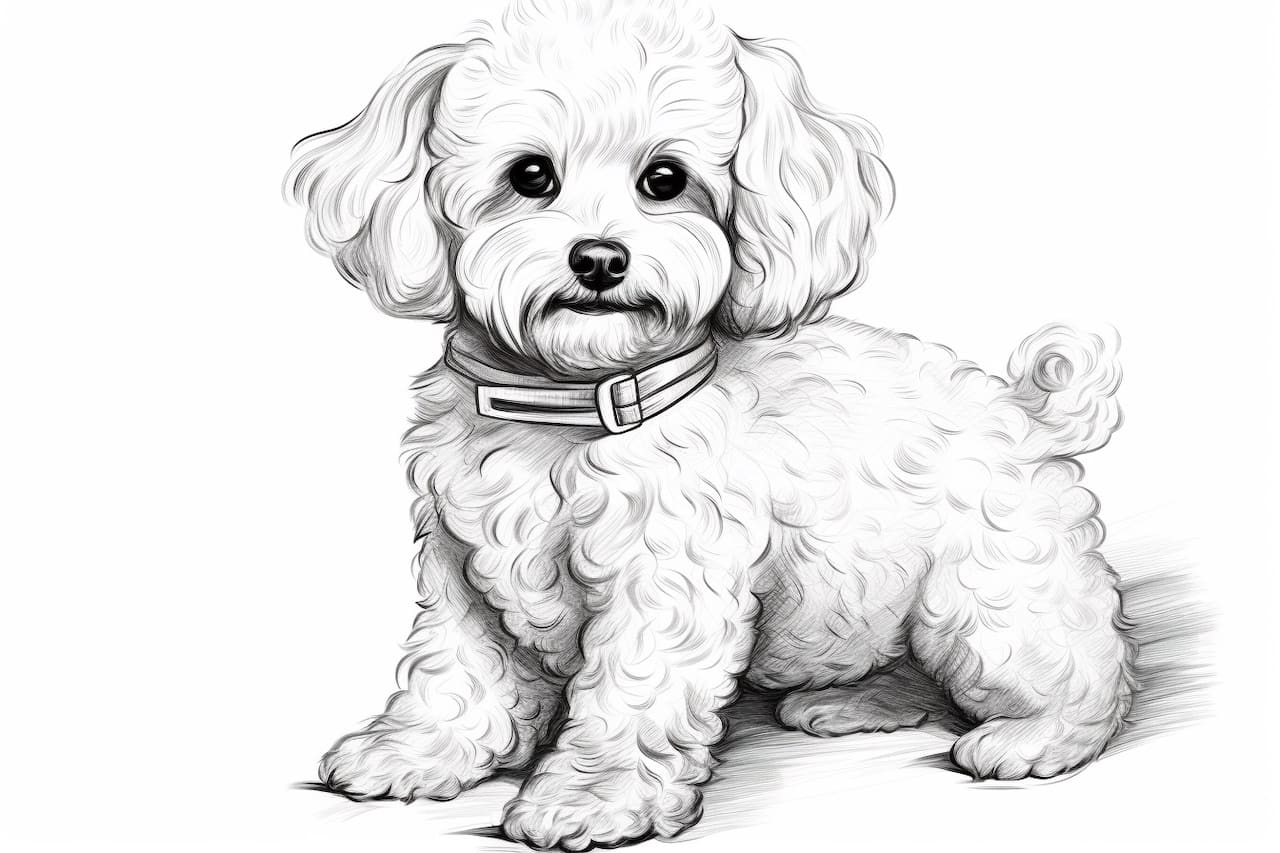
Welcome to this step-by-step guide on how to draw a Bichon Frise! Whether you are an experienced artist or just starting out, this tutorial will provide you with clear and concise instructions to create a beautiful representation of this fluffy and adorable breed. So grab your drawing materials and let’s get started!
Materials Required:
To successfully complete this drawing, you will need the following materials:
- Drawing paper or sketchbook
- Pencils (HB, 2B, and 4B)
- Eraser
- Blending stump or cotton swabs
- Fine-tip black pen or marker (optional)
Now that you have your materials ready, let’s move on to the step-by-step instructions!
Step 1: Basic Shape
Begin by lightly sketching the basic shape of the Bichon Frise. Start with a circle for the head, followed by an oval shape for the body. Keep these shapes light, as they will serve as your guide and can be easily adjusted as you progress.
Step 2: Facial Details
Add the facial details of the Bichon Frise. Draw two circles for the eyes, leaving some space between them. Then, draw a slightly curved line for the nose, followed by a small triangle shape for the mouth. Take your time and ensure that the facial features are proportionate and accurately represent the breed’s characteristics.
Step 3: Ears and Fur
Next, sketch the ears of the Bichon Frise. They are usually fluffy and round, so draw two curved lines on either side of the head, starting from the top. Then, add some fluffy fur details around the ears and on top of the head. Pay attention to the reference image or your own pet to capture the unique texture of their fur.
Step 4: Body and Legs
Now, let’s work on the body and legs. Extend the oval shape you drew earlier to form the body of the Bichon Frise. Then, add four small ovals for the legs, keeping in mind the proportions and size of the breed. Refine the shape of the body, ensuring that it reflects the Bichon Frise’s characteristic fluffy appearance.
Step 5: Tail and Additional Details
In this step, draw the tail of the Bichon Frise. It is usually curled and fluffy, so use curved lines to depict its shape. Add some more fur details around the body and legs, paying attention to the direction of the fur growth. Take your time to create a realistic representation of the breed’s coat.
Step 6: Refine and Shade
Now that you have the basic outline of the Bichon Frise, it’s time to refine your drawing and add shading for depth and dimension. Start by erasing any unnecessary guidelines or construction lines. Then, use a 2B pencil to darken the outlines and add shading to the different areas of the dog’s body.
Pay attention to light and shadow, and shade the areas that would be in shadow, such as under the body or around the ears. Use a blending stump or cotton swabs to blend the shading and create a smooth transition between light and dark areas. This will give your drawing a more realistic and three-dimensional appearance.
Step 7: Final Details
In this final step, add the remaining details to complete your drawing. Pay attention to the Bichon Frise’s facial expression and add any additional features, such as eyebrows or whiskers. You can also use a fine-tip black pen or marker to outline certain areas and make your drawing stand out.
Conclusion
Congratulations! You have successfully drawn a Bichon Frise. By following these step-by-step instructions, you have created a beautiful representation of this adorable breed. Remember, practice makes perfect, so don’t be discouraged if your first attempt isn’t exactly how you envisioned. Keep refining your skills, and with time, you will be able to create even more stunning drawings.
We hope you enjoyed this tutorial on how to draw a Bichon Frise. Happy drawing!