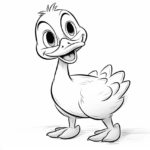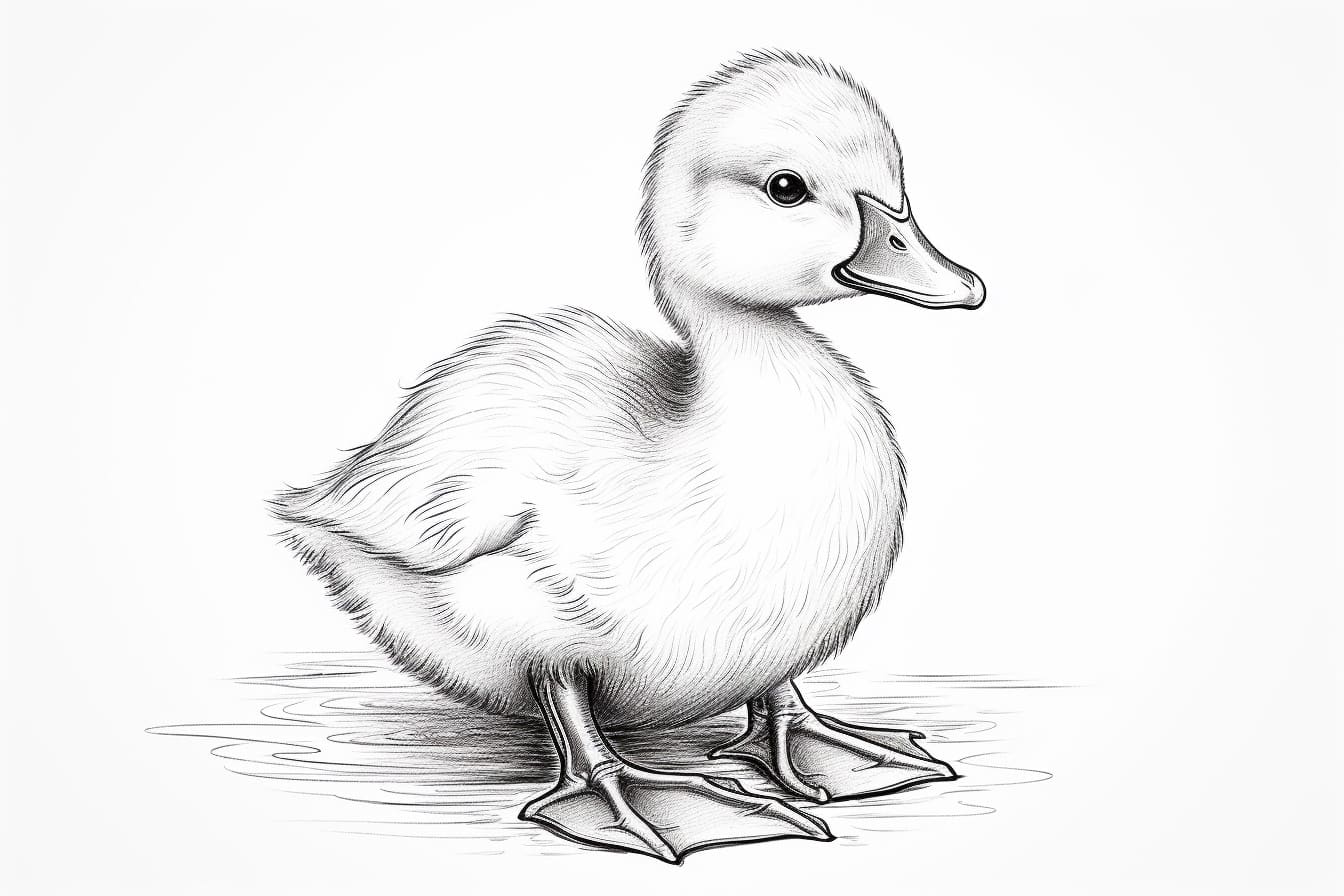
Are you ready to embark on a creative journey and learn how to draw a baby duck? Drawing animals can be a fun and fulfilling experience, allowing you to express your artistic skills and bring adorable creatures to life on paper. In this step-by-step guide, we will explore the process of drawing a cute and cuddly baby duck. So grab your drawing materials, find a comfortable spot, and let’s get started!
Materials Required:
- Drawing paper or sketchbook
- Pencil (preferably an HB or 2B)
- Eraser
- Fine-tip black marker or pen
- Colored pencils or markers (optional)
Now that we have our materials ready, let’s dive into the step-by-step process of drawing a baby duck.
Step 1: Sketching the Basic Shape
Start by lightly sketching an oval shape towards the center of your paper. This will serve as the body of our baby duck. Remember, at this stage, it’s important to keep your lines light and easily erasable, as we will be refining our drawing later.
Step 2: Adding the Head and Beak
Towards the top of the oval shape, draw a slightly smaller oval to represent the duck’s head. Connect it to the body with a curved line. Now, within the head, draw a small triangle shape for the beak. Make sure the beak is pointing slightly upward, giving the duck an adorable expression.
Step 3: Drawing the Eyes
Next, draw two small oval shapes for the eyes. Place them above the beak, leaving some space in between. Add tiny circles inside the eyes to represent the pupils. These will bring life and expression to your baby duck’s face.
Step 4: Outlining the Body and Wings
Using your pencil, carefully outline the body of the duck, following the basic shape you sketched earlier. Then, add two small curved lines on each side of the body to create the wings. Make sure the wings are proportionate to the body and slightly overlapping.
Step 5: Detailing the Tail and Feet
Draw a small curved line at the back of the body to indicate the tail. Keep it simple and petite, as baby ducks have a small tail. For the feet, draw two small triangles at the bottom of the body, slightly overlapping with the oval shape. These will serve as the duck’s webbed feet.
Step 6: Erasing and Refining
Now that you have the basic outline of your baby duck, take a moment to review your drawing. If there are any unwanted lines or mistakes, gently erase them. Once you are satisfied with the overall shape and proportions of your duck, it’s time to move on to the next step.
Step 7: Inking the Drawing
Using a fine-tip black marker or pen, carefully trace over the pencil lines of your baby duck. This step will give your artwork a clean and polished look. Take your time and be patient. Remember to let the ink dry completely before erasing any remaining pencil marks underneath.
Step 8: Adding Details
Now that you have the outline of your baby duck, it’s time to add some adorable details. You can draw small feathers on the wings and tail, adding texture and depth to your drawing. Don’t forget to draw a short line across the beak to represent the duck’s nostrils.
Step 9: Coloring Your Baby Duck (Optional)
If you prefer to add color to your drawing, grab your colored pencils or markers and let your creativity soar! Baby ducks are often yellow in color, but you can experiment with different shades and patterns. Add some highlights and shadows to make your duck come to life.
Conclusion
Congratulations on completing your drawing of a baby duck! Drawing animals allows us to appreciate the beauty of nature and express our imagination. By following these step-by-step instructions, you have learned how to draw a charming baby duck with its distinctive features. Remember, practice makes perfect, so keep exploring and experimenting with your artistic skills. Happy drawing!