Welcome to this comprehensive guide on how to draw a calla lily, one of nature’s most elegant flowers. With its smooth, trumpet-shaped petals and graceful curves, the calla lily is a symbol of purity and sophistication, making it a favorite subject for artists of all skill levels.
In this step-by-step tutorial, we’ll walk you through how to draw a calla lily, from its slender stem to its iconic bloom. Whether you’re just starting or have years of experience, this guide will provide helpful tips and techniques to create a lifelike and captivating representation of this stunning flower. So grab your materials, and let’s get started on your calla lily masterpiece!
Materials:
- Drawing paper
- Pencil (HB or 2B)
- Eraser
- Fine-tip black pen or waterproof fine-tip marker
- Colored pencils or markers (optional)
How to Draw a Calla Lily Step-by-Step
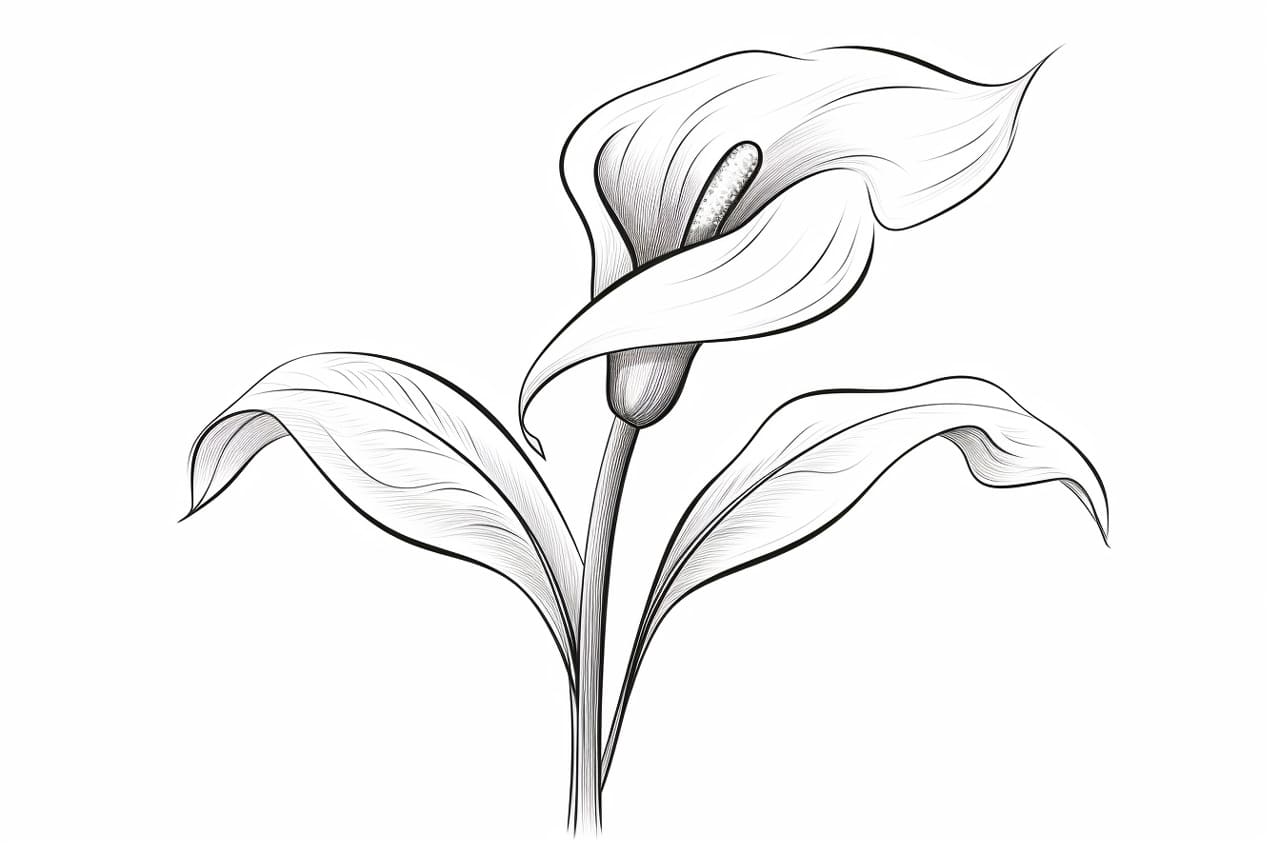
Step 1: Sketch the Basic Shape
Begin by lightly sketching an elongated oval shape for the main body of the calla lily. This shape serves as a guideline for the overall structure of the flower and helps in maintaining proper proportions. Since calla lilies have a graceful, curved form, don’t worry about making it too symmetrical—a little variation adds to its natural beauty.
Step 2: Draw the Flower’s Petals
The calla lily’s petal is actually a single, flowing structure called a spathe, which wraps around the central spike-like structure (spadix).
- Starting from the top-left side of the oval, draw a long, curved line that extends outward before curling back toward the base—this forms the first part of the petal.
- Repeat on the right side, creating a mirror-image curve that meets at the bottom.
- The petals should have a soft, flowing shape, tapering slightly toward the bottom where they meet the stem.
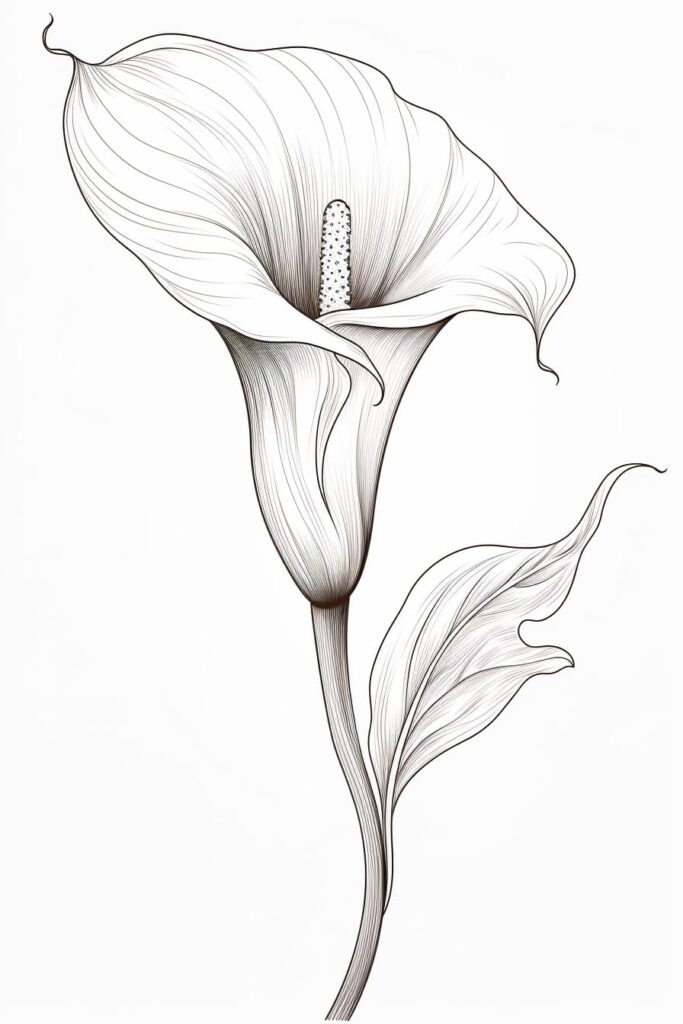
Step 3: Add Detail to the Petals
To enhance realism, add gentle folds and curves along the edges of the petal.
- Draw soft, flowing lines along the surface to indicate the natural creases and subtle curves that make the flower look delicate.
- Keep these lines light and fluid—too many hard edges can make the petals look unnatural.
- If you’re using a reference photo, observe how the petal wraps and bends around the central spadix for added accuracy.
Step 4: Draw the Spadix
Inside the petal’s enclosure, draw a vertical, slightly curved line down the center—this represents the spadix, the cylindrical structure where the flower’s tiny blooms are clustered.
- The spadix should have a soft, rounded top, gently blending into the petal’s shape.
- Make sure it’s slightly off-center to give a more natural, three-dimensional appearance.
Step 5: Add the Pointed Tip to the Spadix
At the top of the spadix, sketch a small, rounded or slightly pointed tip—this will help define the central structure of the flower.
- You can slightly thicken the top to give it a soft, textured appearance, as the spadix often has a subtle surface grain.
Step 6: Sketch the Stem
Extend a gently curved vertical line downward from the base of the flower to form the stem.
- Calla lily stems are long, smooth, and slightly flexible, so avoid making them too rigid or straight.
- If you’d like to make your drawing more dynamic, give the stem a gentle S-curve, as if it’s naturally bending under the weight of the bloom.
Step 7: Detail the Stem
To add depth and texture to the stem, include slight ridges and shading:
- Lightly sketch fine vertical lines to indicate the natural fiber-like texture of the stem.
- Apply subtle shading along one side of the stem to create dimension and curvature, making it appear more rounded and three-dimensional.
Step 8: Refine and Darken Your Sketch
Now, refine your petal, spadix, and stem by cleaning up the lines and adjusting proportions.
- Erase any unnecessary guidelines while keeping the shape crisp and clear.
- If needed, softly darken the outline to define the flower’s shape more prominently.
- Make sure the petal’s edges are smooth, as calla lilies are known for their graceful, flowing form.
Step 9: Outline with Ink (Optional)
For a more polished, defined look, use a fine-tip black pen or waterproof ink marker to trace over your final pencil lines.
- Use smooth, confident strokes to maintain the flower’s natural flow.
- Be careful not to press too hard—keeping soft, delicate outlines will make the flower appear more elegant and organic.
- Allow the ink to fully dry before erasing any leftover pencil marks to prevent smudging.
Step 10: Add Shadows and Depth
To enhance the realism of your drawing, add subtle shading and highlights:
- Identify your light source and shade the opposite side of the flower for depth.
- Apply gentle shading at the base of the petal where it meets the spadix to suggest natural folds and curves.
- Use hatching and cross-hatching techniques to create gradual shadows along the stem and petal’s edges.
- To create a realistic texture for the spadix, add a soft stippling effect (tiny dots) to indicate its slightly bumpy surface.
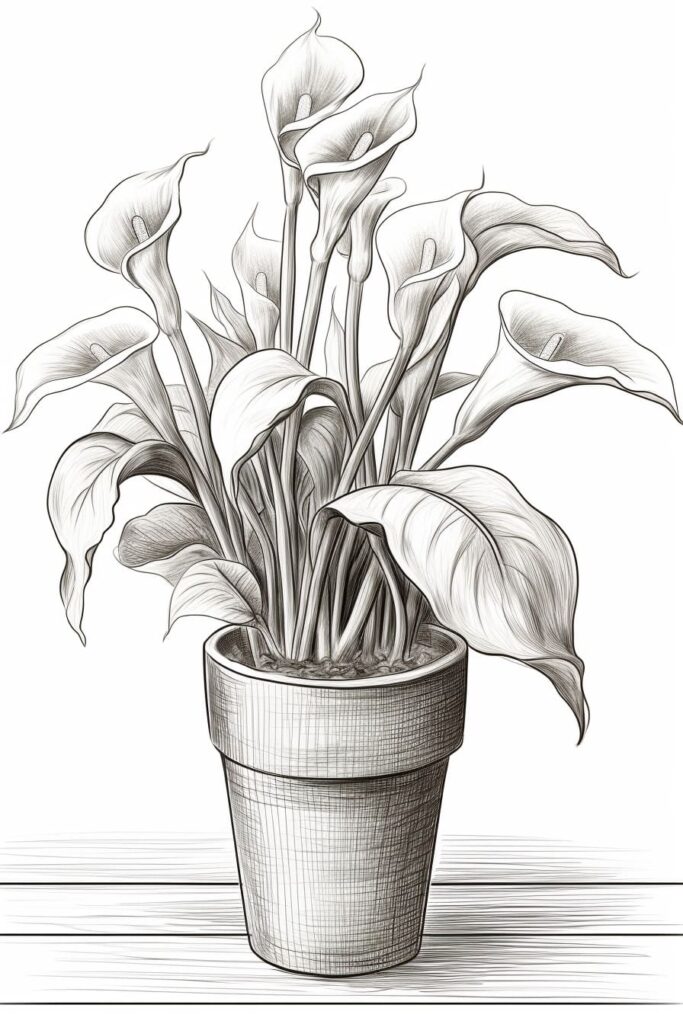
Step 11: Add Color (Optional)
If you’d like to bring your calla lily to life with color, use colored pencils, markers, or watercolors to softly build layers of shading and depth.
- Petals: Calla lilies are typically white, cream, pink, purple, or yellow—start with a light base layer, then gradually blend in soft shadows and gentle highlights.
- Spadix: Often yellow or orange, add soft shading to create a rounded effect.
- Stem: Use varying shades of green, layering darker tones near the edges to enhance depth.
- Blending tip: Use a blending stump or soft brush to smooth out colors for a more natural, delicate finish.
Conclusion: Mastering the Art of Drawing a Calla Lily
Congratulations! You’ve successfully drawn a graceful and elegant calla lily. By following these step-by-step techniques, you’ve learned how to capture its smooth curves, delicate petals, and natural beauty on paper.
Drawing flowers like the calla lily is a great way to practice shading, detail work, and composition. Keep experimenting with different angles, lighting, and styles to improve your floral illustrations.
With patience and practice, you’ll continue to refine your skills and create stunning botanical artwork. So keep sketching, keep creating, and let your artistic journey bloom!
Tip: To capture the elegance of a calla lily, focus on the unique shape of its petals by breaking the flower down into basic forms. Start by sketching a light outline of the flower’s silhouette using gentle curves, ensuring that the widest part of the bloom is accurately proportioned. Use a pencil with a softer lead, like a 2B, to allow for smooth lines that can be easily adjusted. Pay attention to the subtle folds and the way the petals gently curl back; these details add depth and realism to your drawing. Once you’re satisfied with the outline, you can refine it with a fine-tip black pen to enhance the contours before adding color for a vibrant finish.
Fun Facts About the Calla Lily 
- Not Actually a Lily – Despite its name, the calla lily isn’t a true lily! It belongs to the arum family (Araceae) and is more closely related to plants like peace lilies and philodendrons.
- Symbolism & Meaning – Calla lilies are often associated with purity, elegance, and rebirth. They are commonly used in weddings, religious ceremonies, and celebrations of life.
- Toxic Beauty – While stunning, calla lilies are toxic to pets and humans if ingested. Their sap contains calcium oxalate crystals, which can cause irritation.
- Ancient Greek Origins – The name “Calla” comes from the Greek word kallos, which means “beautiful.” According to Greek mythology, the flower was said to have sprung from the milk of Hera, the queen of the gods.
- A Favorite in Art & Literature – Calla lilies have been featured in famous paintings, such as those by Georgia O’Keeffe, and have appeared in various poems, novels, and films, symbolizing both love and mystery.
- They Thrive in Wetlands – Calla lilies are native to South Africa and love moist environments. In the wild, they are often found growing near ponds, streams, and marshes.
So, the next time you draw or admire a calla lily, remember that this elegant flower carries a rich history, deep symbolism, and an air of mystery!