Are you captivated by the beauty of spider lilies and want to learn how to draw them? Look no further! In this step-by-step tutorial, I’ll guide you through the process of how to draw a spider lily. Whether you’re a beginner or an experienced artist, you’ll be able to create a realistic and lifelike representation of this elegant flower. So, let’s pick up our pencils and get started!
Materials Required
Before we begin, gather the following materials:
- Drawing paper or sketchbook
- Pencils (HB, 2B, 4B)
- Eraser (kneaded eraser recommended)
- Fine-tipped black pen (optional for inking)
With these materials at hand, you’re ready to bring the beauty of the spider lily to life on paper!
Step 1: Observing the Spider Lily
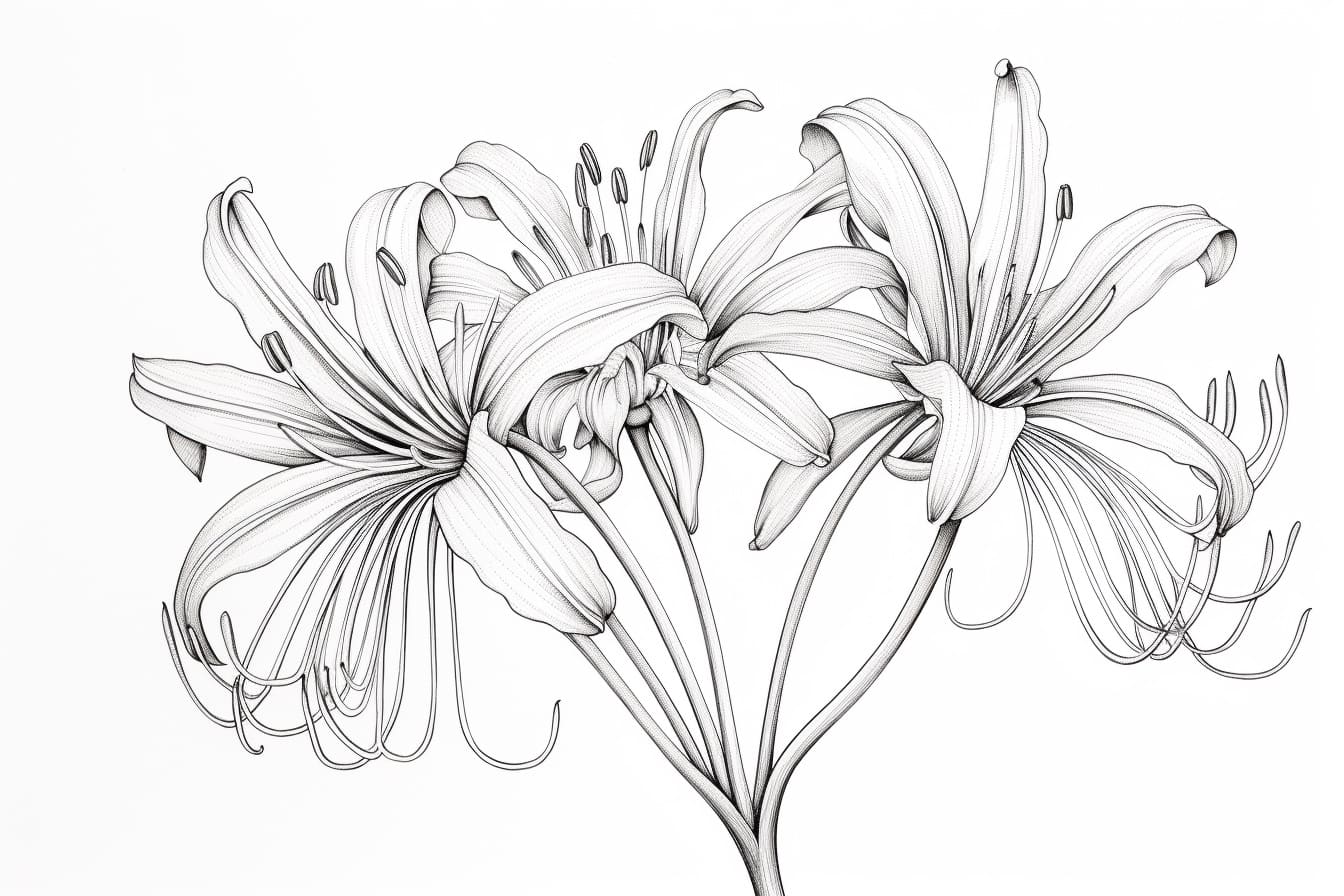
To accurately draw a spider lily, it’s crucial to observe and understand its structure. Take a close look at the flower, paying attention to its shape, petals, and overall form. Notice the unique characteristics that make the spider lily distinct, such as its long, slender petals and prominent stamens. By familiarizing yourself with these details, you’ll be better equipped to depict the flower realistically.
Step 2: Sketching the Basic Shape
Start by lightly sketching the basic shape of the spider lily. Begin with a long, curved vertical line that represents the stem. Then, draw a slightly rounded teardrop shape at the top of the stem to outline the flower’s bud. Keep your lines loose and light at this stage, as they are just guidelines for the final drawing.
Step 3: Outlining the Petals
Spider lilies typically have six petals, each with a slightly curved and tapering form. Draw these petals around the bud, radiating outward in a circular pattern. Remember to keep the lines light and fluid, as you can refine them later. Don’t worry about perfect symmetry – nature is full of beautiful imperfections.
Step 4: Adding Details to the Petals
Now that the basic shape is complete, it’s time to add details to the petals. Spider lilies are characterized by their long, pointed petals. Extend the lines of each petal, making them gradually narrower towards the tips. Add subtle curves to give them a more organic and natural appearance. Remember to vary the length and shape of the petals for a realistic effect.
Step 5: Creating Texture
To make your spider lily drawing more realistic, add texture to the petals. Spider lilies have a delicate, papery texture. Use short, gentle strokes to create lines and creases across each petal. Pay attention to the direction of the strokes and follow the natural flow of the flower’s form. This technique will add depth and dimension to your drawing.
Step 6: Drawing the Stamen
Spider lilies have prominent stamens that protrude from the center of the flower. To draw these, start by lightly sketching several thin lines stemming from the center of the bud. Then, add small oval shapes at the tip of each line to represent the anthers. These anthers are often bright orange or yellow, providing a beautiful contrast to the white petals.
Step 7: Refining the Drawing
Take a step back and assess your drawing. Now is the time to refine and clean up any areas that need improvement. Use an eraser to erase any unnecessary lines or smudges. Enhance the shape of the petals and smooth out any rough edges. Pay close attention to the details and make any necessary adjustments to achieve a more accurate representation of the spider lily.
Step 8: Inking (optional)
If you wish to give your drawing a more finished and polished look, grab a fine-tipped black pen and carefully outline your drawing. Ink over the main lines, adding weight and definition. Be mindful of the pressure you apply to create variation in line thickness, emphasizing the contours of the flower. This step is optional but can add a professional touch to your artwork.
Step 9: Adding Shadows and Highlights
To create depth and make your drawing pop, add shadows and highlights. Determine the direction of the light source and imagine where the shadows would fall. Use your pencils to lightly shade areas that would be in shadow, such as the underside of the petals and the gaps between the stamens. Add gentle highlights with an eraser on areas that catch the light, such as the edges of the petals.
Step 10: Coloring (optional)
If you prefer to add color to your drawing, grab your colored pencils or watercolor paints and bring your spider lily to life! Spider lilies are typically white but can have shades of pink or red. Use light, delicate strokes to layer colors, gradually building up the desired hue. Pay attention to the subtle shifts in color within the petals to capture the natural beauty of the flower.
Conclusion
Congratulations on completing your spider lily drawing! By following these step-by-step instructions, you have learned how to observe, sketch, refine, and add details to create a realistic representation of this captivating flower. Remember, practice makes perfect, so keep honing your skills and exploring your creativity. Now it’s time to sit back, admire your artwork, and enjoy the beauty of the spider lily you’ve brought to life on paper!