Welcome to this step-by-step guide on how to draw a tiger lily! In this tutorial, I will walk you through the process of creating a beautiful and realistic representation of this vibrant flower. Whether you’re a beginner or an experienced artist, you’ll find these instructions clear and easy to follow. So let’s grab our materials and get started!
Materials Required:
Here are the materials you will need to draw a tiger lily:
- Pencil: Use a graphite pencil with a range of hardness, such as 2B, 4B, and 6B.
- Paper: Choose a smooth and sturdy paper suitable for drawing, such as drawing paper or mixed media paper.
- Eraser: Have a kneaded eraser and a regular eraser handy for making corrections.
- Blending Stump or Tortillon: This tool is useful for blending and smudging pencil lines to create smooth transitions.
- Colored Pencils (optional): If you wish to add color to your drawing, have a set of colored pencils ready.
Now that we have our materials prepared, let’s dive into the step-by-step process of drawing a tiger lily.
Step 1: Outline the Basic Shape
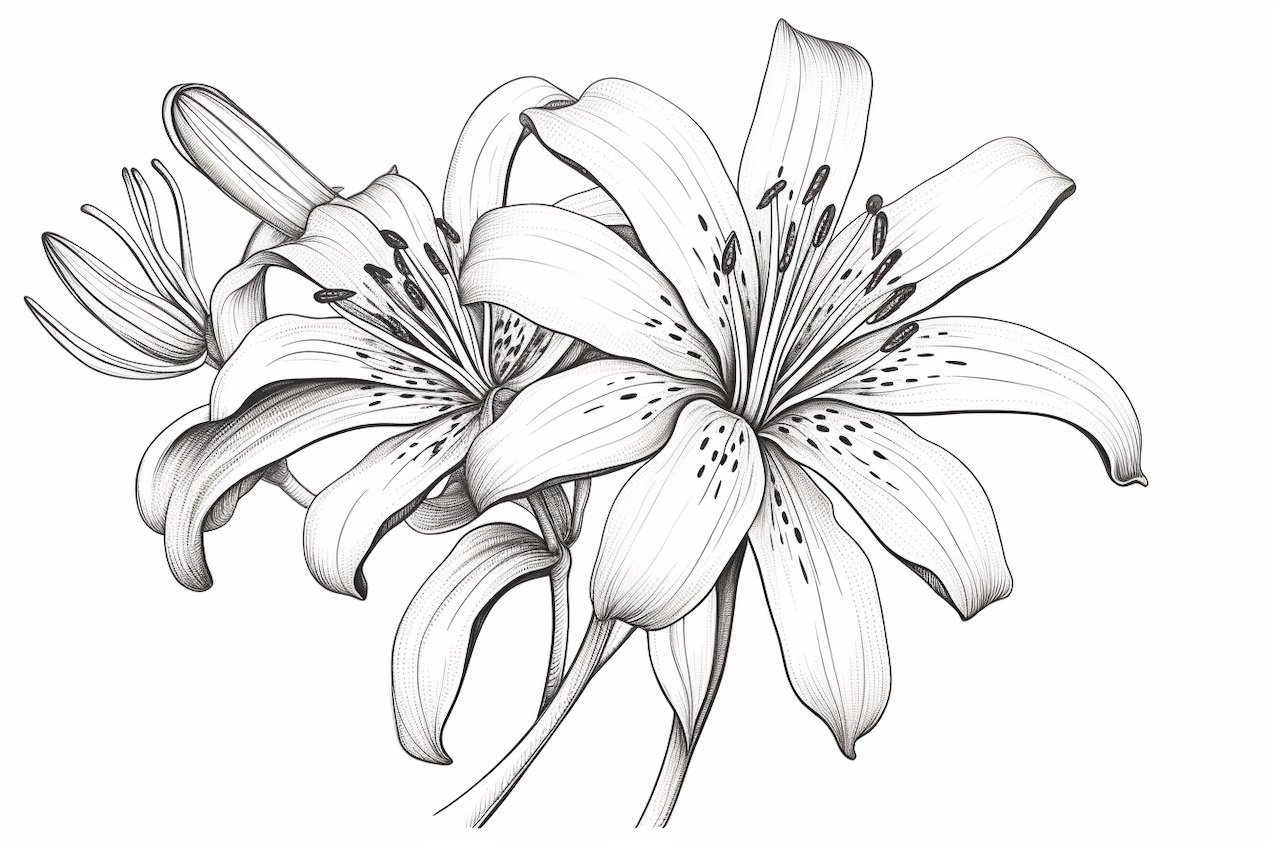
Start by lightly sketching the basic shape of the tiger lily using your pencil. Begin with a long, curved vertical line for the stem, and at the top, draw a large oval for the flower’s head. Add a slightly curved line at the bottom of the oval to indicate the petals’ base.
Step 2: Draw the Petals
Next, we’ll focus on drawing the petals. Tiger lilies have six petals that flare outwards from the center. Begin by drawing two slightly curved lines that connect the base of the oval to the stem. These lines will serve as the outlines of the first two petals.
Now, add the remaining four petals by drawing inverted “U” shapes between the ones you’ve just created. Make sure the petals overlap, giving the flower a natural and three-dimensional appearance.
Step 3: Add Detail to the Petals
To make our tiger lily more realistic, we need to add some details to the petals. Start by sketching short lines along the edges of each petal, following their natural curves. These lines will represent the lily’s distinct veins.
Next, add some texture to the petals by lightly shading them with your pencil. Use short, feathery strokes that follow the contour of each petal. Remember to shade darker on the inner side where shadows would naturally appear.
Step 4: Create the Stigma and Stamen
Moving on to the center of the flower, draw the stigma by creating a small, elongated oval shape near the top of the oval head. Inside the stigma, sketch a few tiny lines to represent its texture.
Then, add the stamen by drawing a group of small, curved lines extending from the center of the stigma. These lines should be slightly longer than the stigma itself.
Step 5: Define the Stem
Now let’s give our tiger lily a stem! Begin by adding a few irregular vertical lines to the stem, giving it a rough and organic look. Then, draw a few horizontal lines intersecting the stem to represent the lily’s leaves. Each leaf should have a long and slender shape with a pointed tip.
Step 6: Refine the Drawing
Take a step back and evaluate your drawing so far. Look for any areas that may need adjustment or refinement. Use your eraser to erase any unwanted pencil lines and make any necessary corrections.
Step 7: Optional: Add Color
If you want to add color to your drawing, now is the time to do so. Use colored pencils to bring your tiger lily to life. Observe the vibrant orange hues of a tiger lily and carefully apply the colors to the petals, ensuring smooth transitions and shading.
Conclusion
Congratulations! You have successfully drawn a beautiful tiger lily. By following these step-by-step instructions, you have learned the techniques to create a lifelike representation of this stunning flower. Remember to practice and experiment with different shading techniques to further enhance your skills as an artist.
We hope you enjoyed this tutorial on how to draw a tiger lily. Keep exploring the world of art, and let your creativity bloom like a tiger lily! Happy drawing!