Drawing shoulders can be a challenging task, especially for beginners. However, understanding the basic structure and following a step-by-step approach can make the process much easier. In this article, we will guide you through the necessary steps and techniques to draw realistic and well-proportioned shoulders. By the end of this tutorial, you will have the skills and confidence to draw shoulders with ease. So, let’s get started!
Materials Required
To begin drawing shoulders, you will need the following materials:
- Drawing paper: Choose a smooth and sturdy paper that can handle pencil or pen strokes without tearing easily.
- Pencils: Have a range of pencils with different grades, such as 2B, 4B, and 6B. These will allow you to create varied tones and shading.
- Eraser: A kneaded eraser is recommended, as it can be molded into different shapes and provides precise erasing.
- Blending tools: You can use blending stumps, tortillons, or even cotton swabs to achieve smooth and seamless shading.
- Reference images: It is helpful to have visual references of shoulders and anatomy to study and understand the structure.
Now that you have gathered your materials, let’s dive into the step-by-step process of drawing shoulders.
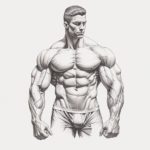
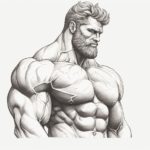
Step 1: Understanding the Anatomy
Before drawing any body part, it is crucial to have a basic understanding of its underlying anatomy. The shoulder is a complex joint composed of several bones, muscles, and ligaments. It consists of the clavicle (collarbone), scapula (shoulder blade), and the humerus (upper arm bone). Familiarize yourself with these structures by studying anatomical references, allowing you to understand how they relate to one another.
Step 2: Basic Construction Lines
Start by drawing a simple framework to establish the overall shape and position of the shoulders. Draw two oval shapes to represent the scapula bones, one on each side. These ovals should be slightly tilted and positioned symmetrically. Next, connect the scapula ovals with two curved lines to represent the collarbone. These lines should follow the natural curve of the shoulders.
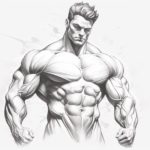
Step 3: Adding Volume and Shape
Now that you have the basic framework, it’s time to add volume to the shoulders. Think of the shoulders as three-dimensional forms rather than flat shapes. Start by adding rounded forms to the scapula bones, using soft curves to give them a realistic appearance. Then, add volume to the collarbone by making it slightly thicker towards the center and tapering towards the ends.
Step 4: Establishing the Shoulder Width
To determine the width of the shoulders, imagine a vertical line in the middle of the body. Generally, the shoulders should be approximately two heads wide. Use this proportion as a guideline to draw the outer edges of the shoulders, making sure they are symmetrical.
Step 5: Adding Muscles and Details
To make the shoulders look more realistic, it’s important to add the major muscles and details. Some key muscles to include are the deltoids, trapezius, and pectoralis major. Study the anatomy of these muscles and their placement on the shoulder to accurately depict them in your drawing. Pay attention to the curves and contours of the muscles, as they will contribute to the overall shape of the shoulder.
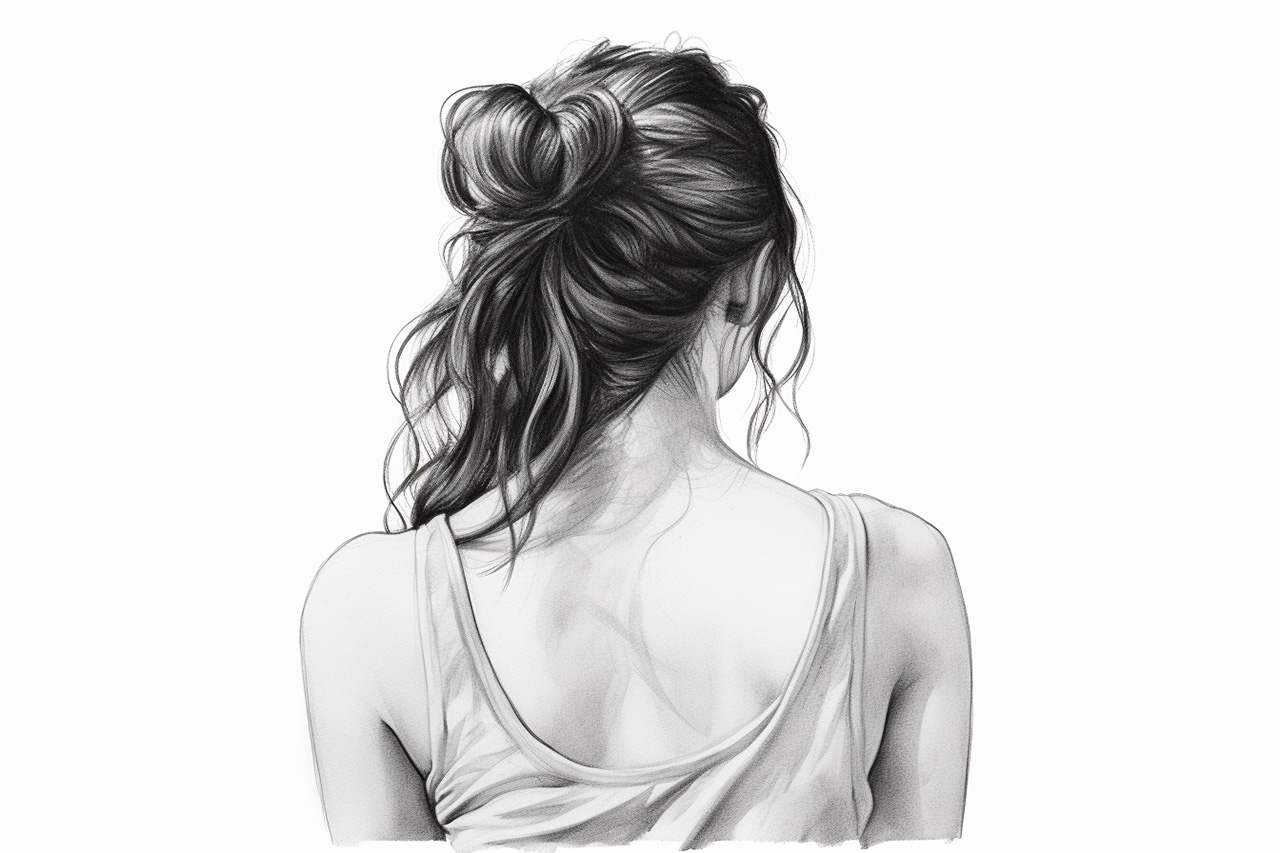
Step 6: Shading and Texturing
Now that you have the underlying structure and details in place, it’s time to add shading and texture to your drawing. Start by determining the direction of the light source and create areas of light, shadow, and mid-tones accordingly. Use your range of pencils to create gradual transitions between these tonal values, giving depth and dimension to the shoulders. Don’t forget to blend the shaded areas using your blending tools to achieve a smooth and realistic appearance.
Conclusion:
Drawing shoulders can be a daunting task, but with practice and an understanding of the underlying anatomy, it becomes more accessible. By following the step-by-step instructions provided in this article, you now have the knowledge and techniques to draw shoulders with confidence. Remember to study anatomy references, pay attention to detail, and practice regularly to improve your skills. With patience and perseverance, you will be able to create realistic and well-proportioned shoulders in your drawings.