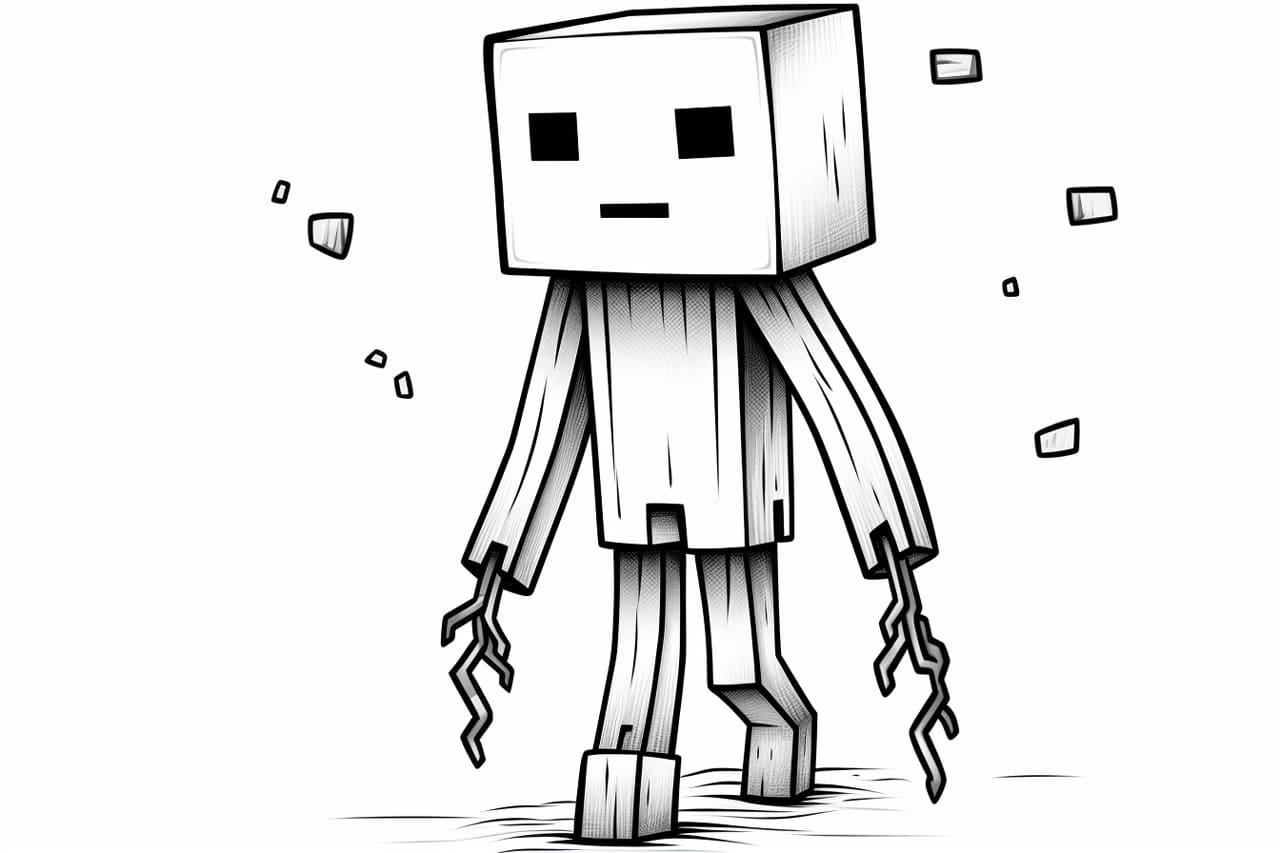
Welcome to this step-by-step guide on how to draw an Enderman! Whether a beginner or an experienced artist, this tutorial will help you create a detailed and accurate representation of this iconic Minecraft character. So grab your drawing supplies, and let’s get started!
Materials Required
Before we begin, make sure you have the following materials ready:
- Pencil
- Eraser
- Paper
- Fine tip black marker or pen
- Colored pencils or markers (optional)
Now that you have everything you need, let’s dive into the process of drawing an Enderman!
Step 1: Basic Shapes
Start by drawing a rough outline of the Enderman using basic shapes. Begin with a large rectangular shape for the head and a smaller rectangle for the body. Add two circles for the upper and lower parts of the legs. Don’t worry about the details at this stage, as we will refine them in the following steps.
Step 2: Head and Facial Features
Using the basic shape as a guide, start adding the details to the Enderman’s head. Draw the eyes as two elongated rectangles with rounded corners. Place them in the center of the head, leaving some space between them. Add a horizontal line across the middle of the head to create the separation between the eyes and the mouth. Draw the mouth as a straight horizontal line below this separation line.
Step 3: Body and Arms
Refine the shape of the body by adding more curves and angles to create the Enderman’s trademark tall and slender appearance. Connect the upper and lower parts of the legs with two diagonal lines on each side to form the arms. Draw the hands as simple rectangles at the ends of the arms.
Step 4: Legs and Feet
Complete the legs by adding more details. Draw the lower parts of the legs as rectangular shapes that gradually become narrower towards the bottom. Add small rectangular shapes at the bottom for the Enderman’s feet.
Step 5: Details and Texture
Now it’s time to add some texture and details to our drawing. Start by erasing any unnecessary lines and refining the overall shape of the Enderman. Add some short, jagged lines around the head and body to represent the blocky texture of its appearance.
Step 6: Face and Eyes
Focus on the facial features of the Enderman. Draw the pupils as two small squares inside the eyes. Add shading around the eyes to give them a more intimidating look. Darken the area around the mouth to emphasize its rectangular shape.
Step 7: Clothing and Accessories
Enhance the appearance of the Enderman by adding some clothing and accessories. Draw a loose-fitting cloak around its body, using curved lines to create a flowing effect. Add a simple belt around its waist and give the Enderman a blocky object, such as a dirt block, to hold in one hand.
Step 8: Final Details and Outlining
Before we move on to the final step, take a moment to refine any remaining details and clean up the drawing. Erase any unnecessary lines and smoothen out any rough edges. Once you’re satisfied, use a fine tip black marker or pen to trace over the final lines of your drawing. This will make it stand out and give it a professional finish.
Step 9: Coloring (optional)
If you prefer a colored drawing, now is the time to bring it to life. Use colored pencils or markers to add your desired colors to the Enderman. You can keep it simple and use shades of gray, or get creative and experiment with different colors. Refer to the Minecraft game for inspiration or add your own unique twist.
And there you have it! You have successfully drawn an Enderman from Minecraft. Feel free to experiment, add your personal touch, and have fun with your artwork.
Conclusion
Drawing an Enderman may seem challenging at first, but with the help of this step-by-step tutorial, you can create an impressive representation of this iconic Minecraft character. Remember to take your time, practice, and enjoy the process. Keep your creativity flowing and experiment with different techniques to make your drawing unique. With these skills, you can create amazing Minecraft-themed artwork. Happy drawing!