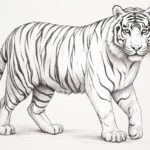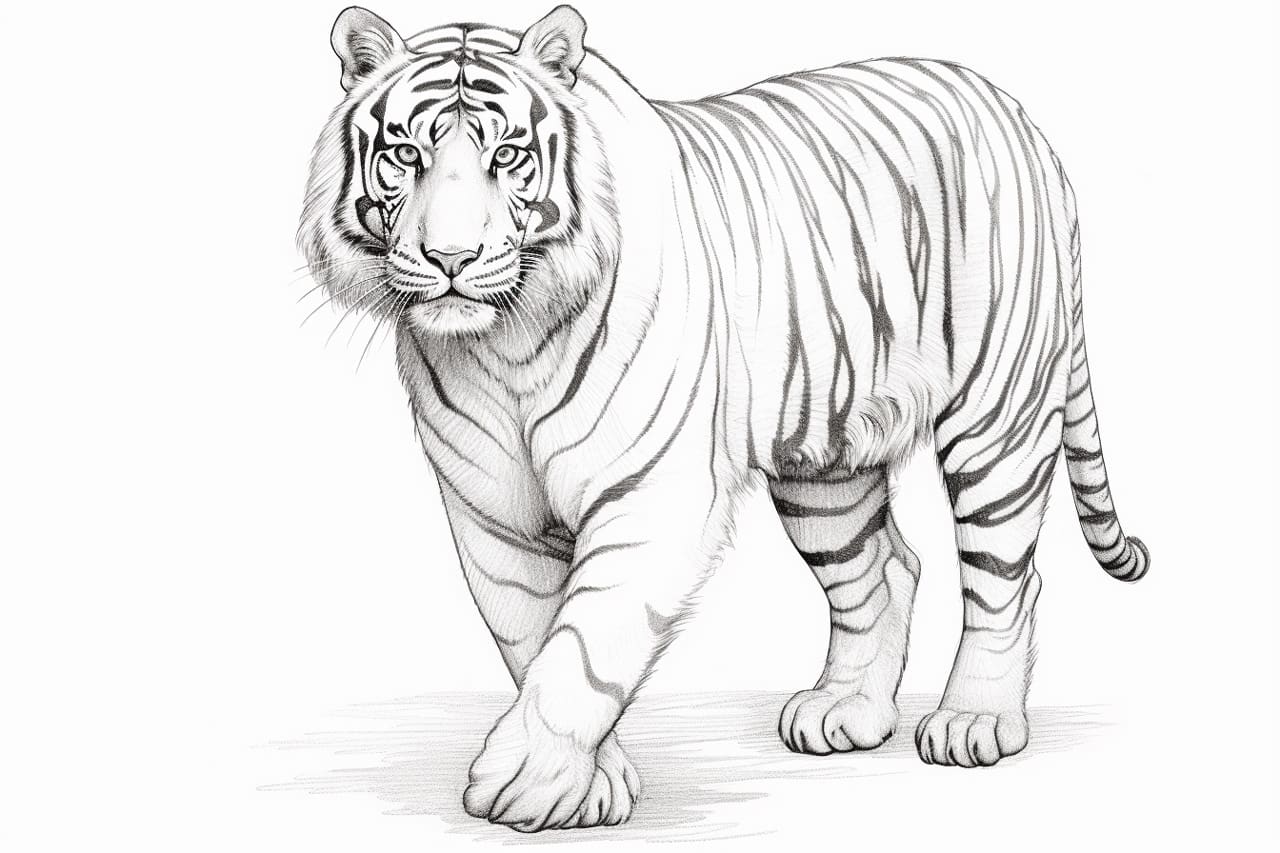
Welcome to this step-by-step guide on how to draw a white tiger. Tigers are majestic and powerful creatures, and capturing their beauty on paper can be an exciting challenge. In this tutorial, I will walk you through the process of drawing a white tiger, from sketching the basic structure to adding realistic details. So grab your drawing materials and let’s get started!
Materials Required
Before we begin, let’s gather the materials you’ll need for this drawing. Here’s a list of what you’ll need:
- Drawing paper or sketchbook
- Pencil set (preferably with HB, 2B, and 4B)
- Eraser
- Blending stumps or cotton swabs
- Charcoal pencils (optional, for shading)
Now that we have everything we need, let’s begin our drawing!
Step 1: Sketch the Basic Shapes
Start by lightly sketching the basic shapes that will serve as the foundation for your white tiger drawing. Begin with a large circle for the head and a smaller circle attached to it for the body. Add simple lines to indicate the tiger’s spine, limbs, and tail. Don’t worry about adding details at this stage, as this is just a rough guideline for the overall proportions.
Step 2: Refine the Body Shape
Using the basic shapes as a guide, refine the body shape of the tiger. Add curves to define the muscles and joints. Pay attention to the placement and size of the limbs, ensuring they are proportionate and in the desired position. Take your time with this step, as getting the body shape right will greatly contribute to the overall realism of your drawing.
Step 3: Add Facial Features
Next, it’s time to focus on the tiger’s face. Start by sketching the eyes, using almond shapes with smaller circles inside for the pupils. Add a triangular shape for the nose and a vertical line for the mouth. Don’t forget to indicate the position of the ears as well. Take note of the angle and placement of these features to capture the tiger’s expression accurately.
Step 4: Define the Fur
Now that the basic structure is in place, it’s time to start adding details, starting with the fur. Tigers have unique fur patterns, so observe reference images or photographs to get an idea of the direction and shape of the fur. Use short, curved lines to indicate the fur texture, focusing on the areas around the face and neck. Gradually add more fur details to the body, keeping in mind the direction of the muscles underneath.
Step 5: Refine the Facial Features
With the fur details in place, it’s time to refine the facial features. Add more depth to the eyes by darkening the pupils and sketching the surrounding areas. Pay attention to the placement of the eyebrows and the shape of the nose and mouth. Tigers have distinct facial markings, so take your time to capture these patterns accurately.
Step 6: Shade and Add Depth
To bring your white tiger drawing to life, it’s important to add shading and depth. Start by lightly shading the areas that are in shadow, such as the underside of the tiger’s body and the areas between the fur. Use a blending stump or a cotton swab to blend the shading and create a smooth transition between light and dark areas. Gradually build up the shading, adding more depth and contrast to your drawing.
Step 7: Add Final Details
In this final step, add any remaining details to your drawing. Pay attention to the smaller features, such as the whiskers, the texture of the nose, and the shape of the ears. Take a step back and assess your drawing as a whole. Make any necessary adjustments to ensure accuracy and balance in your composition.
Conclusion
Congratulations on completing your white tiger drawing! Capturing the grace and beauty of these animals on paper is truly a rewarding experience. Remember, practice makes perfect, so don’t be afraid to try again and again to improve your skills. With each drawing, you’ll continue to grow as an artist.
I hope you found this tutorial helpful in guiding you through the process of drawing a white tiger. Remember to have fun and enjoy the journey of creating art. Happy drawing!