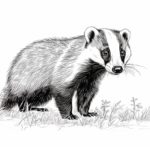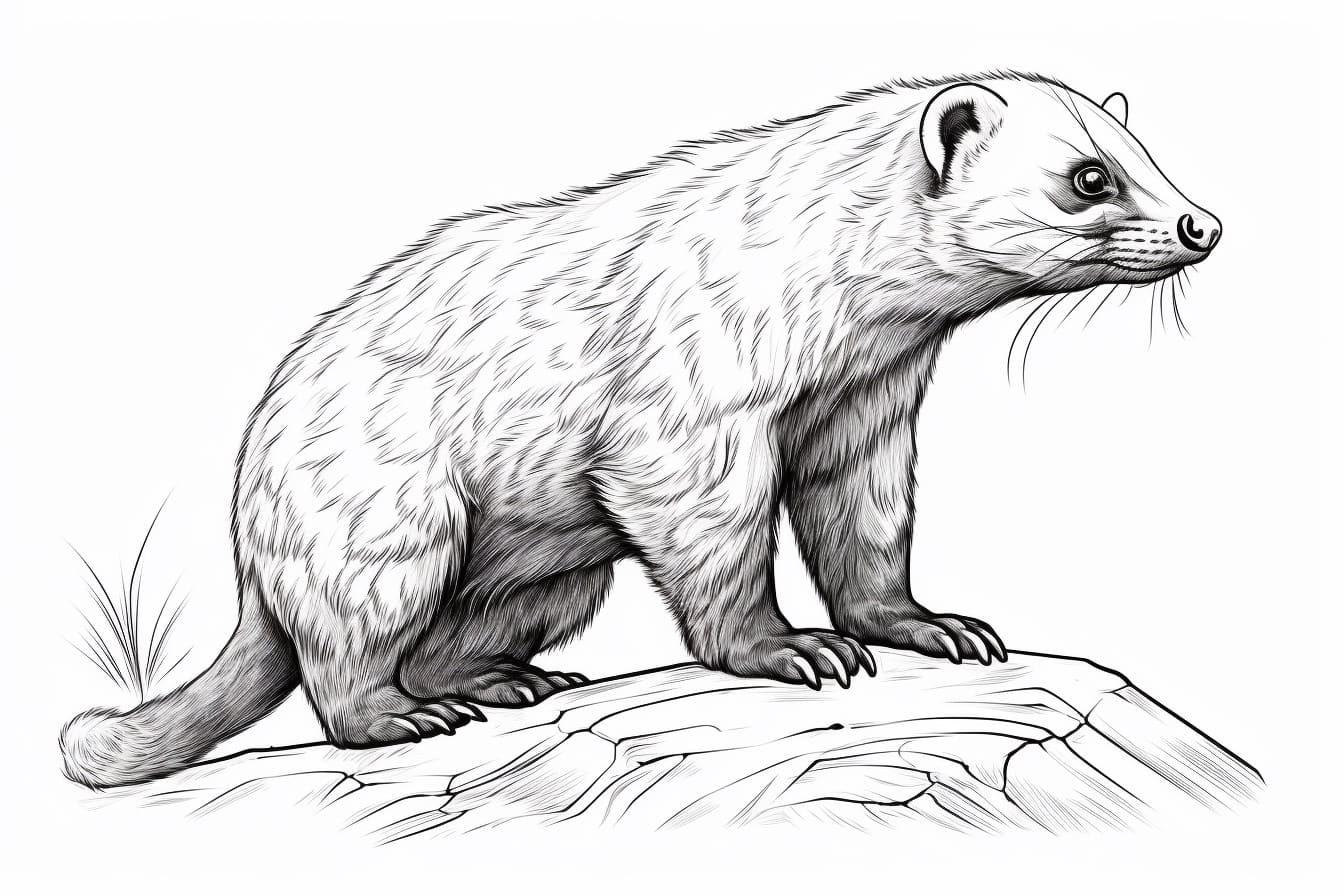
Welcome to this step-by-step guide on how to draw a honey badger! Whether you are a beginner artist looking to improve your skills or an experienced artist seeking a new challenge, this tutorial will help you create a realistic and detailed depiction of this fascinating animal. So, grab your drawing materials and let’s get started!
Materials Required
Before we begin, make sure you have the following materials at hand:
- Drawing paper
- Pencil (preferably an HB or 2B)
- Eraser (preferably a kneaded eraser)
- Fine-tip black marker or pen
- Colored pencils or markers (optional)
- Reference photo of a honey badger (for inspiration and accuracy)
Now that we have our materials ready, let’s dive into the step-by-step process of drawing a honey badger!
Step 1: Basic Shapes
Begin by lightly sketching the basic shapes that form the honey badger’s body. Start with a circle for the head and then add an oval shape for the body, slightly overlapping the head. Next, draw a rounded rectangle for the honey badger’s muzzle and a long oval for the tail.
Step 2: Facial Details
Using the basic shapes as a guide, start adding the details of the honey badger’s face. Add two small circles for the eyes, slightly tilted towards each other. Then, draw a triangular-shaped nose in the middle of the muzzle, with two small nostrils. Add the mouth by drawing a curved line below the nose.
Step 3: Ears and Fur
Now, move on to drawing the honey badger’s ears. Start by adding two curved lines on top of the head, slightly tilted backward. Connect the ends of these lines with a curved shape to form the ears. Add some fur details around the ears and on top of the head by drawing short, curved lines.
Step 4: Body Structure
Refine the shape of the honey badger’s body by adding more curves and defining the muscle structure. Pay attention to the proportions and try to capture the unique shape of a real honey badger. Add the front legs by drawing two slightly curved lines coming out from the body shape.
Step 5: Legs and Claws
Continue sketching the honey badger’s legs. Add the hind leg by drawing a long curved line that connects to the body. Then, draw the front legs by extending the initial lines and forming the paws. Sketch the toes and add small curved lines to represent the claws.
Step 6: Tail and Fur Texture
Refine the shape of the honey badger’s tail by adding curves and small details. Make the tail look bushy by drawing short, overlapping lines. Add more fur texture details to the body as well, using short, curved lines to give the drawing a realistic feel.
Step 7: Facial Features
Now it’s time to focus on the honey badger’s facial characteristics. With a darker pencil or pen, trace over the initial sketch to bring out the features. Darken the eyes, adding some pupils for a more intense look. Define the nose and mouth by adding more details and texture.
Step 8: Final Touches
Clean up your drawing by erasing any unnecessary guidelines and smudges. Take a moment to refine any areas that need more attention, such as adding more fur texture or adjusting proportions. Once you are satisfied with your drawing, use colored pencils or markers to add color if desired.
Congratulations! You have successfully drawn a honey badger. Take a step back and admire your creation. Remember, practice makes perfect, so don’t be discouraged if your first attempt doesn’t turn out exactly as planned. Keep practicing and experimenting, and soon you’ll be able to draw honey badgers with ease.
Conclusion
In conclusion, drawing a honey badger is an exciting and rewarding experience. By following these step-by-step instructions and using reference photos, you will be able to create a realistic and detailed depiction of this fascinating animal. Remember to be patient with yourself and enjoy the process of learning and improving your drawing skills. Happy drawing!