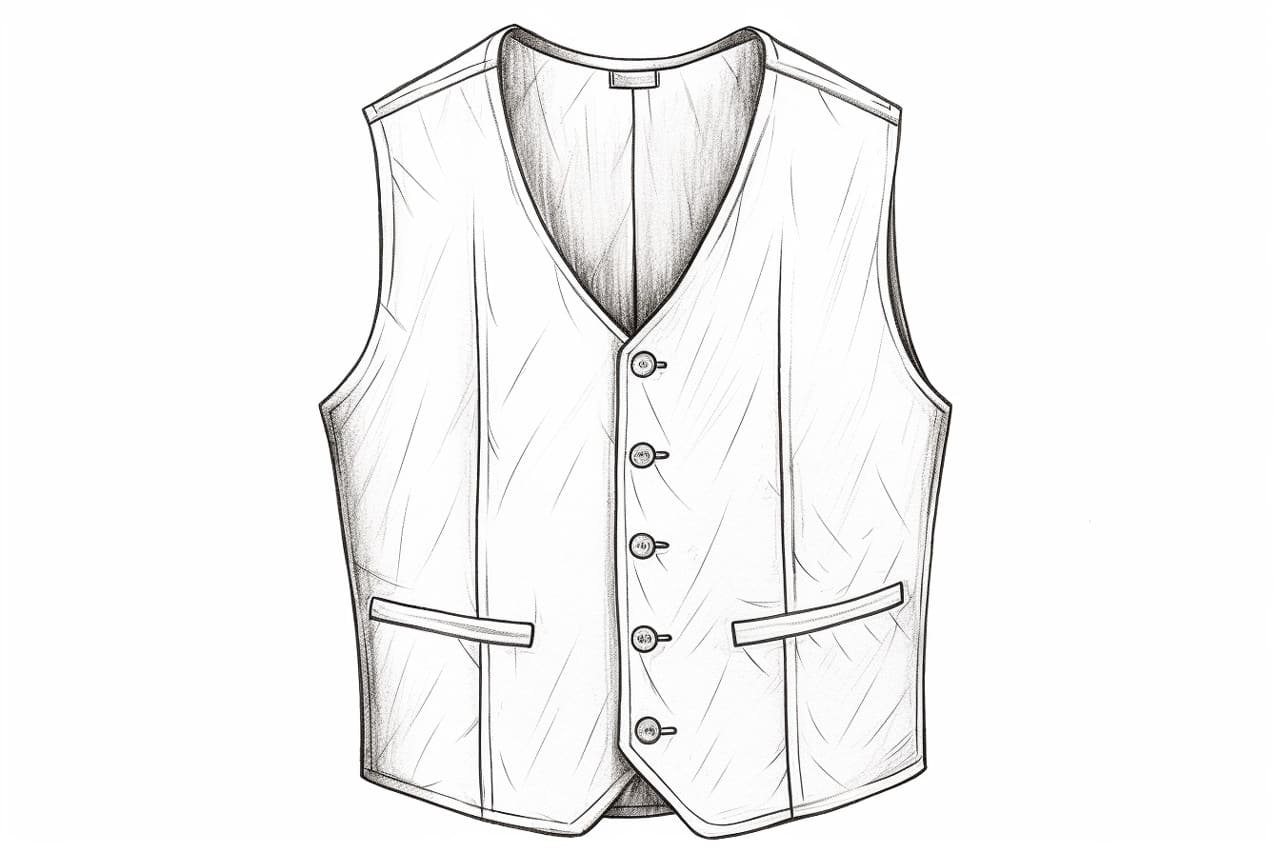
Welcome to this step-by-step guide on how to draw a vest! Whether you’re an experienced artist looking to expand your drawing repertoire or a beginner eager to learn, this tutorial will help you create a realistic and detailed vest illustration. So let’s get started!
Materials Required
To begin drawing a vest, you will need the following materials:
- Paper: Choose a smooth and sturdy paper that is suitable for drawing. A heavier weight paper such as bristol board or drawing paper works well.
- Pencil: Use a range of pencils, from soft to hard, to create various shades and textures.
- Eraser: Have a good quality eraser on hand to make corrections and clean up any stray lines.
- Ruler: A ruler will help you create straight lines and ensure symmetry in your drawing.
- Colored pencils or markers (optional): If you want to add color to your vest illustration, have some colored pencils or markers available.
Now that you have your materials ready, let’s move on to the steps involved in drawing a vest.
Step 1: Sketch the Basic Shape
Start by lightly sketching the basic shape of the vest. Draw a horizontal line slightly above the center of your paper to serve as a guideline for positioning the collar of the vest. Then, draw two vertical lines that intersect the horizontal line at the midpoint. These lines will define the front opening of the vest. Sketch lightly, as these initial lines will be erased later.
Step 2: Outline the Collar
Using the horizontal guideline as a reference, draw the outline of the collar. Begin by sketching two curved lines that slope downward from the top of the vertical lines. Connect these lines with a curved line at the bottom, forming the collar shape. Make sure the collar is symmetrical and centered on the vertical lines.
Step 3: Define the Shoulders
To create the shoulder lines, draw two slightly curved lines that extend outward from the top corners of the collar. These lines should slope downward and slightly outward, following the natural shape of the shoulders. Be mindful of maintaining symmetry between the left and right sides of the vest.
Step 4: Draw the Armholes
Below the shoulder lines, sketch two curved lines on each side to define the armholes. These lines should curve downward from the shoulder lines, creating an open space for the arms to pass through. The size and shape of the armholes may vary depending on the style of the vest you want to draw.
Step 5: Add Details to the Front Opening
Now it’s time to add some details to the front opening of the vest. Draw two parallel lines on each side of the vertical lines, starting from the top and ending at the bottom of the vest. These lines will represent the edges of the fabric that meet at the front opening. Add small horizontal lines near the bottom of the vest to indicate buttons or fasteners if desired.
Step 6: Define the Waistline and Hem
To create a realistic vest shape, draw a slightly curved line across the front and back of the vest to define the waistline. This line should be positioned slightly above the halfway point between the bottom of the collar and the bottom of the vest. Then, draw another curved line at the bottom of the vest to represent the hem.
Step 7: Refine the Shape and Proportions
Take a moment to review your sketch and make any necessary adjustments. Erase any unwanted lines and refine the shape of the vest by adding more definition to the collar, shoulders, and armholes. Pay attention to the overall proportions to ensure a balanced and visually appealing drawing.
Step 8: Add Texture and Details
To make your vest illustration more realistic, add texture and details. Use light shading to create depth and dimension by adding shadows and highlights to different areas of the vest. Pay attention to the fabric’s folds and wrinkles, and use your reference material (if available) to capture the specific details of the vest you are drawing.
Conclusion
Congratulations! You’ve successfully learned how to draw a vest. By following these step-by-step instructions and using your creativity, you can create beautiful vest illustrations. Remember to practice regularly to improve your skills and experiment with different styles. Happy drawing!