Welcome to this step-by-step tutorial on how to draw a button-up shirt. Drawing clothing can be a fun and rewarding experience, and with a little practice, you can create realistic and detailed illustrations. In this guide, we will break down the process into simple and easy-to-follow steps that will help you draw a button-up shirt with confidence.
Materials Required
Before we get started, let’s gather the materials you’ll need for this drawing tutorial:
- Pencil
- Eraser
- Drawing paper
- Ruler
- Colored pencils or markers (optional)
Now that you have your materials ready, let’s begin!
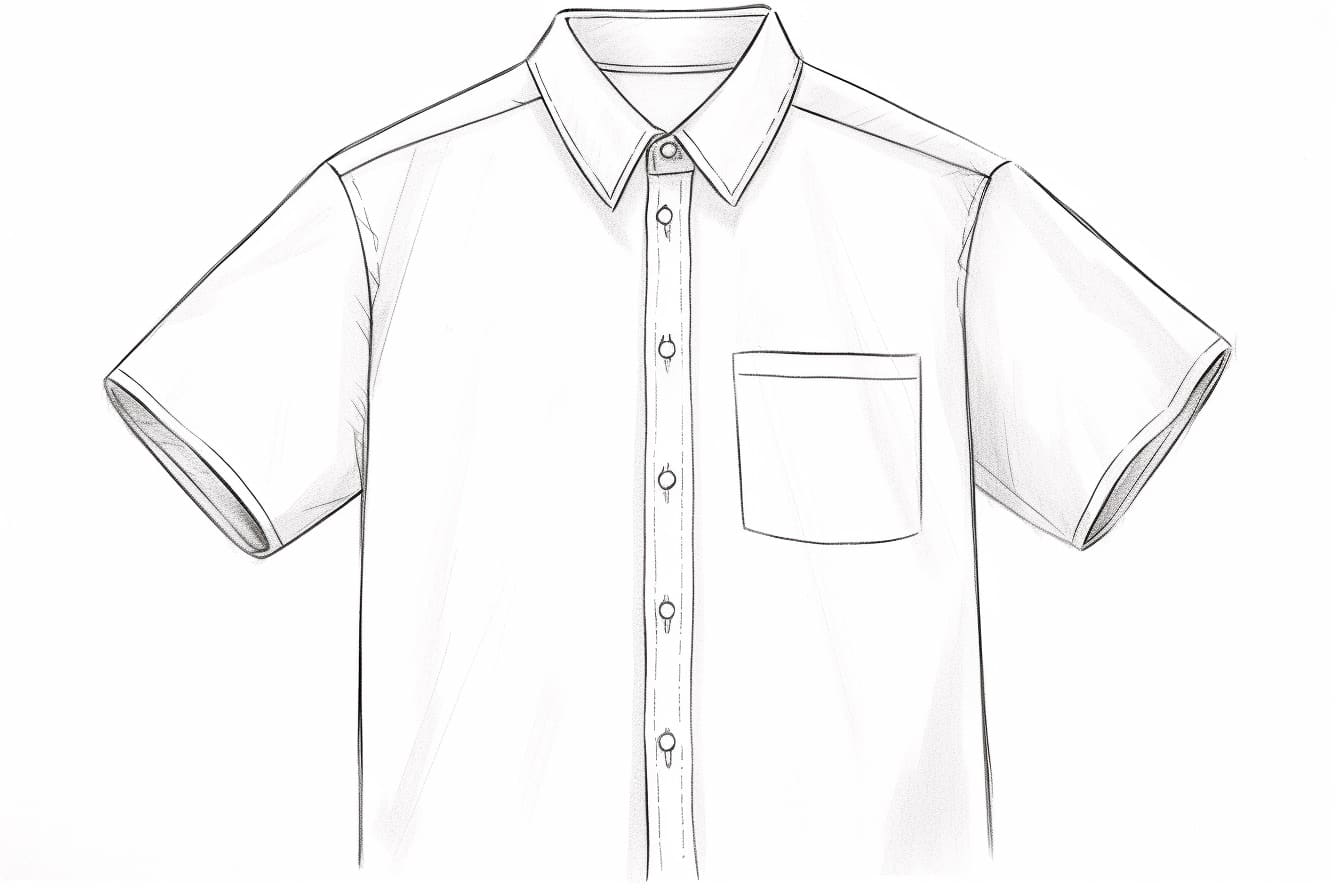
Step 1: Draw the Basic Outline
Start by drawing a vertical line in the center of your paper. This line will be the guideline for the shirt’s front. Next, draw a horizontal line slightly below the center to represent the shoulder line. The length of this line will determine the shirt’s neckline. Use a ruler to ensure the lines are straight and proportionate.
Step 2: Sketch the Collar and Shoulders
At the top of the vertical line, draw a curved line on each side to represent the collar. Connect these lines to the shoulder line to form the top part of the shirt. Next, draw two diagonal lines from the shoulder line downward to create the shirt’s sleeves.
Step 3: Define the Shirt’s Shape
To give the shirt more definition, draw curved lines starting from the shoulder line down to the waistline. These lines will create the shirt’s side seams. Make sure the lines are slightly curved to mimic the shape of a person’s body.
Step 4: Add Buttons and Buttonholes
Draw small vertical lines on one side of the shirt’s front to represent the buttonholes. The number of buttonholes will depend on the size of the shirt and personal preference. Next, draw small circles on the opposite side of the buttonholes to represent the buttons. These circles should align with the buttonholes.
Step 5: Draw the Shirt’s Sleeves
Start by drawing a small curve at the end of each sleeve to represent the cuffs. From the cuffs, draw two parallel lines extending upward to indicate the sleeves. Make sure the sleeves are evenly proportioned and flow naturally from the shoulders.
Step 6: Add Details to the Collar and Cuffs
To make the collar more realistic, draw a diagonal line on each side of the collar, connecting it to the front of the shirt. This will create the collar stand. For the cuffs, draw small lines across the sleeve to indicate the folds.
Step 7: Finalize the Design
Now it’s time to add your personal touch to the shirt. You can add patterns, pockets, or any other details you’d like. This is where your creativity can shine. Take your time and experiment with different textures and designs to make the shirt unique.
Conclusion
Drawing a button-up shirt may seem challenging at first, but with practice and patience, you can master this skill. By following these step-by-step instructions, you can create a realistic and detailed illustration of a button-up shirt. Remember to use light pencil strokes and take breaks when needed. Enjoy the process and have fun exploring your artistic abilities!