Drawing a trench coat may seem challenging, but with the right techniques, anyone can create a stylish and detailed illustration. In this step-by-step guide to how to draw a trench coat, we will explore the process of drawing a trench coat, from the initial sketch to the final shading. Whether you’re an aspiring fashion illustrator or simply looking to enhance your drawing skills, this tutorial will provide you with the knowledge and guidance you need to bring a trench coat to life on paper.
Materials Required
Before we begin, gather the following materials:
- Pencil (preferably HB or 2B)
- Eraser
- Paper (any type of sketching paper will suffice)
- Ruler (optional, but useful for precise measurements)
Now that we have our materials ready, let’s dive into the process of drawing a trench coat.
Step 1: Outline the Basic Shape
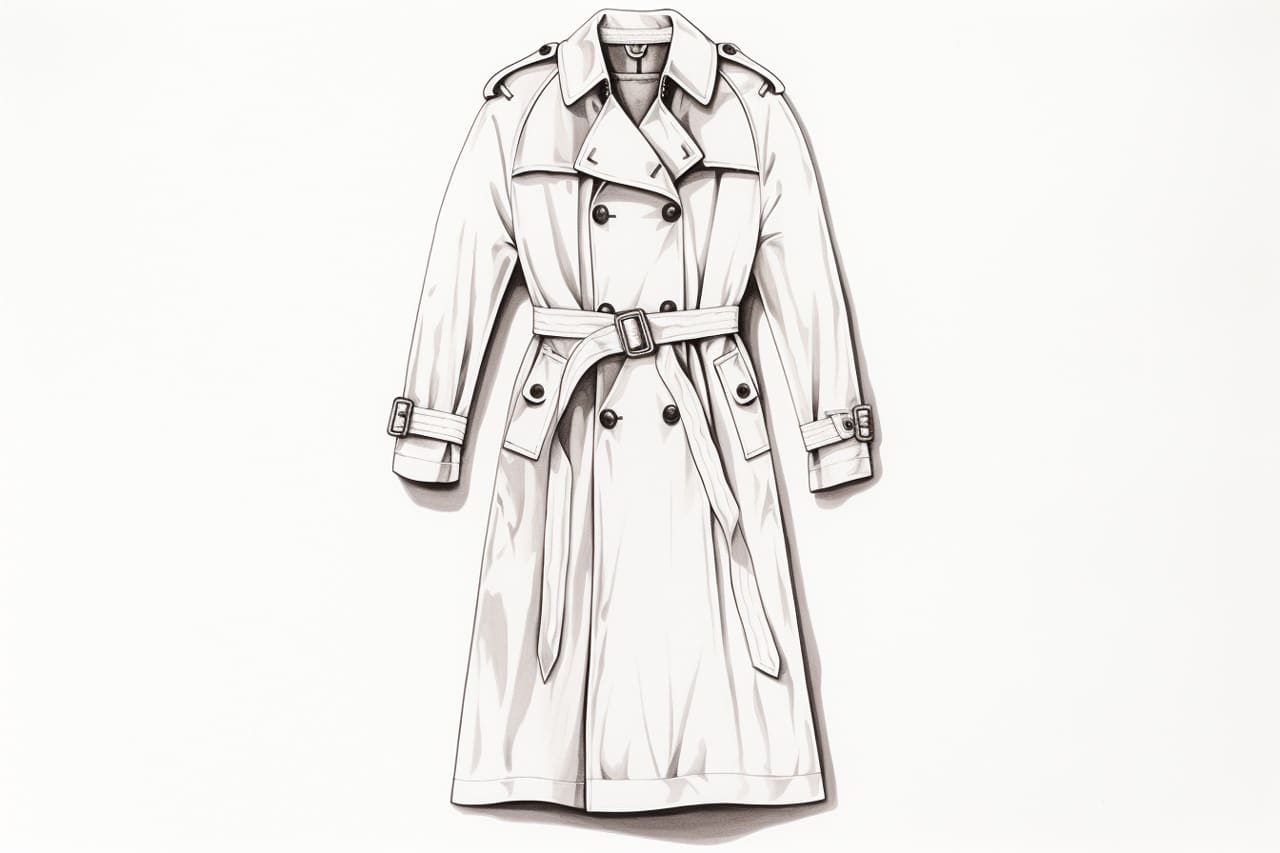
To start, lightly sketch a vertical line down the center of your paper. This line will serve as the guideline for the coat’s symmetry. Next, draw a horizontal line slightly below the center of the page. This line represents the waistline of the coat. Use light strokes to draw a trapezoidal shape extending from the waistline downwards, creating the outline of the coat’s torso.
Step 2: Add the Lapel and Collar
At the top of the coat’s torso, draw a curved line on each side, starting from the center guideline and extending outward. These lines will form the lapels of the trench coat. Connect the ends of the lapels with a curved line, creating the collar. Ensure that the collar wraps around the neck and extends towards the shoulders on each side.
Step 3: Sketch the Shoulders and Sleeves
From the top of the collar, draw two slightly curved lines that extend diagonally outward. These lines represent the shoulders of the coat. Add two parallel lines on each side, starting from the shoulder level and extending downwards. These lines form the basic structure of the sleeves.
Step 4: Define the Waist and Hemline
Using a ruler, draw a horizontal line slightly below the waistline. This line will determine the position of the coat’s belt. Extend the vertical lines of the torso downwards, creating the shape of the coat’s skirt. Add a slightly curved line at the bottom, defining the hemline. Ensure that the hemline is longer in the back than in the front, as this is a characteristic feature of a trench coat.
Step 5: Refine the Shape and Details
Now that the basic structure is complete, it’s time to refine the sketch and add more details. Use bold, confident lines to outline the coat, emphasizing its shape and contours. Pay close attention to the lapels, collar, and sleeves, ensuring that they follow the natural curves and folds of the fabric. Erase any unwanted guidelines and adjust the proportions if necessary.
Step 6: Add Buttons and Pockets
Add buttons to the front to make the trench coat look more realistic. Draw small circles evenly spaced along the center line, starting from the collar and extending down to the hemline. Then, include pockets on each side of the coat’s torso. Draw rectangular shapes at the appropriate height, ensuring they align with the coat’s seams. You can sketch flaps over the pockets for added detail, giving them a three-dimensional appearance.
Step 7: Finalize the Drawing with Shading and Textures
To bring your trench coat illustration to life, it’s essential to incorporate shading and textures. Use cross-hatching or hatching techniques to add depth to the coat’s folds and creases. Pay attention to the areas where light and shadow interact, such as the collar and the sleeves. Additionally, you can create texture by lightly sketching horizontal lines across the coat’s fabric, giving it a woven appearance.
Conclusion
Drawing a trench coat may require some attention to detail, but with practice and patience, you can master this fashion illustration. By following the step-by-step instructions provided in this guide, you’ll be able to create a stylish and realistic rendition of a trench coat. Remember to focus on the fundamental shapes, proportions, and textures, and don’t hesitate to experiment with your techniques to add your unique touch to the final artwork. So grab your pencil and paper, and let’s start drawing a trench coat today!