Introduction
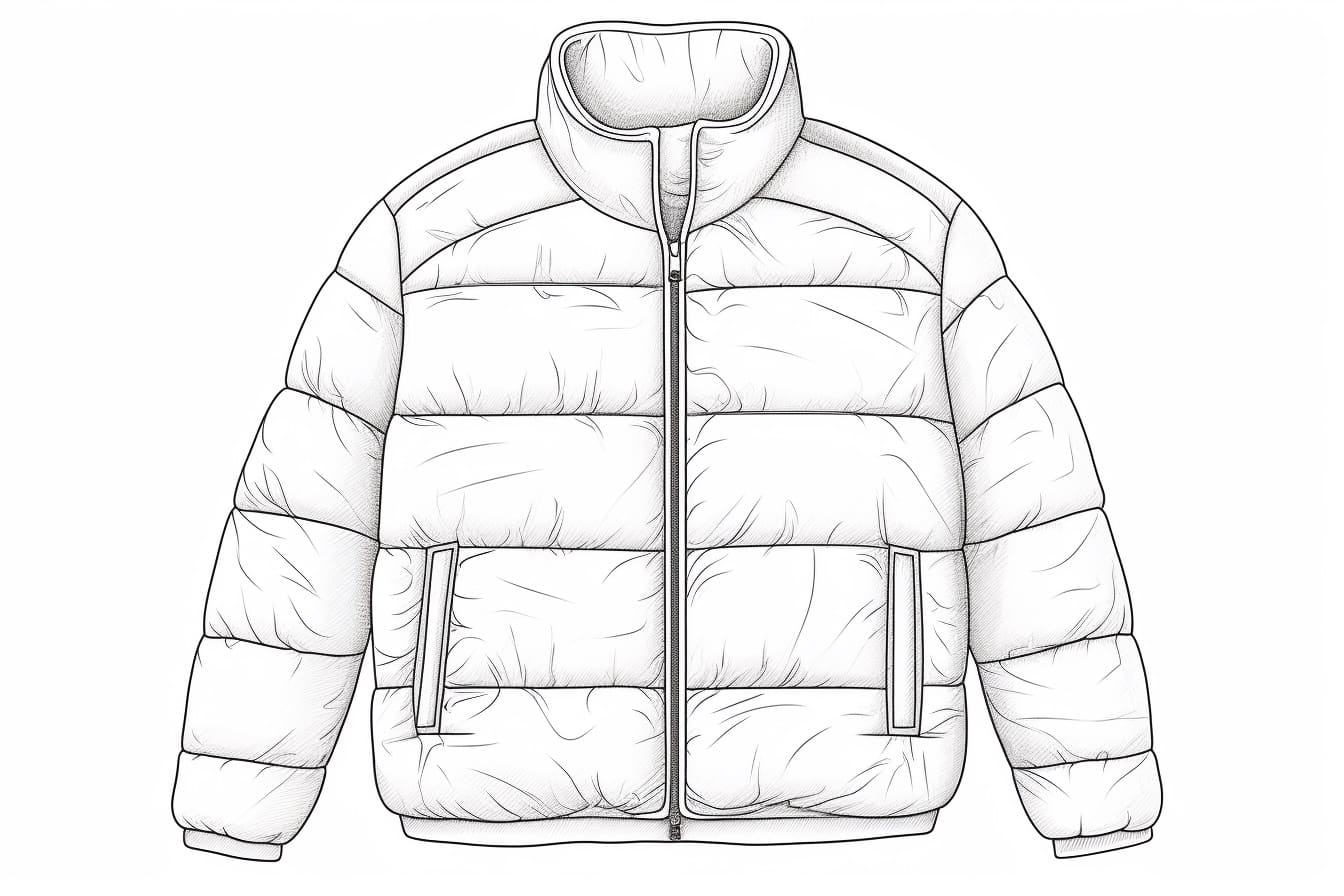
Welcome to this step-by-step guide on how to draw a puffer jacket! Puffer jackets are a popular and stylish choice for outerwear, known for their quilted design and cozy insulation. In this tutorial, I will walk you through the process of drawing a puffer jacket, providing clear and concise instructions. So, grab your drawing materials and let’s get started!
Materials Required
To complete this tutorial, you will need the following materials:
- A blank piece of paper
- Pencil or drawing pen
- Eraser
- Ruler
- Colored pencils or markers (optional)
Now that we have our materials ready, let’s dive into the steps of drawing a puffer jacket!
Step 1: Outline the Jacket Shape
Start by drawing a horizontal line slightly above the middle of your paper. This line will act as the neckline of the jacket. Next, draw two slightly curved lines downwards from each end of the neckline to create the shoulder seams. Now, draw a vertical line downwards from the end of each shoulder seam to represent the side of the jacket. Finally, connect the two vertical lines at the bottom with a slightly curved horizontal line to form the hem of the jacket.
Step 2: Draw the Collar
At the top of the neckline, draw two curved lines on each side, slightly flaring outwards. These lines will serve as the collar of the puffer jacket.
Step 3: Add the Quilting Details
Using your ruler, draw vertical lines across the entire surface of the jacket, evenly spaced apart. These lines will represent the quilted sections of the puffer jacket. Make sure the lines are parallel to each other for a neat and organized look.
Step 4: Create the Zipper
Positioned at the front center of the jacket, draw a vertical line that starts from the neckline and extends down to the desired length of the jacket. From the top of this line, draw a slightly curved horizontal line to create the zipper slider. Then, on each side of the vertical line, draw a series of small rectangular shapes to represent the teeth of the zipper.
Step 5: Draw the Sleeves
Starting from the shoulder seams, draw two curved lines that extend downwards and slightly outwards to represent the sleeve of the jacket. The length of the sleeves can vary depending on your preference. For a more accurate look, you can add small curved lines at the elbows to indicate the folding of the fabric.
Step 6: Add Pockets
To create pockets on the jacket, draw two rectangular shapes on each side of the zipper line, starting from the bottom of the jacket and extending upwards to your desired height. Make sure the rectangles are parallel to the zipper line. You can also add smaller rectangular shapes within the pockets to depict the pocket openings.
Step 7: Enhance the Details
To make your puffer jacket look more realistic, add some extra details. You can draw horizontal lines across the quilted sections to enhance the texture. Additionally, you can add buttons, logos, or other embellishments to make your jacket unique.
Conclusion
Congratulations! You have successfully learned how to draw a puffer jacket. By following these step-by-step instructions, you can create a realistic representation of this fashionable outerwear piece. Feel free to experiment with different colors and patterns to customize your jacket drawing. Now, go ahead and showcase your drawing skills by creating amazing puffer jacket illustrations!

