Welcome to this step-by-step guide on how to draw a realistic track. Whether you’re an aspiring artist or just looking for a fun project, drawing a track can be a rewarding and enjoyable experience. In this article, I will walk you through each stage of the drawing process, from laying out the basic shapes to adding details and shading. So grab your pencil and let’s get started!
Materials Required
Before we begin, make sure you have the following materials on hand:
- Pencil (preferably HB or 2B)
- Eraser
- Ruler
- Drawing paper
Now that we have everything we need, let’s dive into the step-by-step process of drawing a track.
Step 1: Start with Basic Shapes
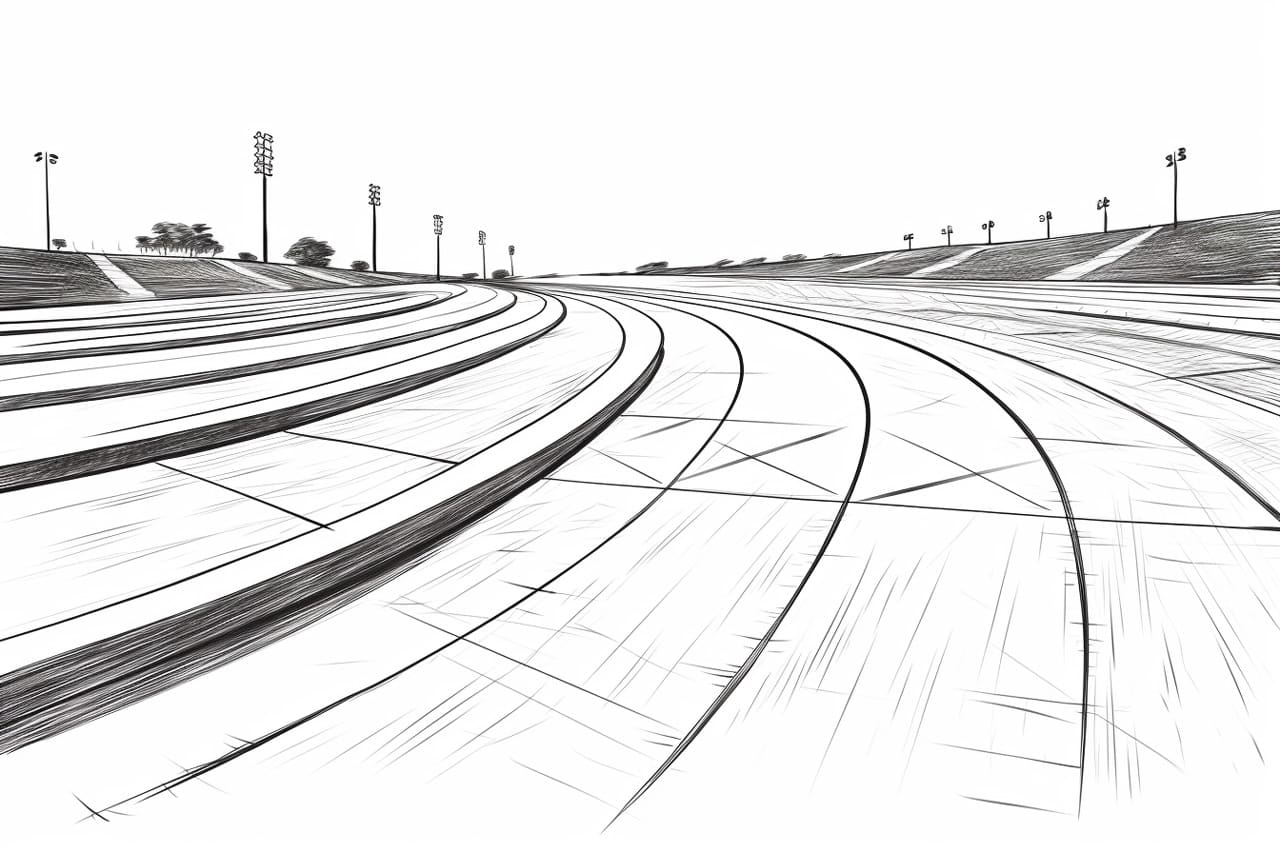
Begin by lightly sketching two straight lines that will act as the starting and finishing points of the track. These lines should be parallel and slightly curving towards each other, giving the impression of depth. Use a ruler to ensure the lines are straight.
Step 2: Draw the Outer Boundaries
Next, draw the outer boundaries of the track. Start from the starting point and draw a curved line that connects to the finishing point. This will form the outer edge of the track. Keep the curve smooth and symmetrical.
Step 3: Add the Inner Boundaries
Use the same technique as in Step 2 to draw the inner boundaries of the track. These lines should be parallel to the outer boundaries and slightly closer to the center. The width between the inner and outer boundaries will determine the width of the track.
Step 4: Create the Track Surface
Now it’s time to add the texture and details to the track surface. Start from one end of the track and draw short, curved lines across the width of the track. These lines should be close together and follow the curve of the track. Repeat this process until you cover the entire track surface.
Step 5: Draw the Lane Dividers
To give the track a more realistic look, draw lane dividers along the inner boundaries. These dividers will separate each lane on the track. Use short, straight lines and make sure they are evenly spaced.
Step 6: Add Details to the Track Surface
To make the track surface look more realistic, add various details such as tire marks, skid marks, and small stones. Use small, irregular shapes and lines to create these details. Pay attention to the areas where cars would naturally leave marks, such as turns and braking points.
Step 7: Shade the Track
To add depth and dimension to your drawing, it’s important to add shading. Determine the direction of the light source and shade the areas of the track that would be in shadow. Use light, circular motions with your pencil to create a smooth and even shading effect.
Step 8: Add Final Touches
Take a step back and evaluate your drawing. Look for any areas that may need adjustment or additional details. Use your eraser to lighten any lines that are too dark or correct any mistakes. Once you’re satisfied with your drawing, you’re ready to call it complete.
Conclusion
Congratulations! You’ve successfully learned how to draw a track. By following this step-by-step guide, you’ve created a realistic representation of a track with all its details and textures. Remember, practice makes perfect, so keep honing your drawing skills and explore different techniques to further enhance your artwork. Enjoy the process and have fun with your drawings!