Welcome, aspiring artists! In this step-by-step guide, I will show you how to draw Shrek, the lovable ogre. Shrek has captured the hearts of millions with his unique appearance and charming personality. By the end of this tutorial, you will be able to recreate the iconic ogre yourself. So, let’s grab our pencils and get started!
Materials Required
Before we begin, let’s gather all the materials you will need for this drawing tutorial. Don’t worry, nothing fancy is required—just the basics:
- Drawing paper or sketchbook
- Pencils (HB, 2B, 4B)
- Eraser
- Black ink pen (optional, for outlining)
- Colored pencils or markers (optional, for coloring)
Now that we have everything we need, let’s dive into the step-by-step instructions.
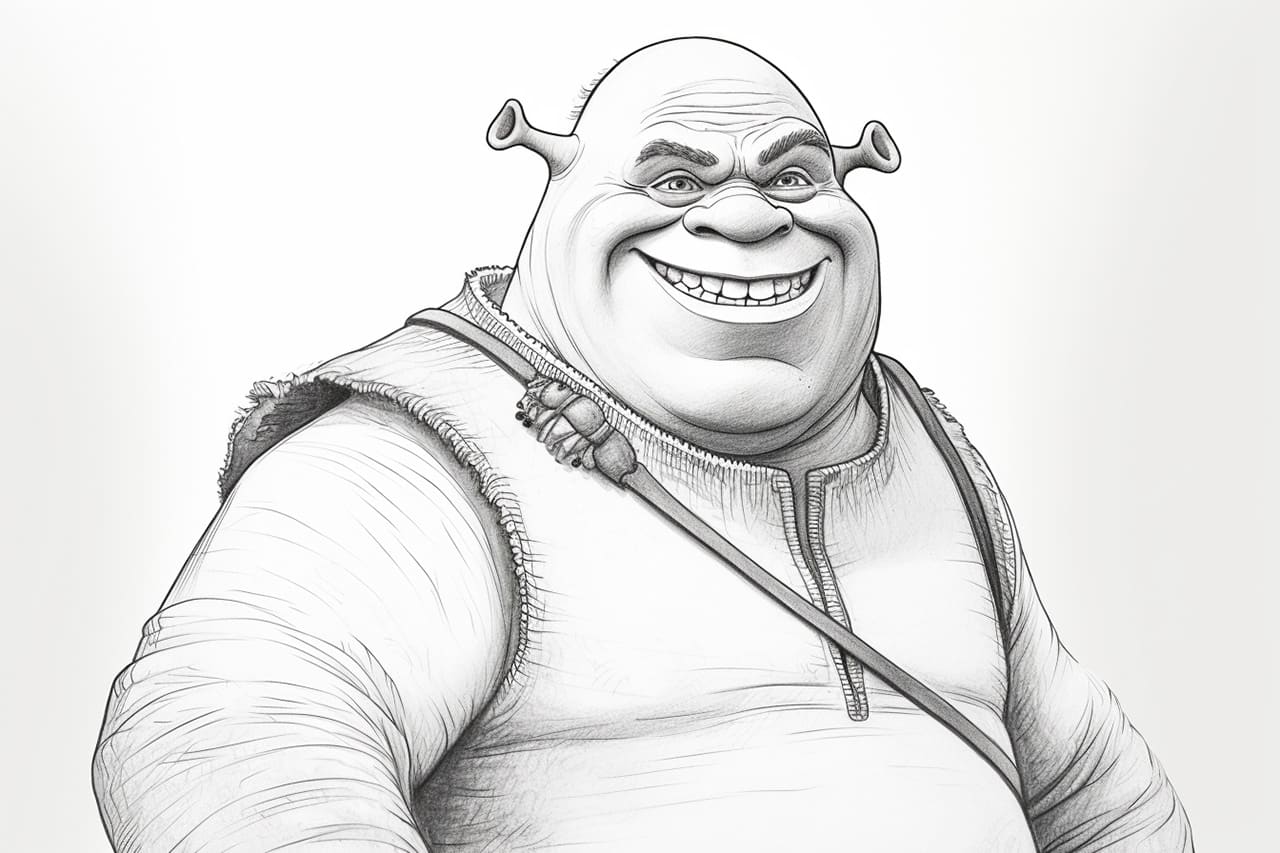
Step 1: Head and Facial Features
- Start by drawing a large oval shape for Shrek’s head.
- Divide the oval into half with a horizontal line to mark the eye level.
- Draw two circles on the horizontal line as Shrek’s eyes.
- Add eyebrows above each eye, making them thick and bushy.
- Draw a small rounded nose in the center of the face.
- Below the nose, draw a wide smile with two rows of crooked teeth.
- Finally, add some wrinkles and lines around the nose, mouth, and eyes to give Shrek his characteristic expression.
Step 2: Ears and Hair
- On either side of Shrek’s head, draw two large, curved ears.
- Inside each ear, draw some small details to indicate folds and creases.
- Above the ears, add some wild and messy hair. Shrek’s hair should be uneven and stick out in different directions.
Step 3: Body and Clothing
- Extend two slightly curved lines downwards from the head to create Shrek’s shoulders and upper body.
- Draw two rounded shapes below the shoulders to represent the belly.
- Connect the body to the head with two curved lines to form the neck.
- Next, draw Shrek’s clothing by adding a vest-like shape around his upper body.
- Add some detail to the clothing by drawing patches, stitches, and buttons.
Step 4: Arms and Hands
- From the shoulders, draw two slightly curved lines to create Shrek’s arms.
- At the end of each arm, draw three overlapping ovals to form the fingers.
- Add some lines to indicate the folds and joints in the arms and hands.
Step 5: Legs and Feet
- Below the belly, draw two long, curved lines to create Shrek’s legs.
- At the end of each leg, draw three oval shapes to form the toes.
- Add some lines to indicate the folds and joints in the legs and feet.
Step 6: Facial Details
- Start adding more details to Shrek’s face by drawing his round pupils within the eye circles.
- Add some shading around the eyes to give them depth.
- Draw the irises and highlight with small circles to make them pop.
- Shade below the eyes to create the illusion of Shrek’s cheekbones.
- Use quick, short strokes to add more detail and shading to his eyebrows, nose, and mouth.
Step 7: Coloring (Optional)
- If you want to add some color to your drawing, start by coloring Shrek’s skin with a light green shade.
- Use a darker green shade to add some shadows and depth to the skin.
- Color the eyes light brown and the iris a darker shade of brown.
- Shrek’s eyebrows and hair can be colored a darker shade of brown.
- Don’t forget to color his vest and pants in the appropriate shades. Be creative with your choice of colors!
You have successfully drawn Shrek! Congratulations on completing this tutorial. I hope you enjoyed the process and are proud of your creation.
Conclusion
In this tutorial, we learned how to draw Shrek step by step. By breaking down the process into simple instructions, we were able to create a recognizable and enjoyable representation of this beloved character. Remember, practice makes perfect, so keep drawing and exploring your artistic skills.
So grab your pencils and bring your favorite ogre to life on paper. Happy drawing!