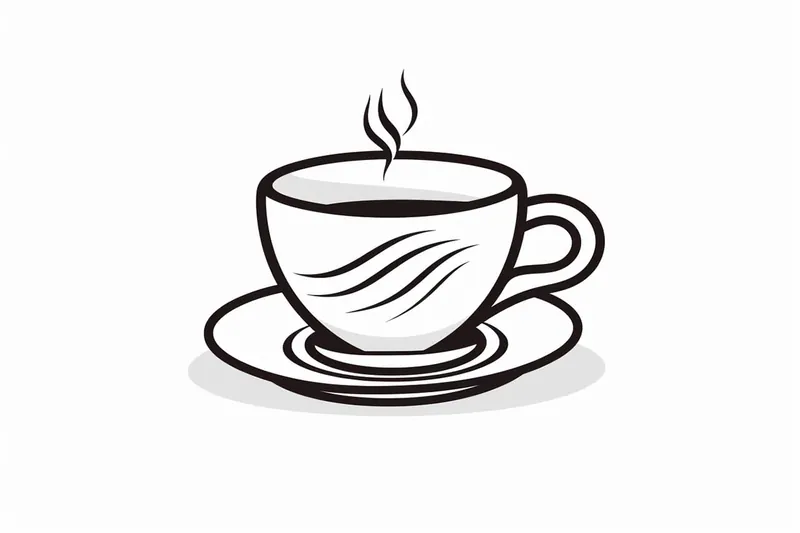
How to Draw a Tea Cup
Learn how to draw a tea cup with this step-by-step tutorial. Follow the clear and concise instructions to create a realistic and beautiful tea cup artwork.
Materials You'll Need
- Pencil
- Paper
- Eraser
The humble tea cup is more than just a vessel for your favorite warm beverage—it's a symbol of comfort, tradition, and the simple joys in life. Throughout history, tea cups have appeared in art and literature as icons of relaxation, hospitality, and even elegance. Their graceful curves, delicate handles, and the subtle reflections on their surfaces make them an intriguing subject for artists of all levels. Learning how to draw a tea cup not only helps you practice basic drawing skills like proportion, perspective, and shading, but also gives you the opportunity to capture the quiet beauty found in everyday objects.
Whether you're a beginner eager to build a strong foundation or an experienced artist seeking to refine your observational skills, drawing a tea cup can offer valuable lessons. This tutorial is designed to guide you step-by-step, making the process approachable and enjoyable. You'll explore techniques such as constructing basic shapes, achieving smooth curves, and rendering highlights to create a realistic sense of form and texture. Not only will you learn how to draw a tea cup, but you'll also develop transferable skills that will elevate your overall drawing ability.
Don't worry if you feel uncertain about your artistic abilities—every artist starts somewhere, and every sketch brings you closer to your goals. With patience, practice, and the right guidance, you'll be amazed at what you can create. So, gather your materials, get comfortable, and let's begin this creative journey together!
Materials Required
To get started, gather the following materials:
- Pencil: Use a graphite pencil with a medium or soft lead for sketching.
- Eraser: Have a soft eraser handy to correct any mistakes.
- Paper: Choose a smooth and sturdy paper suitable for drawing, such as bristol board or drawing paper.
- Ruler: Use a ruler for measuring and creating straight lines.
- Compass: A compass will come in handy for drawing circular shapes, such as the rim of the tea cup.
Now that you have all the necessary materials, let's dive into the step-by-step process of drawing a tea cup.
Tip: As you draw your tea cup, take frequent breaks to step back and assess your work from a distance; this will help you identify any imbalances or areas needing refinement that may not be apparent up close. Additionally, consider using reference images to observe the nuances of light and shadow on real tea cups, allowing you to enhance the realism of your drawing.
Step 1: Sketch the Basic Shape
Start by lightly sketching a horizontal oval shape to represent the base of the tea cup. Make sure it is centered on the paper and proportional to the size you desire. This oval will serve as the foundation for the rest of the drawing.
Step 2: Draw the Handle
On the right side of the oval shape, draw a curved line that extends vertically and then curves back towards the base of the cup. This line will form the outer edge of the handle. Next, draw a smaller curved line within the first line, following its general shape. This will create the inner edge of the handle. Connect the two lines at the top and bottom to complete the handle.
Step 3: Add Depth to the Cup
To give the tea cup a three-dimensional appearance, draw a vertical line down the center of the oval shape, starting from the top rim and extending to the base. This line represents the side of the cup facing away from the viewer. Then, draw a horizontal line that slightly curves to indicate the bottom of the cup. Connect the end of this line to the sides of the cup, forming the base.
Step 4: Define the Rim and Base
Using the compass, draw a circle at the top of the oval shape to create the rim of the tea cup. Make sure it is centered and proportionate to the cup's size. Next, add another smaller oval shape at the bottom of the cup to represent the base. This oval should align with the shape of the cup and be slightly wider.
Step 5: Refine the Shape
Now that the basic structure of the tea cup is in place, refine the shape by erasing any unnecessary lines and adjusting the curves and proportions as needed. Take your time during this step to ensure that the cup looks balanced and symmetrical.
Step 6: Add Details
To make the tea cup more realistic, add some details such as a decorative pattern or texture to the rim and base. You can also draw a small curved line near the base to create a shadow, giving the cup a sense of depth and dimension.
Step 7: Shade and Add Shadows
Now it's time to bring your tea cup drawing to life through shading and shadows. Use your pencil to create subtle gradients by applying lighter pressure for lighter areas and darker pressure for shadows. Shade the areas of the cup that are facing away from the light source, such as the side opposite to the light. Add shadows underneath the cup and the handle to create a more realistic and three-dimensional effect.
Mistake Alert: A common mistake when drawing a tea cup is making the rim perfectly flat or straight, which can lead to an unnatural, stiff appearance. This often happens because we instinctively draw what we think a cup looks like, rather than observing how the rim actually curves in perspective. To fix this, carefully observe your reference and notice how the rim forms an ellipse—wider when viewed from above and narrower from the side. Practice sketching ellipses before starting your tea cup, and lightly map out the rim's curve to ensure it feels rounded and three-dimensional. This small adjustment will instantly add realism and elegance to your drawing!
Conclusion
Congratulations! You have successfully learned how to draw a tea cup. By following these step-by-step instructions and using your creativity, you can create beautiful tea cup drawings. Remember to practice regularly to improve your drawing skills and explore different styles and techniques. Enjoy your artistic journey, and happy drawing!
Fun Facts About Tea Cup
- The earliest known tea cups originated in China during the Han Dynasty.
- Traditional Japanese tea cups, called yunomi, are handleless and designed for everyday use.
- Porcelain tea cups became popular in Europe after the 17th century, thanks to the import of Chinese porcelain.
- The world's largest tea cup can hold over 5,000 liters of tea.
- In Britain, the tea cup is traditionally smaller than a coffee cup.
- Fine bone china, a popular material for tea cups, contains actual bone ash for added strength and translucency.
- Victorian-era tea cups often featured elaborate floral designs.
- In Turkish culture, tea is served in small, tulip-shaped glasses rather than traditional cups.
- Tea cups have inspired famous works of art, such as the surrealist "Lobster Telephone" by Salvador Dalí.
Suggestions for Scenes and Settings for Tea Cup Drawings
- A tea cup sitting on a cozy window sill, with raindrops trickling down the glass and a book nearby.
- [[A delicate tea cup surrounded by blooming flowers in a sunny garden](https://yonderoo.com/how-to-draw-a-garden/), with butterflies](https://yonderoo.com/how-to-draw-a-butterfly-easily/) fluttering around.
- An elegant tea cup on a vintage lace tablecloth, accompanied by a teapot and a plate of pastries for afternoon tea.
- A whimsical tea cup held by a cat or other animal, playfully pretending to take a sip.
- A steaming tea cup with swirling vapor rising, placed next to a flickering candle in a dimly lit room.
- A tea cup set against a backdrop of traditional Asian decor, with cherry blossom branches and bamboo accents.
- An ornate tea cup being painted by an artist, with paintbrushes, palettes, and splashes of color all around.
- A tea cup resting on a rustic wooden table, surrounded by autumn leaves and a knitted scarf.
- A magical floating tea cup pouring an endless stream of tea into itself in a surreal, dreamlike scene.
- A collection of mismatched tea cups arranged in a playful stack, each with unique patterns and colors.